Removal and Replacement Procedures
2-30 HP ProLiant DL320 Generation 3 Server Maintenance and Service Guide
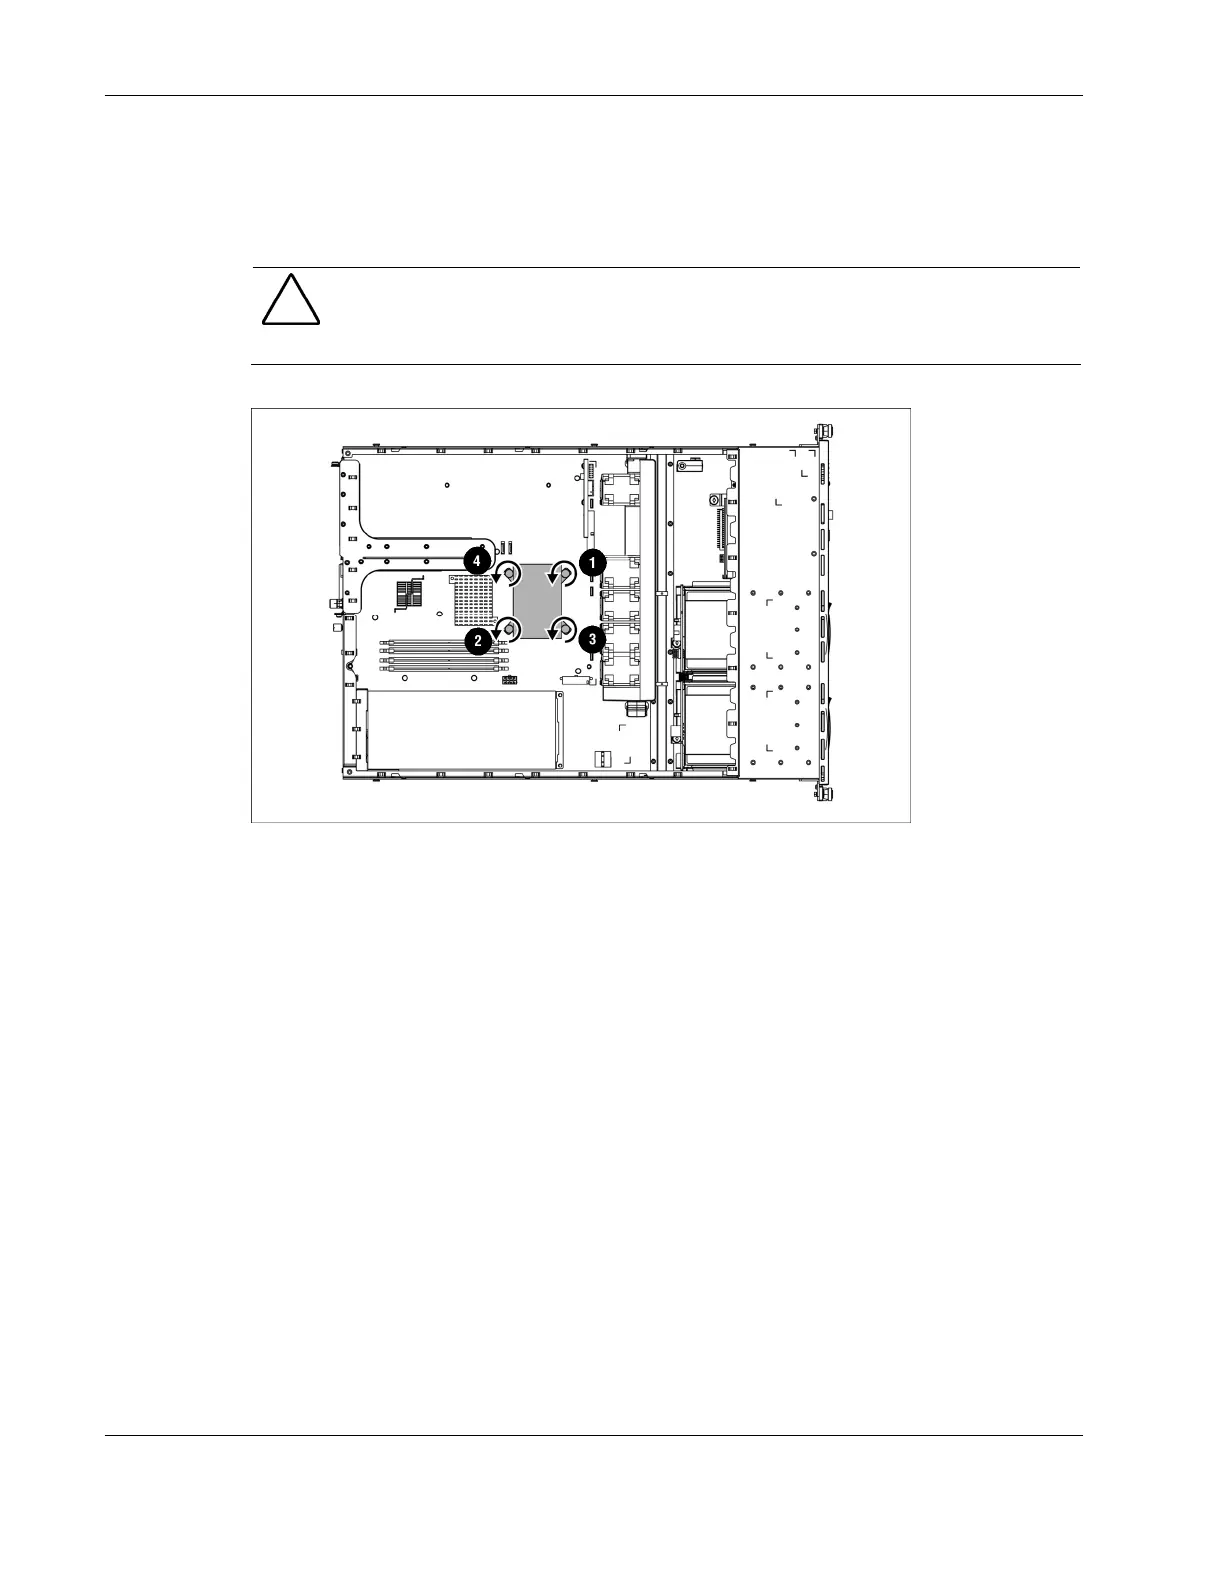
5. Loosen the four screws securing the heatsink:
a. Loosen each screw three or four turns in the order shown in the illustration.
b. Fully loosen the screws to free the heatsink, being careful not to remove the screw
assemblies from the heat sink.
CAUTION: Heatsink retaining screws should be tightened or loosened in diagonally opposite
pairs (in an "X" pattern). Do not over tighten the screws as this may damage the board,
connectors, or screws. Using the wrench supplied with the system will reduce the possibility of
over tightening the screws.
Figure 2-25: Loosening screws on the heatsink and removing the
heatsink
6. Remove the heatsink from the top of the processor.
7. Lift the processor locking lever (1) and the cover (2)
8. Lift the processor from the socket (3).

 Loading...