Removal and Replacement Procedures
HP ProLiant DL320 Generation 3 Server Maintenance and Service Guide 2-27
z If only one DIMM is installed, HP recommends installing it in slot 1A.
z All DIMMs installed must be of the same speed (DDR PC3200).
z For best performance the amount of memory in bank A should equal to the amount in
bank B.
IMPORTANT: A DIMM can be installed only one way. Be sure to match the key slots on the module
with the tabs on the memory slot. Push the module down into the slot until it is fully inserted and
properly seated. The system will not recognize improperly aligned or seated DIMMs.
To remove a DIMM from the system board:
1. Power down the server. See “Powering Down the Server” in this chapter.
CAUTION: ESD can damage electronic components. Ensure that you are properly grounded
before beginning any installation procedure. Refer to “Electrostatic Discharge Information” in
this chapter.
2. Remove the access panel. See “Access Panel” in this chapter.
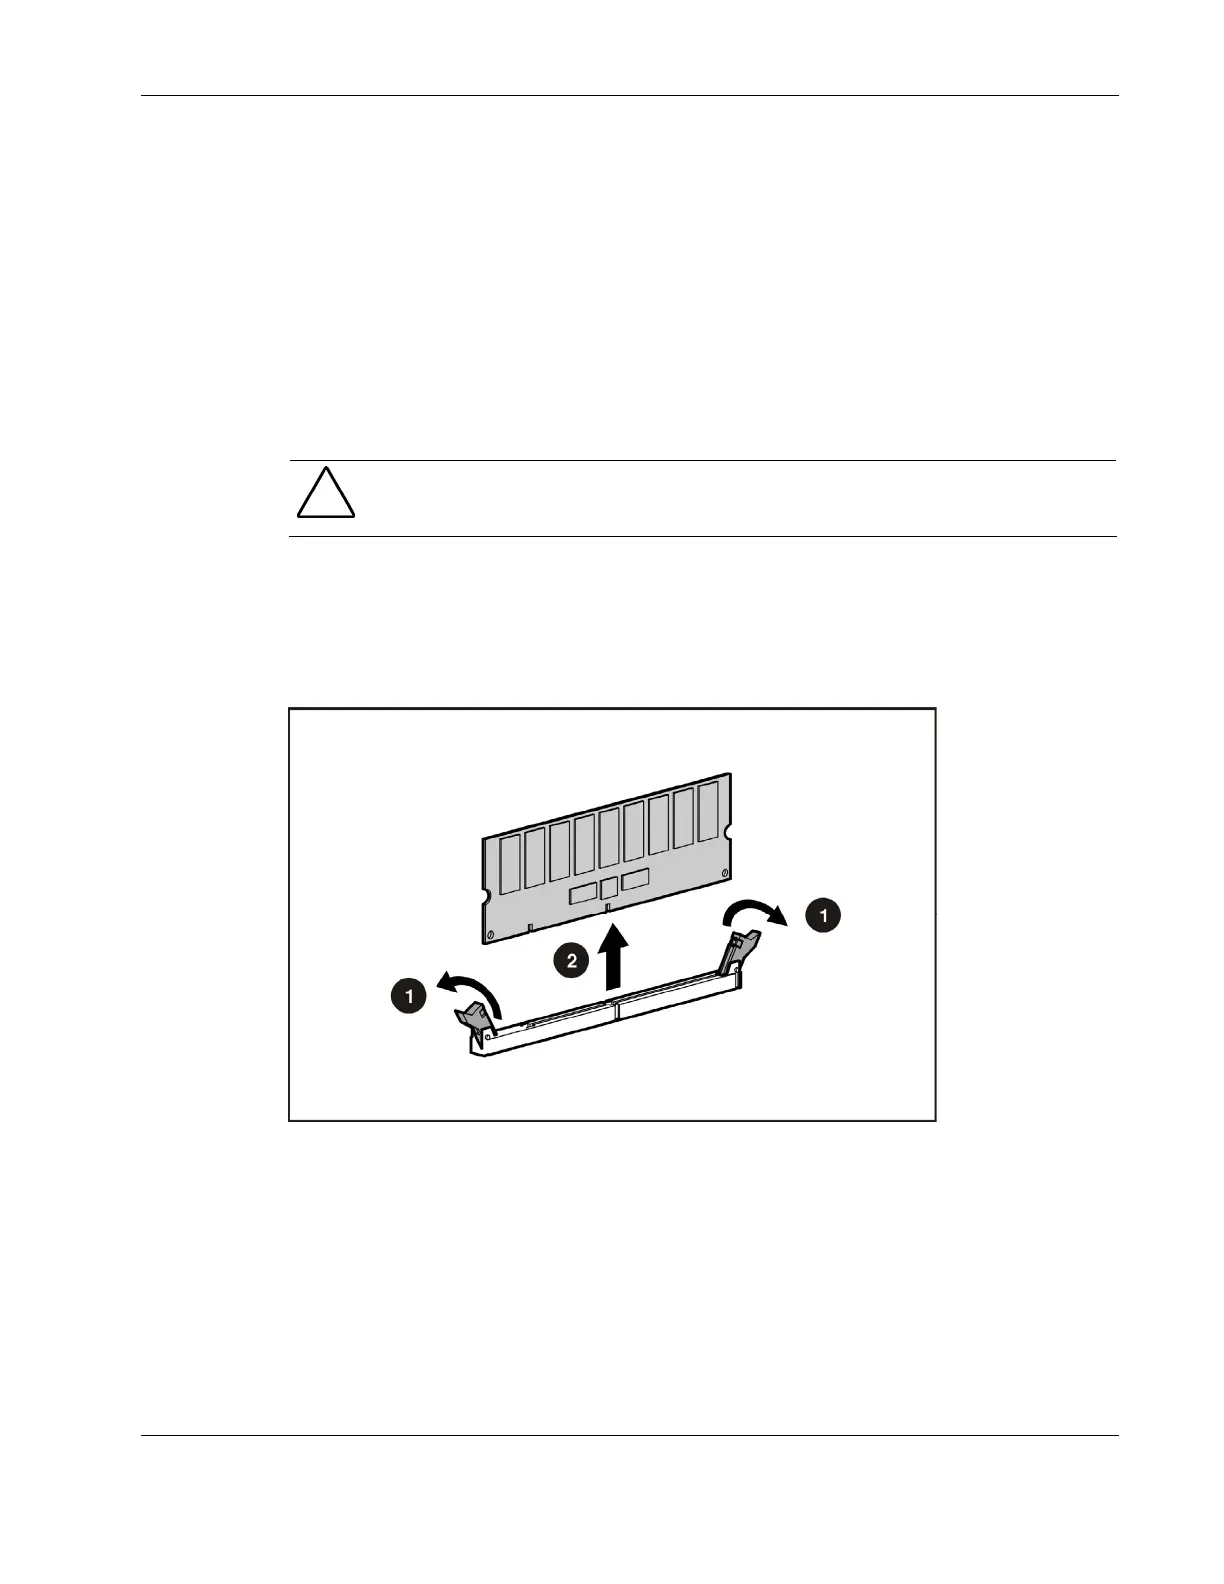
3. Press both DIMM socket latches outward (1). This action releases the DIMM and
partially lifts it out of the socket.
4. Lift out the DIMM (2).
5. Align the key slot in the bottom edge of the DIMM with the tab in the expansion socket.
Figure 2-22: Removing a DIMM from a DIMM socket

 Loading...