EasyManuals Logo

HP ProLiant ML310 Maintenance And Service Guide

HP ProLiant ML310
90 pages
To Next Page IconTo Next Page
To Previous Page IconTo Previous Page
Page #41 background imageLoading...
Page #41 background image
Removal and Replacement Procedures
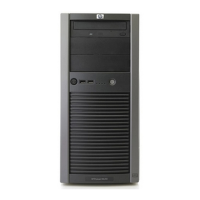
4. Remove the LED shield from the front of the chassis by pressing the levers (1), and then
pulling the shield away from the chassis (2).
Figure 2-18: Removing the LED shield
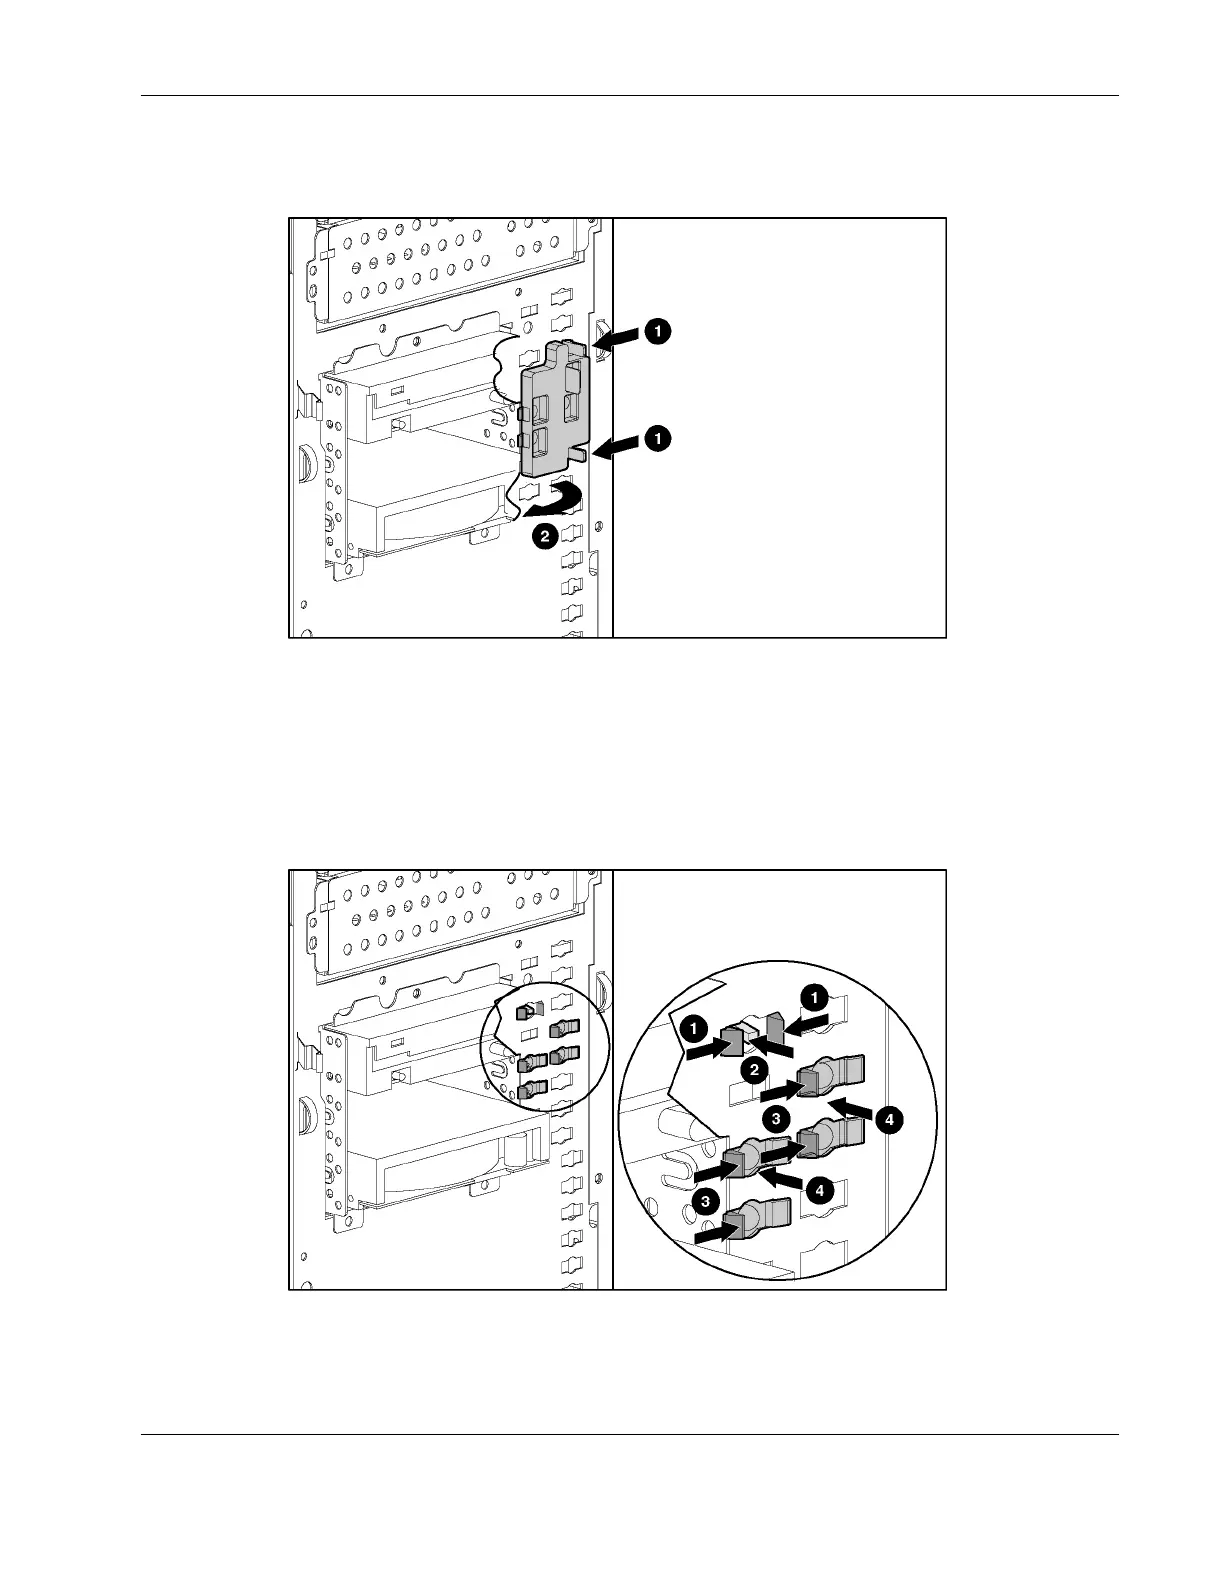
5. From the front of the chassis, squeeze the sides of the power switch to disengage the two
retainer clips from the chassis (1), and then gently remove the power switch from the
chassis (2).
6. Also from the front of the chassis, squeeze the side of the LED to disengage the two retainer
clips from the chassis (3), and then gently remove the LED from the chassis (4). Repeat for
other LEDs.
Figure 2-19: Removing the power switch and LED
To replace the power switch and LED, reverse steps 2 through 6.
HP ProLiant ML310 Server Maintenance and Service Guide 2-25

Table of Contents

Other manuals for HP ProLiant ML310

Questions and Answers:

Question and Answer IconNeed help?

Do you have a question about the HP ProLiant ML310 and is the answer not in the manual?

HP ProLiant ML310 Specifications

General IconGeneral
Form FactorTower
Processor Sockets1
Maximum Memory32GB
Memory Slots4
Storage ControllerHP Dynamic Smart Array B120i
ProcessorIntel Xeon E3-1200 series
Memory TypeDDR3
RAID SupportRAID 0, 1, 10
StorageUp to 4 LFF (3.5-inch) drives
Hard Drive InterfaceSATA
Network1Gb Ethernet
Power Supply350W
Operating System SupportRed Hat Enterprise Linux, SUSE Linux Enterprise Server
Expansion Slots1 x PCIe 2.0 x1

Related product manuals