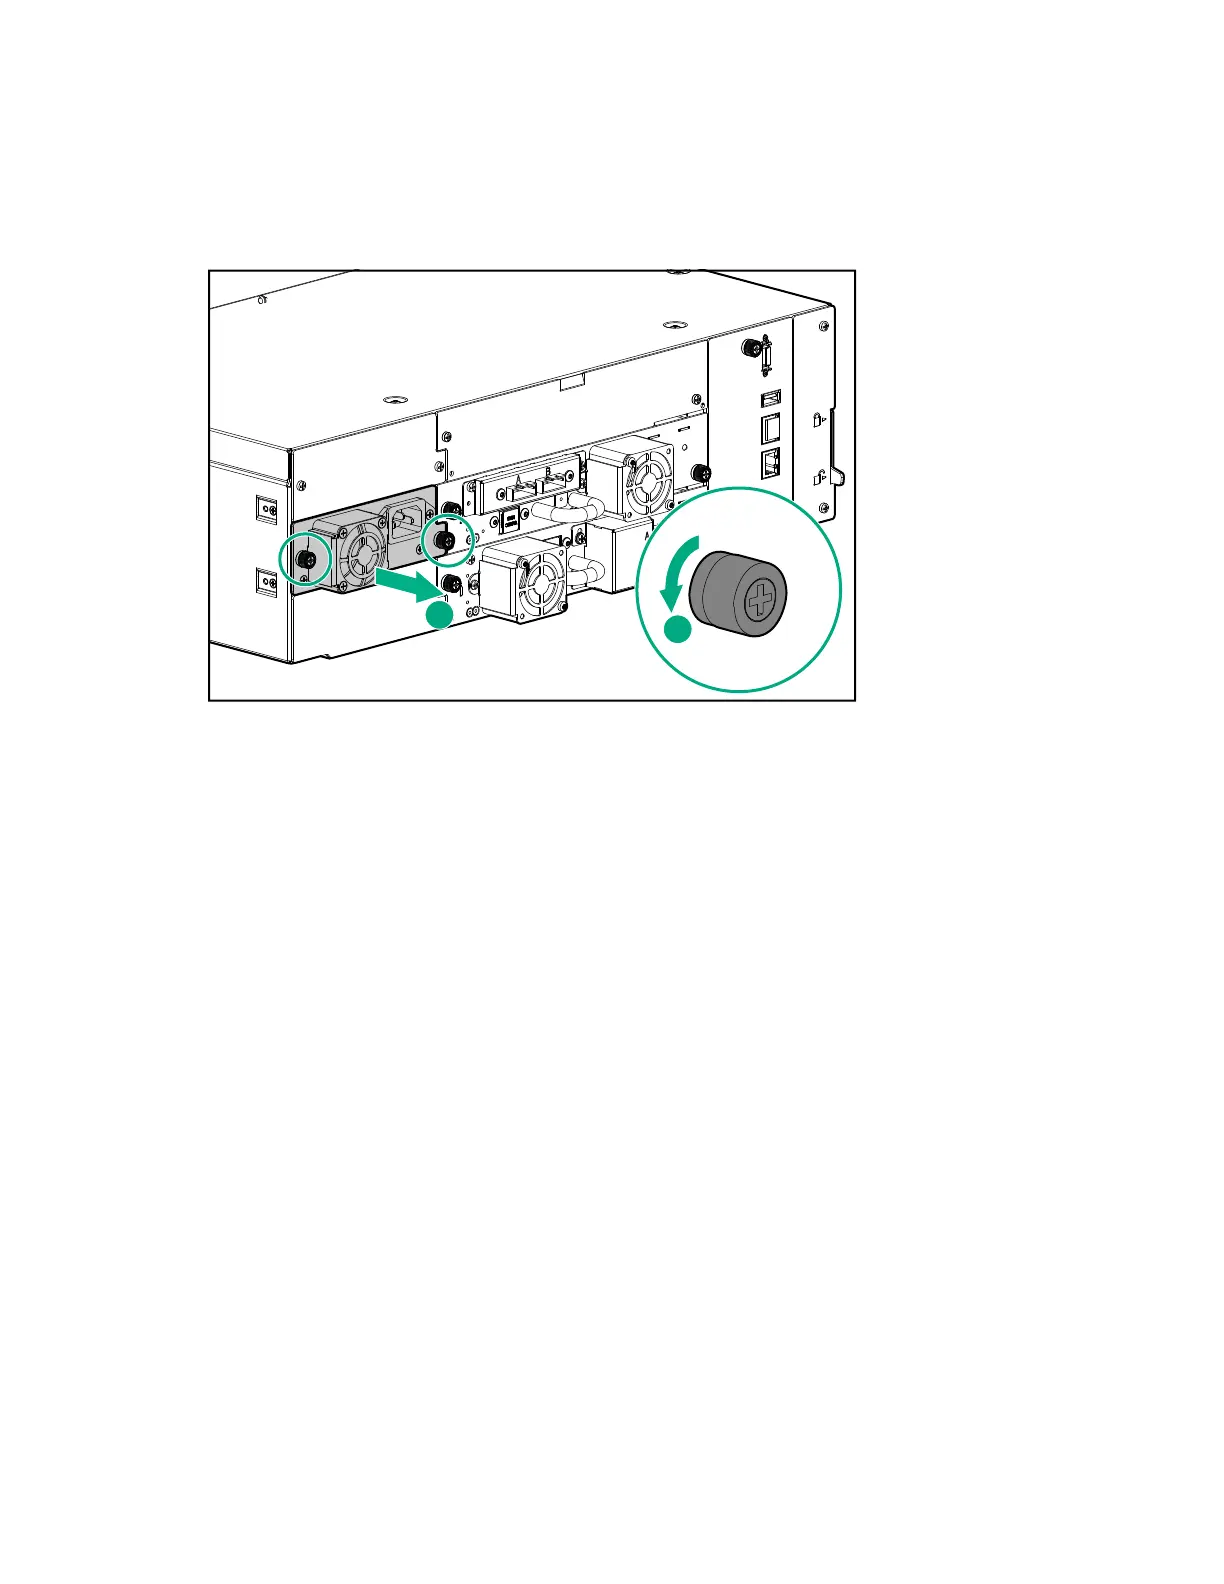
Removing a power supply
Procedure
1. Remove the AC power cord, if not done previously.
2. Loosen the two blue captive thumbscrews on the power supply with your fingers or a #2 Phillips
screwdriver.
3. Using the thumbscrews (one on each side), slowly pull the power supply approximately 10 cm (4
inches) from the back of the module.
4. Use one hand to completely remove the power supply from the module while using the other hand to
support the bottom.
Removing a power supply bay cover
Procedure
1. Locate an unused power supply bay.
Power supply bays are located on the back of the module on the left side, in the middle and upper bay
locations. They are secured to the module with #2 Phillips screws. (The bottom cover is riveted in
place.)
2. Use a #2 Phillips screwdriver to loosen the two Phillips screws.
3. Remove the cover.
Installing the new power supply
Procedure
1. Position the new power supply on the alignment rails.
2. Slide the power supply into the module until it is flush with the back panel of the module.
Removing a power supply 129