Chapter 8 Accessories Shenzhen Hpmont Technology Co., Ltd.
- 108 - HD3N Series User Manual V1.1
Install HD-LED-P-S
Install HD-LED-P-S with screws or with mounting base.
When packing HD-LED-P-S, mounting base, keypad, 2 pcs of M3
×
5 size screws, 1 pcs of 1m extension
cable.
To install with the screw
Install keypad on panel of control cabinet with the screws.
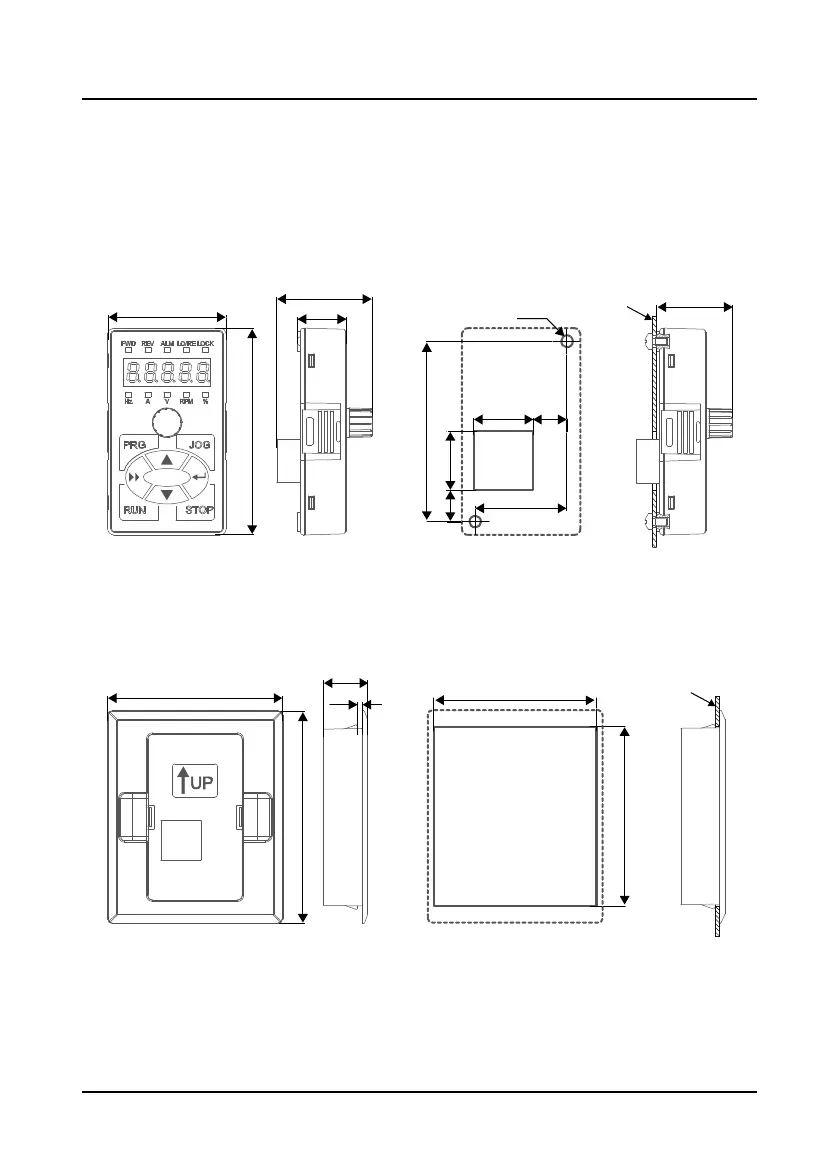
Size of HD-LED-P-S is show in Figure 8-2, unit: mm.
Figure 8-2 HD-LED-P-S
To install with the mounting base
Install the mounting base (HD-KMB-S) on panel of control cabinet, then install keypad on the base.
Mounting base (HD-KMB-S) and its size are in Figure 8-3, unit: mm.
Figure 8-3 HD-KMB-S
HD-LED-P-S dimension Mounting aperture size
10.7 20
61
2-Ø4
31
20 11.5
25.4
70
40
16.5
32.3
Installation
Door cabinet
Door cabinet
90
74
Mounting aperture size
75.5±0.2
68.5±0.2
19
1.8
Installation
HD-KMB-S size
 Loading...