Chapter 4 Electrical Installation Shenzhen Hpmont Technology Co., Ltd.
- 26 - HD3N Series User Manual V1.1
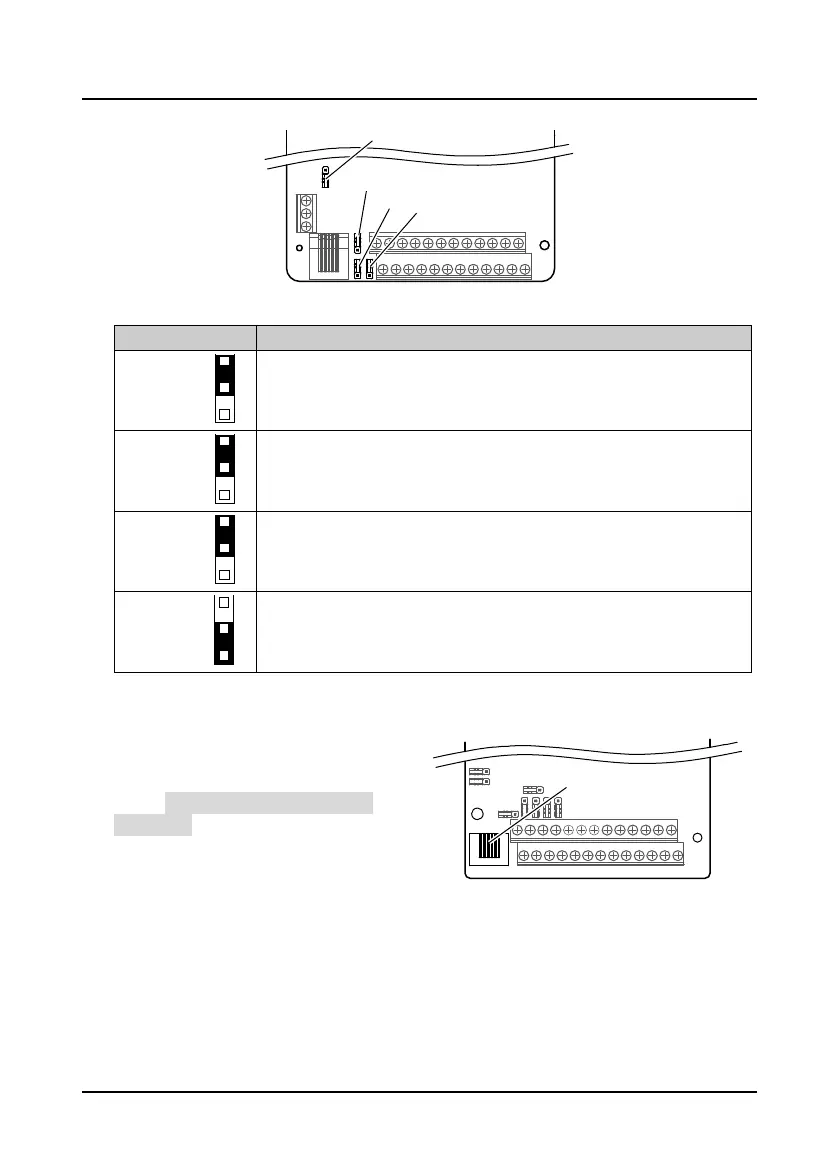
4.4.4 Jumper (90 - 400kW)
Figure 4-4 Jumper position (90 - 400kW)
Table 4-9 Jumper description (90 - 400kW)
Jumper Description
CN6
AI2 can select voltage or current signal.
• Pin 1 & 2 are short-connected, AI2 inputs voltage signal (factory setting).
• Pin 2 & 3 are short-connected, AI2 inputs current signal.
CN7
AO1 can select voltage or current signal.
• Pin 1 & 2 are short-connected, AO1 inputs voltage signal (factory setting).
• Pin 2 & 3 are short-connected, AO1 inputs current signal.
CN8
AO2 can select voltage or current signal.
• Pin 1 & 2 are short-connected, AO2 inputs voltage signal (factory setting).
• Pin 2 & 3 are short-connected, AO2 inputs current signal.
CN9
SCI communication can select proper resistance.
• Pin 1 & 2 are short-connected, select the proper resistance.
• Pin 2 & 3 are short-connected, no resistance (factory setting).
4.4.5 Communication Terminal (7.5 - 75kW)
Connect optional keypad (HD-LED-P /
HD-LED-P-S) through keypad terminal.
Refer to Chapter 5 Operation Instructions,
(on page 37) for keypad description.
CN6
CN9
CN7
CN8
Control Board
 Loading...