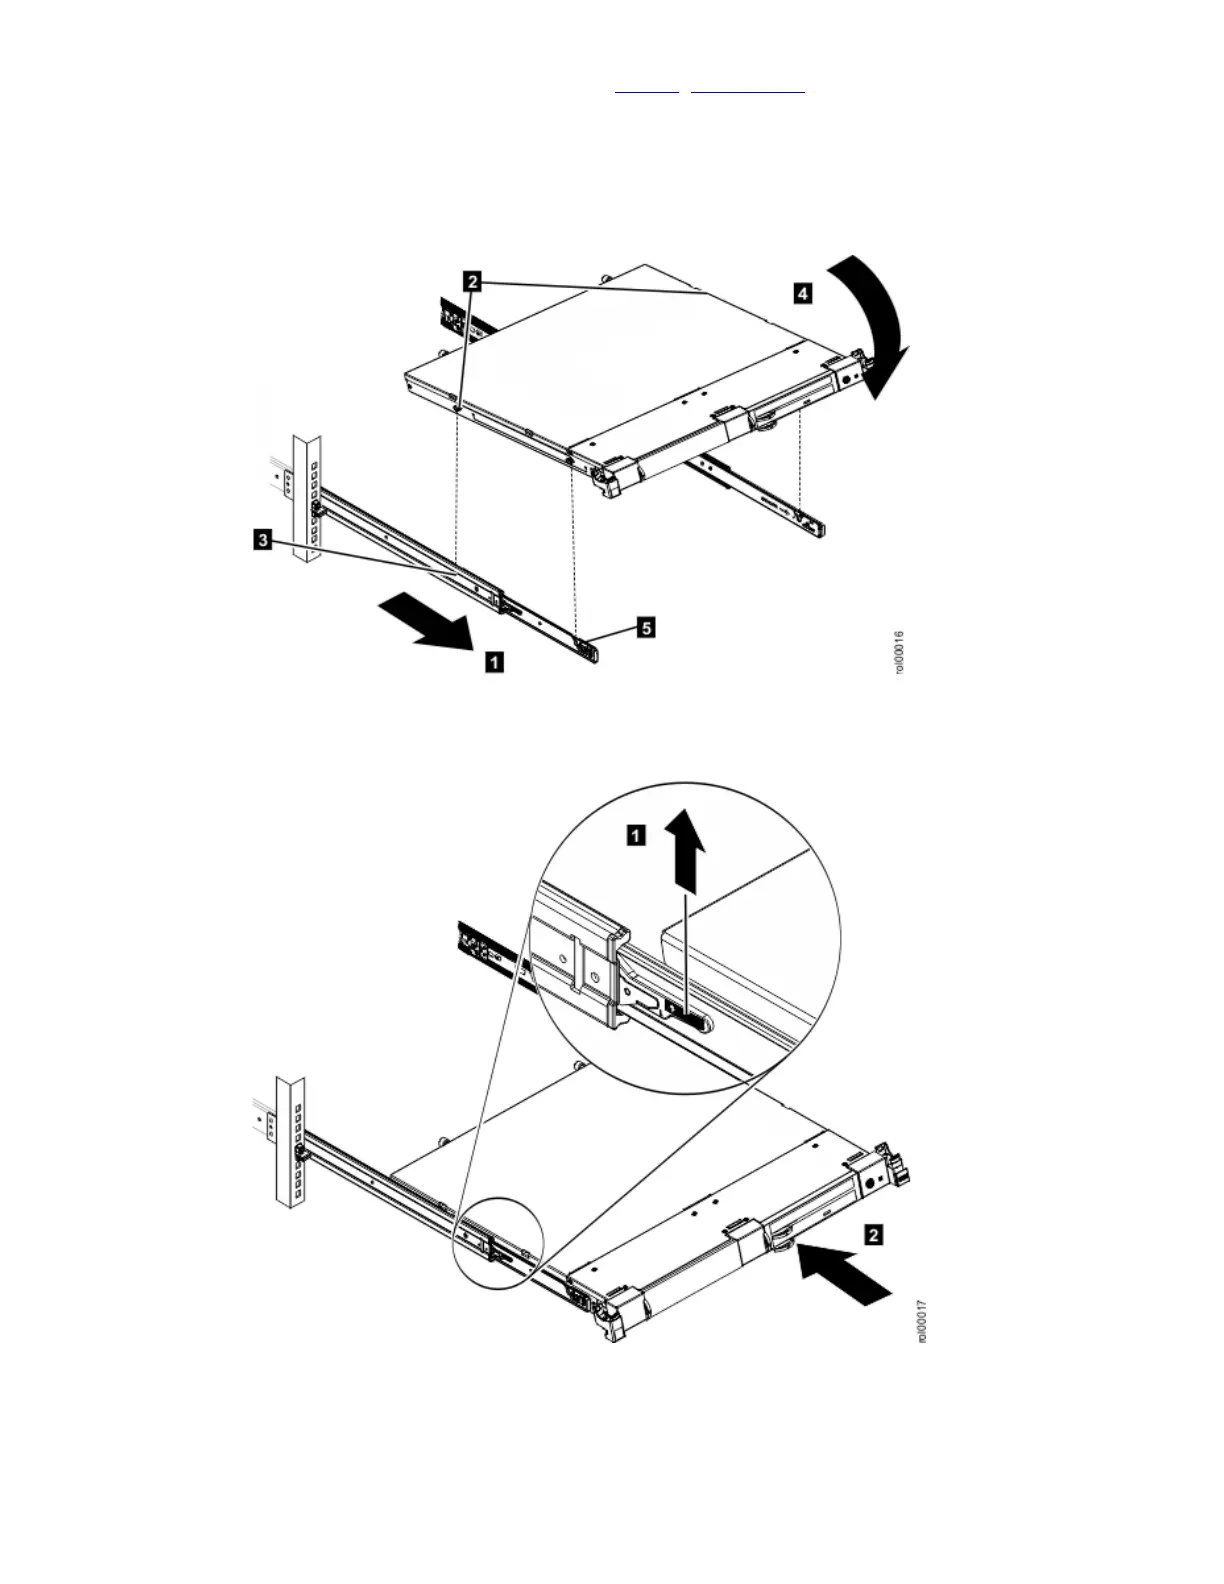
2. Ensure that the slide rails are correctly installed. See Installing the Slide Rails.
3. Pull the slide rails forward 1 until they click, twice, into place. Carefully lift the 7226 Storage Enclosure and tilt it into
position over the slide rails so that the rear posts 2 on the 7226 Storage Enclosure line up with the rear slots 3 on the
slide rails. Slide the server down until the rear posts slip into the two rear slots, and then slowly lower the front of the
7226 Storage Enclosure 4 until the other posts slip into the other slots on the slide rails. Make sure that the front latch
5 slides over the posts.
Figure 1. Slide rails extended, 7226 posts aligned with slots in rail
4. Lift the blue release latches 1 on the slide rails and push the 7226 Storage Enclosure 2 all the way into the rack until it
clicks into place.
Figure 2. Release latches and 7226 Storage Enclosure
5. Note: This step is optional. The screws are only necessary for shipping or in vibration-prone areas.
The M6 screws may be inserted into the front of the Right Slide Rail 1 and the Left Slide Rail 2 using a flat-head or
Phillips screwdriver.
Figure 3. M6 Screws into the Slide Rails

 Loading...


