4. Place the drive assembly on an ESD protected work surface.
5. Locate the new Drive Feature.
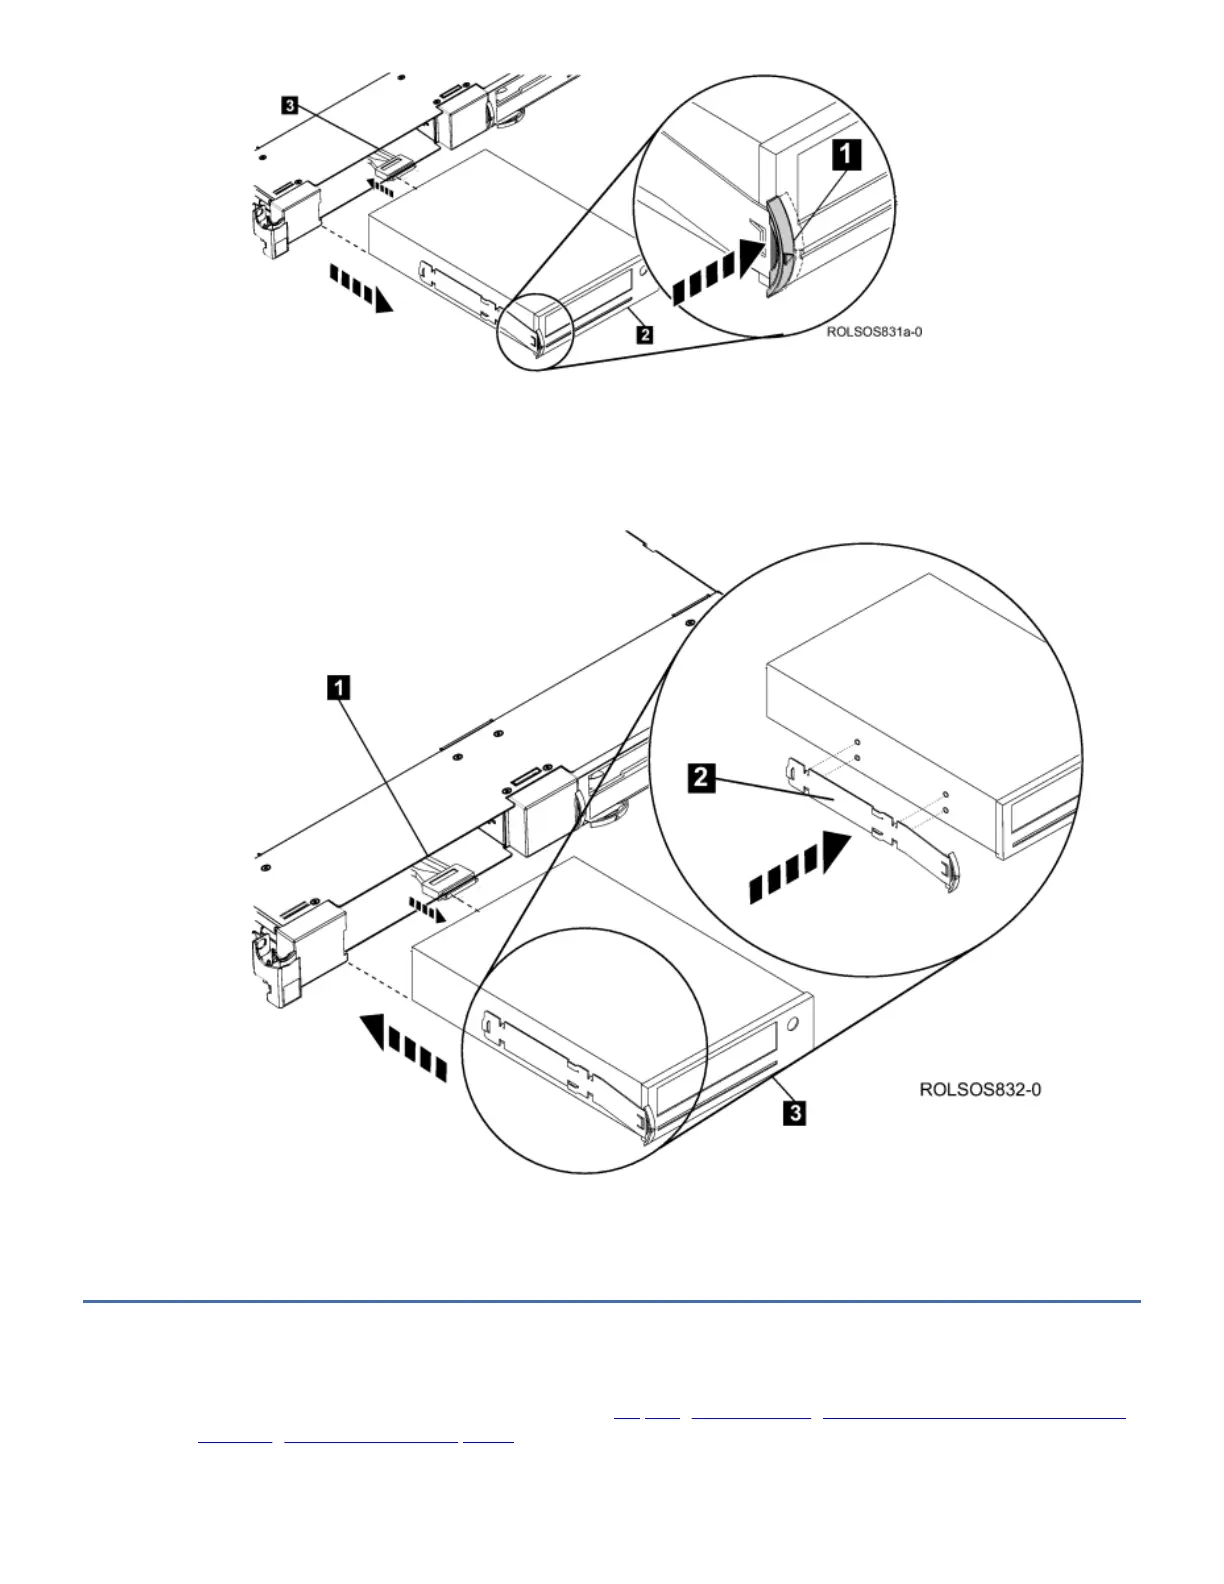
6. Attach the connectors 1 to the drive assembly. Attach the Drive Latch 2 to the Drive 3 and insert both into the drive
bay until they click into place.
Figure 2. Inserting a Drive
7. Attach the power cord and other cables to the rear of the enclosure.
8. Power on the 7226 storage enclosure.
9. Refer to your system manuals to verify installation.
Replacing a DVD Drive Feature
1. Prepare the 7226 Storage Enclosure for Service. See Preparing the 7226 Storage Enclosure for Removal or Installation
of a Storage Device or Other Component for the correct procedure.
Note: The 7226 Storage Enclosure does not need to be extended from the rack for this procedure.
2. Determine which DVD Drive will be replaced.

 Loading...


