Installing the rear fan
To install the rear fan, complete the following steps:
1. Read the safety information that begins in “Safety” on page vii and
“Installation guidelines” on page 36.
2. Turn off the server (see “Turning off the server” on page 24) and all attached
peripheral devices. Disconnect all power cords; then, disconnect all external
cables as necessary to replace the device.
3. Carefully turn the server on its side so that it is lying flat, with the cover facing
up.
Attention: Do not allow the server to fall over.
4. Unlock and remove the left-side cover (see “Removing the left-side cover” on
page 39).
5. Remove the air baffle (see “Removing the air baffle” on page 41).
6. Touch the static-protective package that contains the fan to any unpainted
metal surface on the server; then, remove the fan from the package.
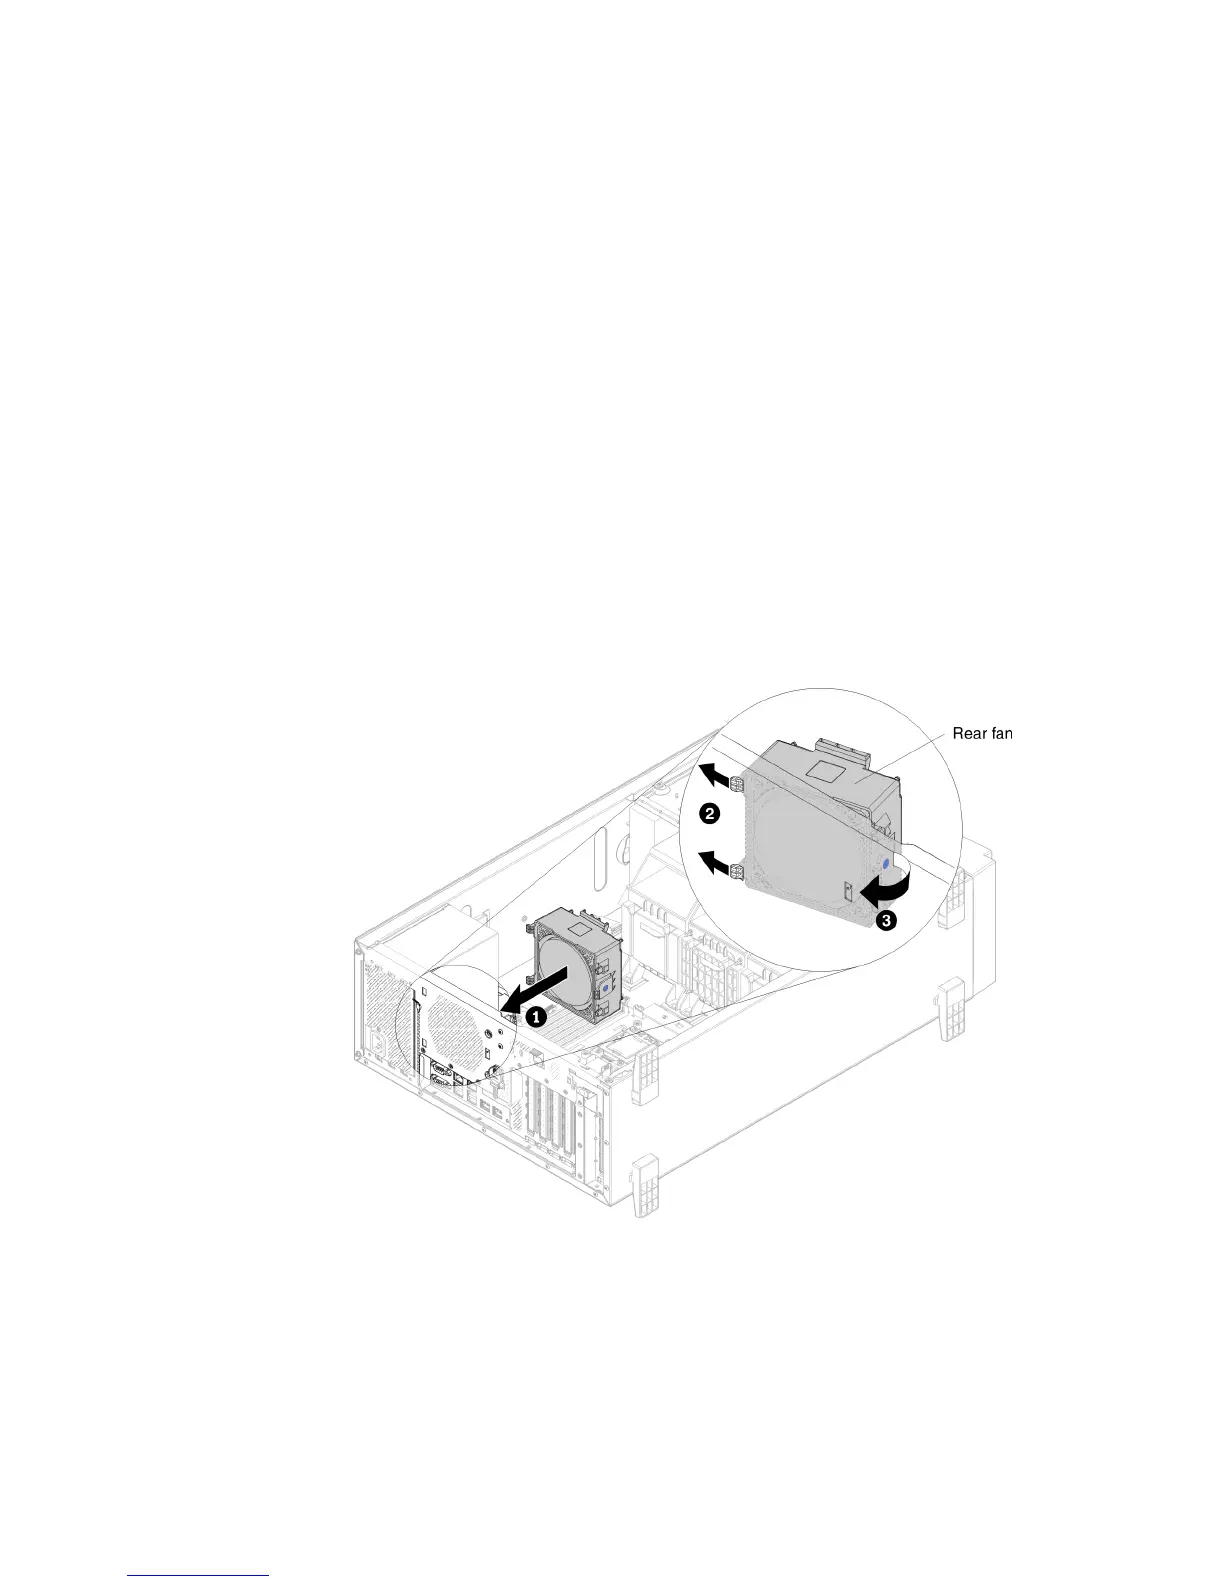
7. Locate the rear fan position of the server chassis (see step 1 in the following
illustration).
8. Insert two tabs of the rear fan into the holes of the server chassis, and rotate
the rear fan to click into the server chassis (see step 1 in the following
illustration).
9. Connect the rear fan power cable on the system board. (see “Internal Cable
Routing and Connectors” on page 47).
106 System x3300 M4 Type 7382: Installation and Service Guide
 Loading...


