Removing a 3.5-inch disk drive backplane
To remove the 3.5-inch disk drive backplane, complete the following steps:
1. Read the safety information that begins in Safety and “Installation guidelines”
on page 36.
2. Turn off the server (see “Turning off the server” on page 24) and all attached
peripheral devices. Disconnect all power cords; then, disconnect all external
cables as necessary to replace the device.
3. Disconnect all external cables and power cords.
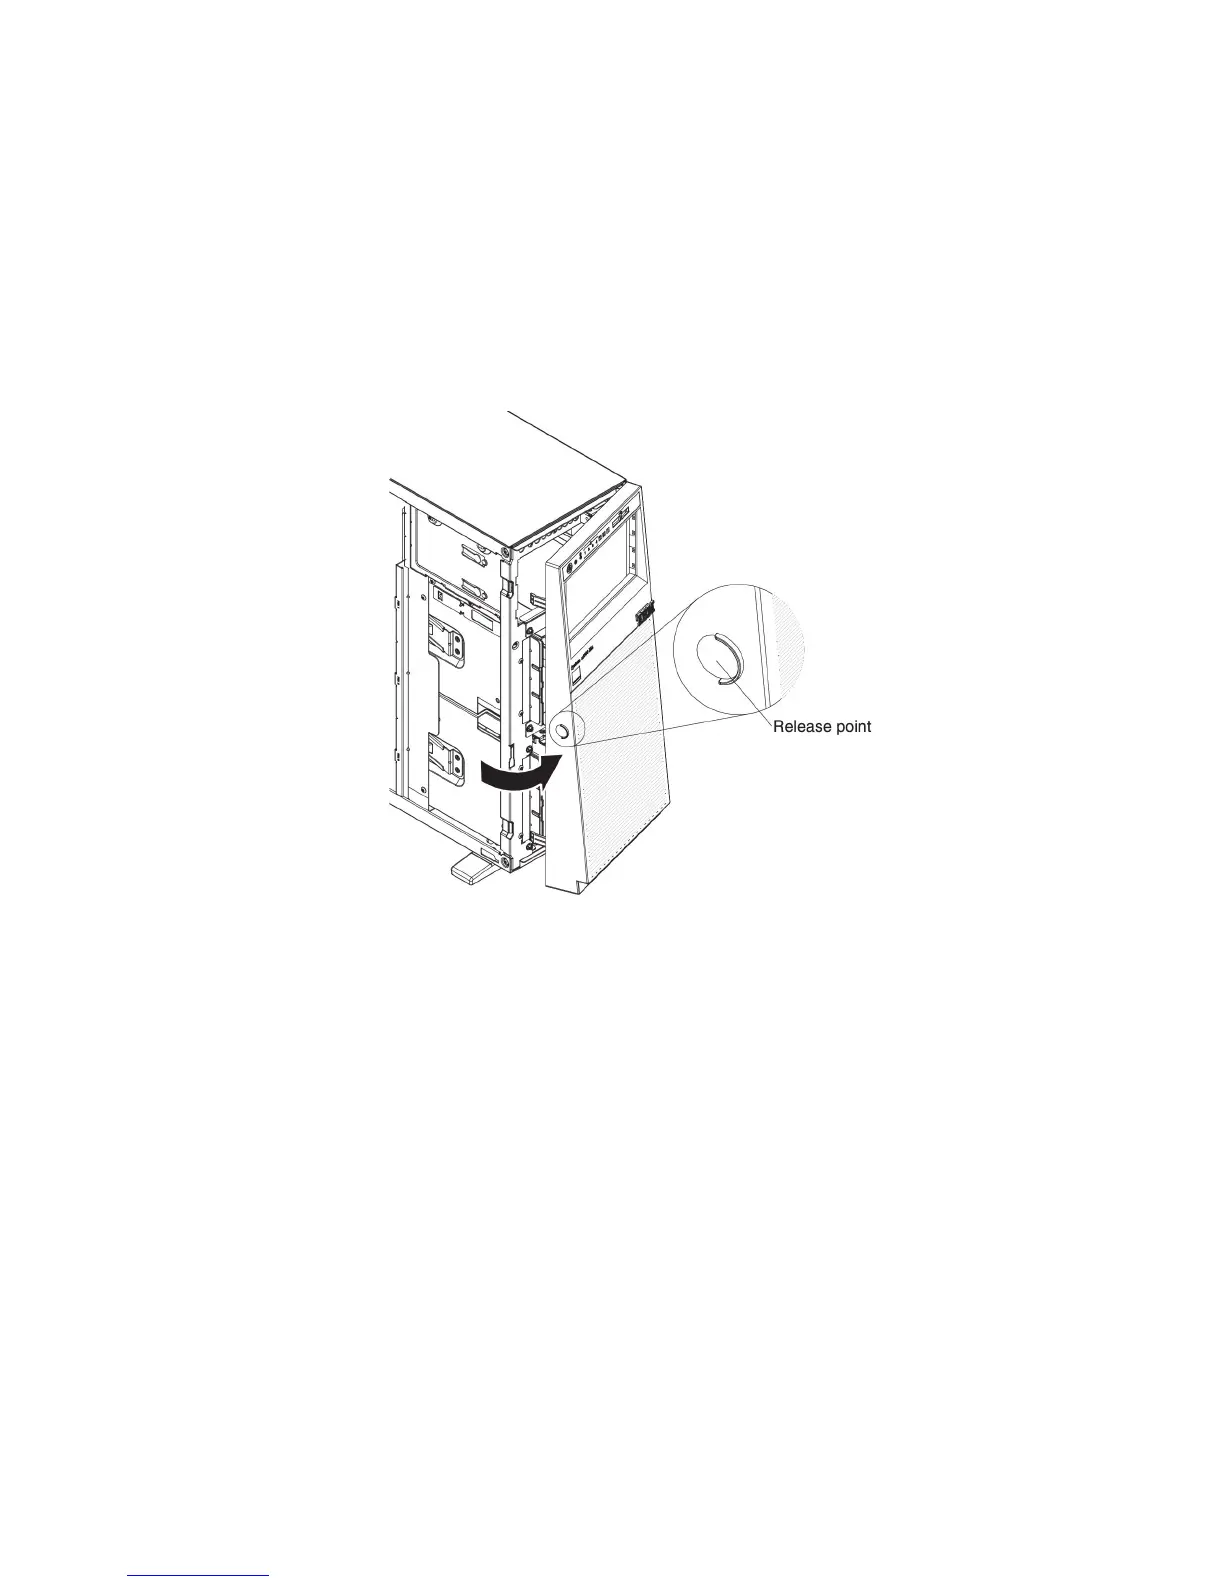
4. Open the bezel from the release point on the left edge of the bezel, and rotate
the left side of the bezel away from the server.
5. Carefully turn the server on its side so that it is lying flat, with the cover
facing up.
Attention: Do not allow the server to fall over.
6. Remove the left-side cover (see “Removing the left-side cover” on page 39).
7. Remove the 3.5-inch hot-swap hard disk drives (see “Installing a 3.5-inch
hot-swap hard disk drive” on page 72)
8. Remove the air baffle (see “Removing the air baffle” on page 41)
9. Remove the fan assembly (see “Removing the fan assembly” on page 42)
10. Note where the power, signal, and configuration cables are connected to the
3.5-inch hard disk drive backplane; then, disconnect them (see “Internal Cable
Routing and Connectors” on page 47)
11. Lift up the retention latches that hold the backplane in place; then, grasp the
top edge of the backplane and rotate it toward the rear of the server. When
the backplane is clear of the drive-cage retention tabs, remove it out from the
server.
Chapter 6. Removing and replacing components 389

 Loading...


