EasyManuals Logo

Image Access bookeye 3 Assembly Manual

Image Access bookeye 3
79 pages
To Next Page IconTo Next Page
To Previous Page IconTo Previous Page
Page #41 background imageLoading...
Page #41 background image
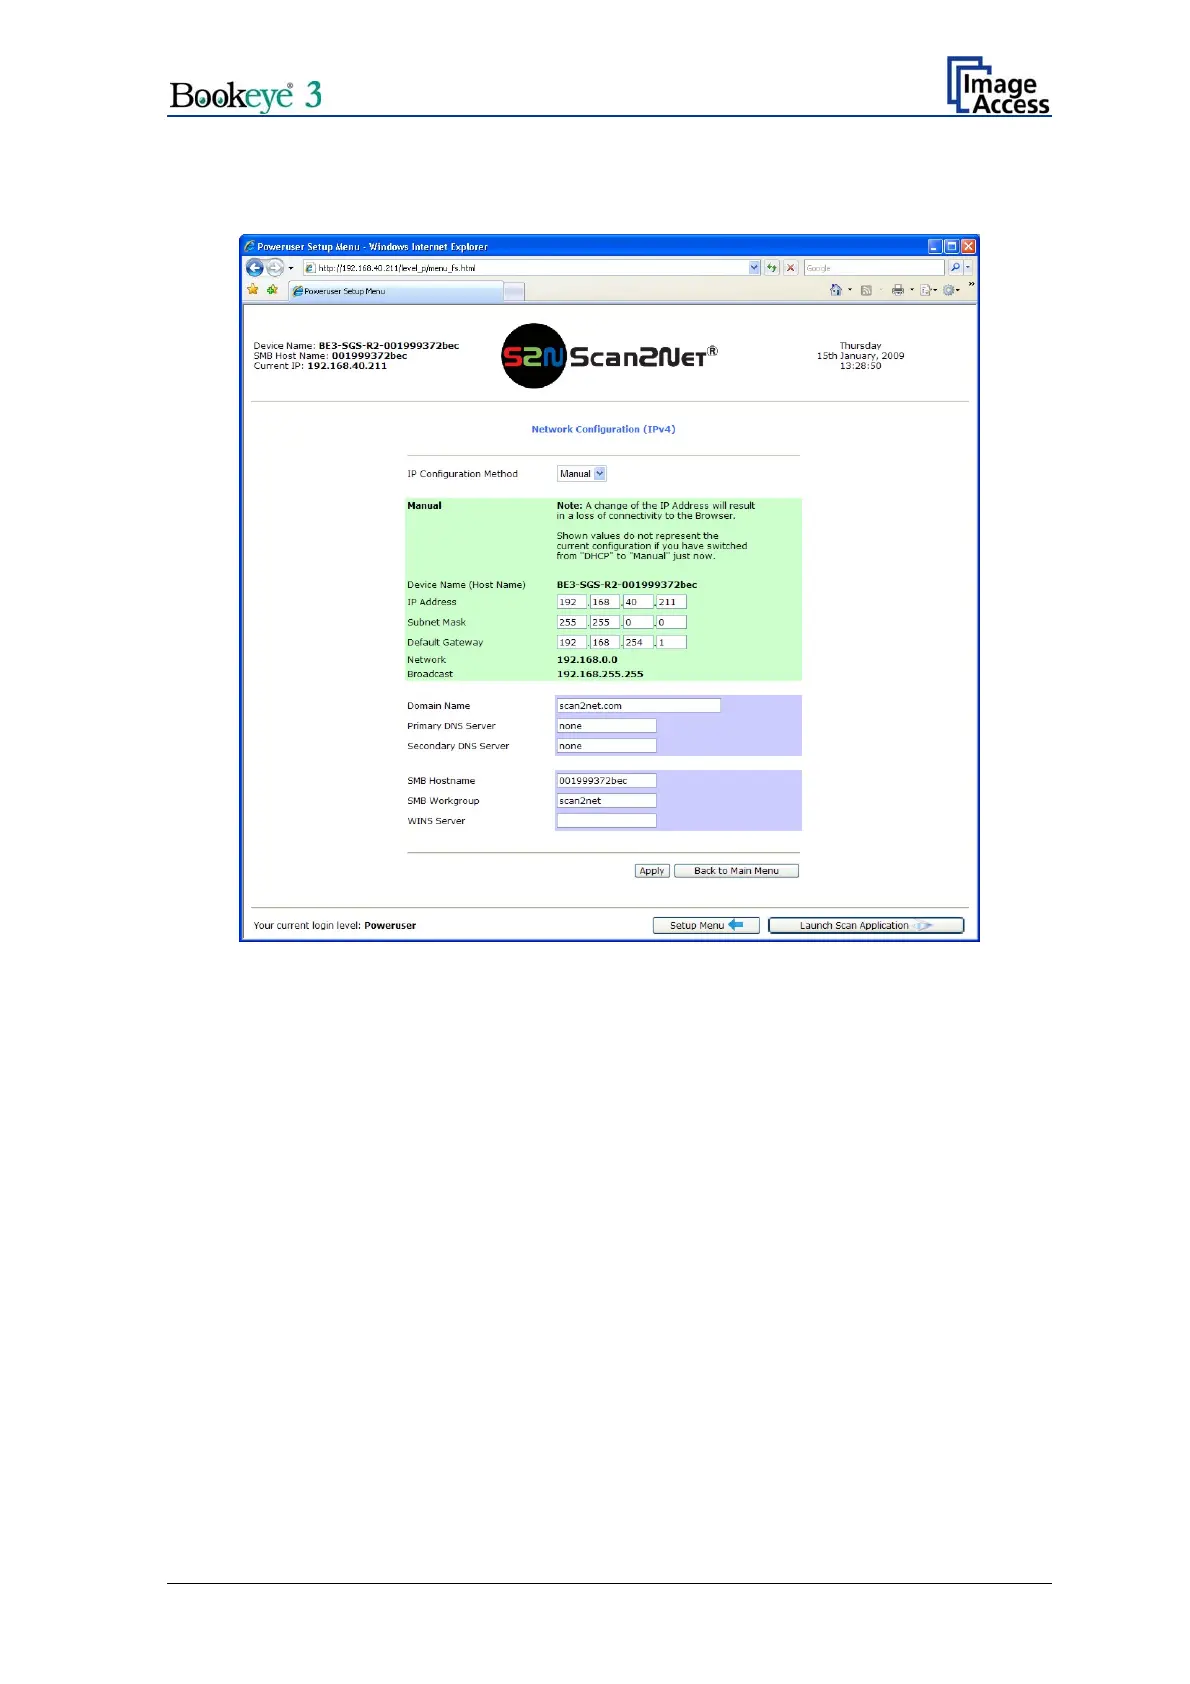
Now change the IP address, subnet mask and gateway to a valid address or select DHCP
to obtain an IP address automatically.
Picture 48: Network configuration screen
If the IP address has been changed, the device has to be powered down and up again.
Change the settings of your local PC back to the previous network settings. Enter the new
IP address of the scanner and go to the “Poweruser” main menu again.
Setup and Assembly Manual Page 41

Table of Contents

Other manuals for Image Access bookeye 3

Questions and Answers:

Question and Answer IconNeed help?

Do you have a question about the Image Access bookeye 3 and is the answer not in the manual?

Image Access bookeye 3 Specifications

General IconGeneral
BrandImage Access
Modelbookeye 3
CategoryScanner
LanguageEnglish

Related product manuals