82
NETWORK menu
Item Description
WIRED SETUP
(continued)
TIME
DIFFERENCE
Use the ▲/▼ buttons to enter the TIME
DIFFERENCE.
Set the TIME DIFFERENCE to match your
computer. If you are unsure what to enter, contact
your IT manager.
Use the ► button to return to the menu after
setting TIME DIFFERENCE.
• When this item is set, TIME DIFFERENCE in the
WIRED SETUP menu will be overwritten with the
same setting (
77
).
DATE AND
TIME
Use the ▲/▼/◄/► buttons to enter the Year (last
two digits), Month, Date, Hours and Minutes.
• When this item is set, TIME DIFFERENCE in the
WIRED SETUP menu will be overwritten with the
same setting (
78
).
• The projector will override this setting and retrieve
DATE AND TIME information from the Time server
when SNTP is enabled. (3.1.8
Date/Time
Settings in the Network Guide
)
• If STANDBY MODE in the SETUP menu is set
to SAVING and the projector is turned off (or AC
power is turned off), this setting will be reset.
(
56
).
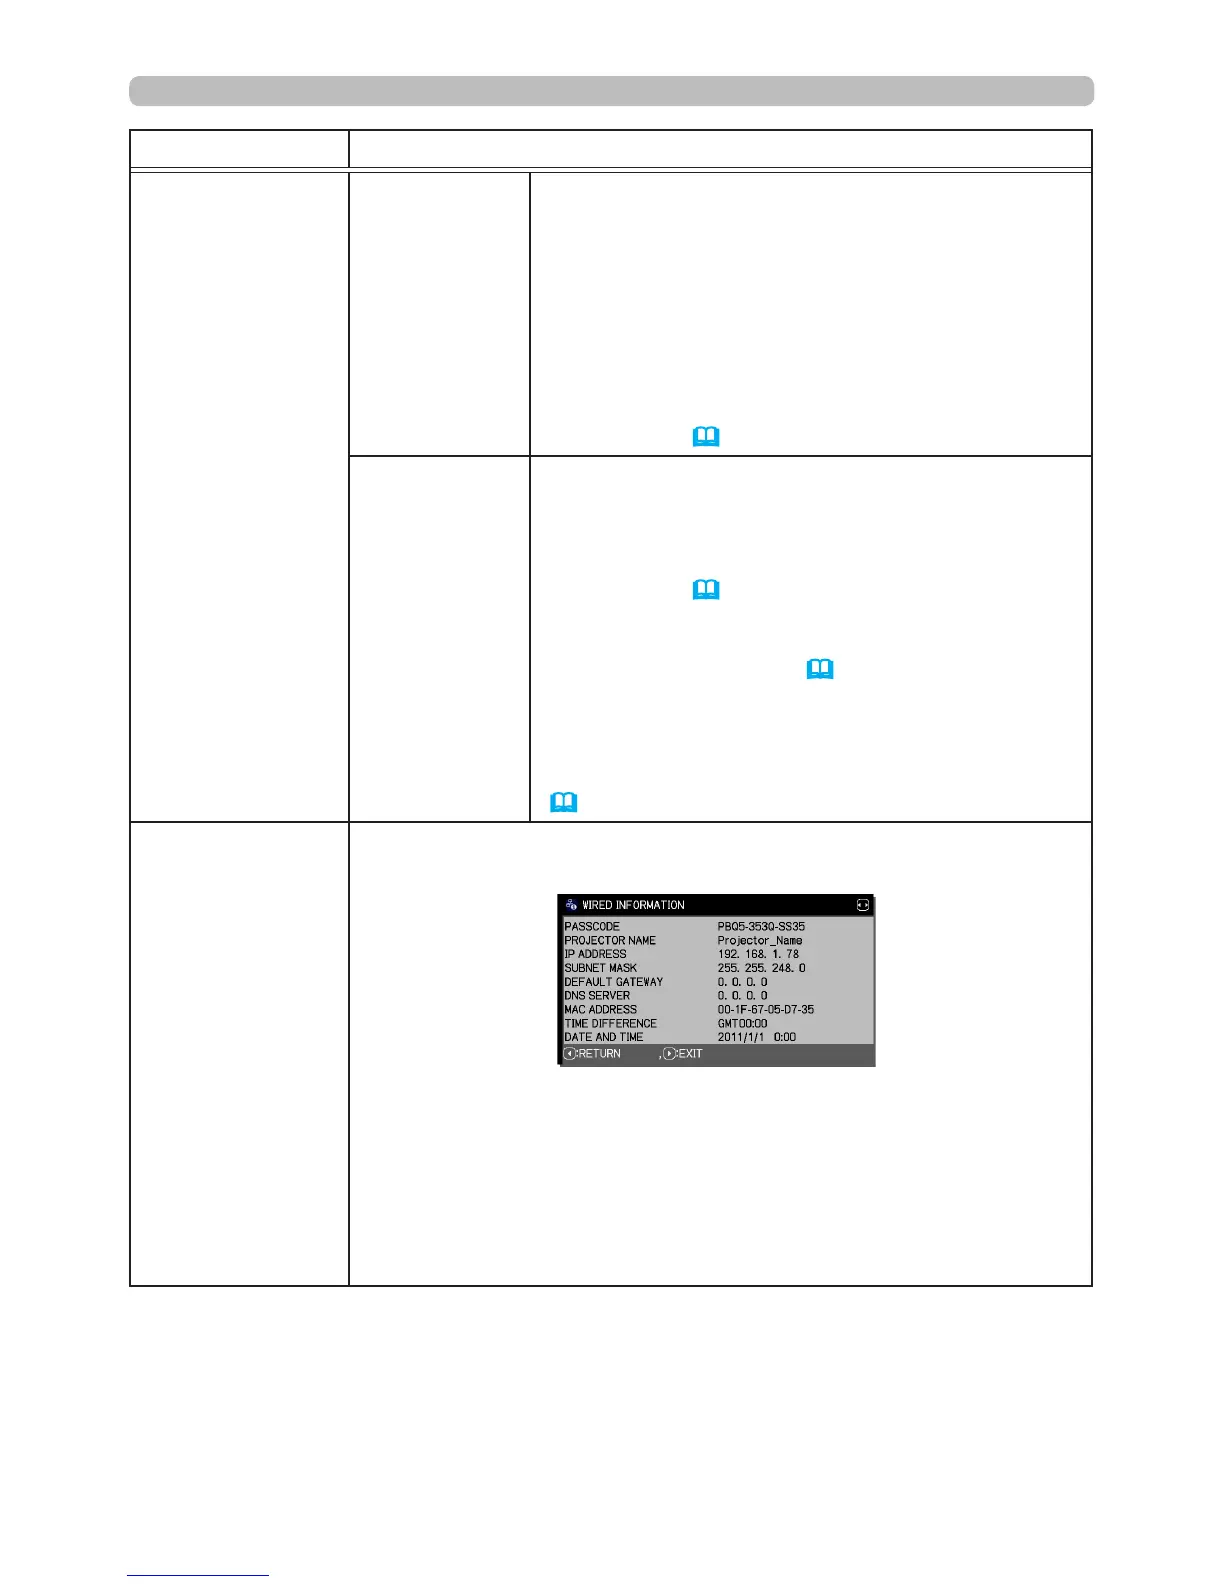
WIRED
INFORMATION
Select this to display the WIRED INFORMATION dialog to view the
wired LAN settings.
• For more details about PASSCODE, refer to the LiveViewer
manual.
• Only the first 16 characters of the PROJECTOR NAME are
displayed.
• IP ADDRESS, SUBNET MASK and DEFAULT GATEWAY indicate
0.0.0.0 when DHCP is ON and the projector has not received an
address from DHCP server.
(continued on next page)