3.
Once the preceding actions have been carried out, the appliance may be started
up.
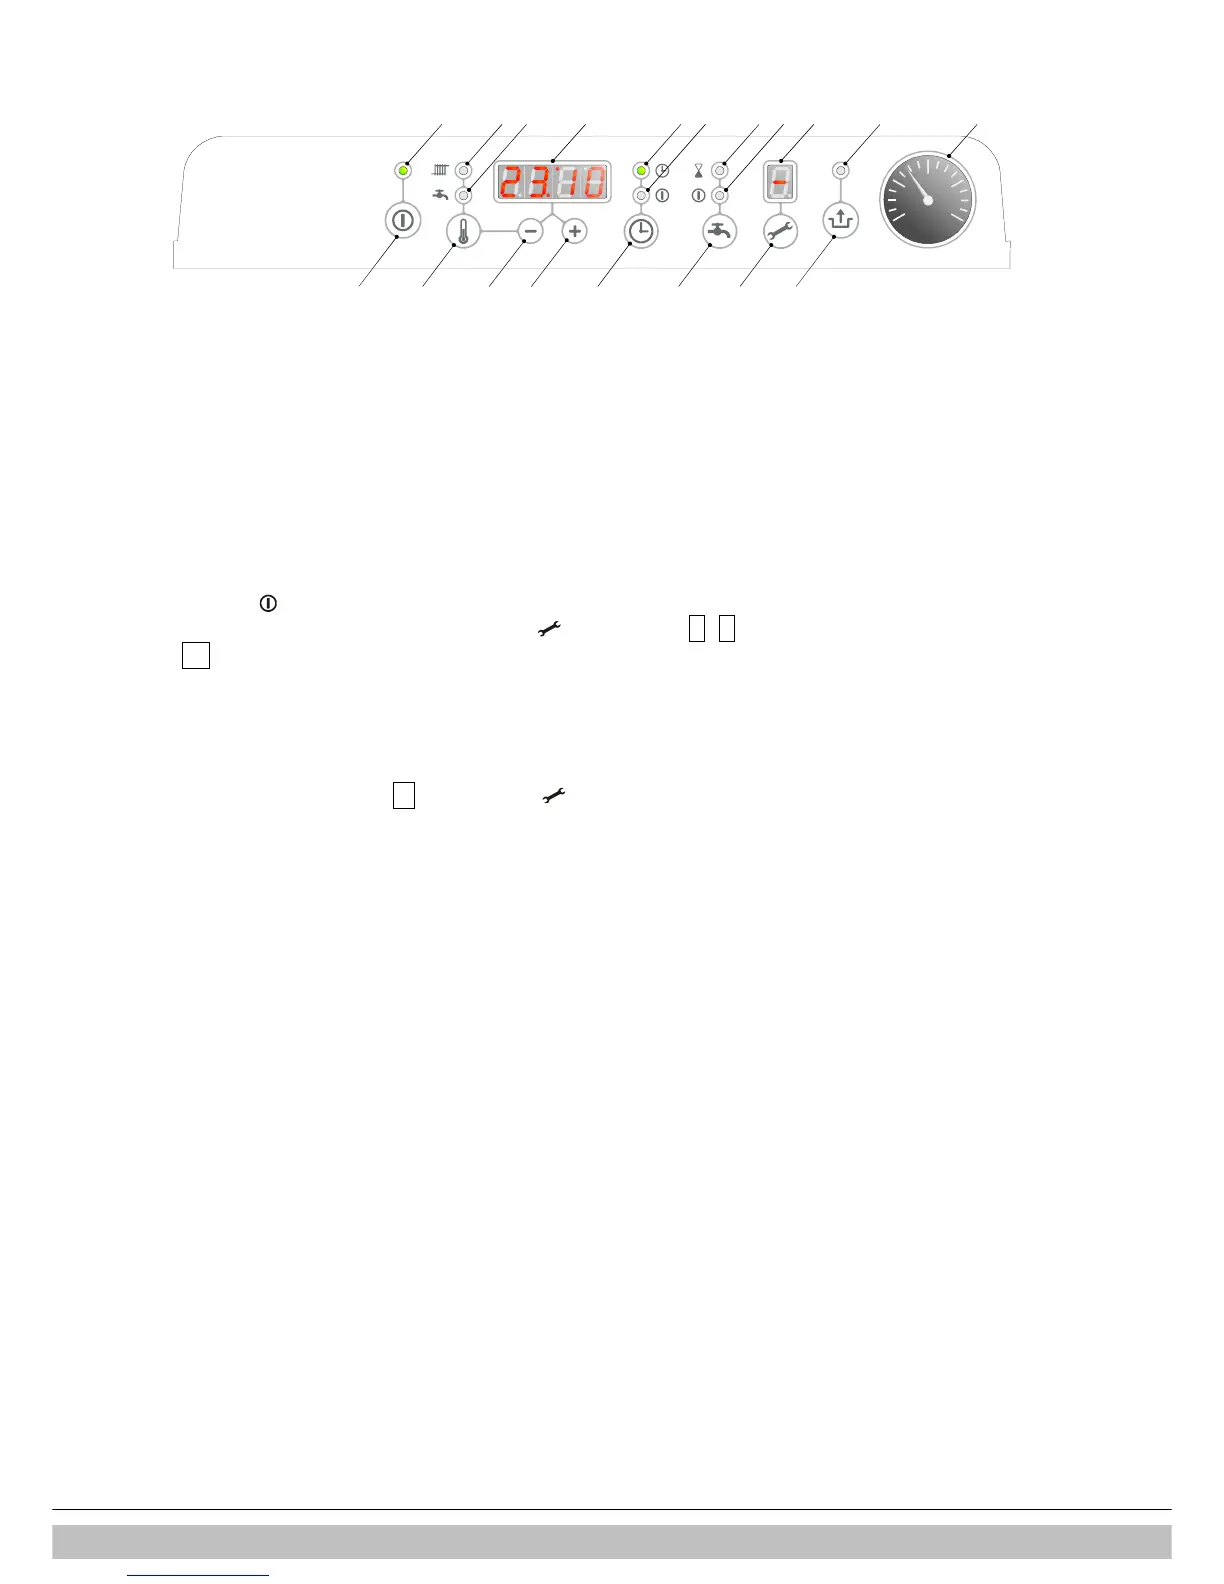
1. Press the button , to start the appliance.
The heat exchanger is heated up and the service display will show
3
,
4
and
6
(depending on the status of the DHW disabling switch and/or Open Therm
regulation).
2. Adjust the pump setting depending on the maximum power set and the
resistance in the CH installation. For the water head of the pump and the
pressure loss of the appliance see § 10.5.
3. Set the room thermostat higher than the room temperature. The appliance will
now switch to CH operation:
5
will show on the display.
4. Heat the installation and the appliance to approximately 80°C.
5. Check the temperature difference between the supply and return for the
appliance and the radiators. This must be approximately 20°C. For this purpose
set the maximum power on the service panel. See setting maximum power. If
necessary adjust the pump setting and/or the radiator valves. For the minimum
flow see § 10.5.
6. Switch the appliance off.
7. Bleed the appliance and the installation after cooling (if necessary top up).
8. Check correct operation of the heating and hot water supply.
9. Instruct the user on filling, bleeding and the operation of the clock, heating and
hot water supply. For setting the clock see § 9.3.
Notes
• The appliance is equipped with an electronic boiler controller, which ignites
the burner and continuously monitors the flame during each request for heat
from the heating or from the hot water supply.
• The circulation pump starts running in response to every request for heat. The
pump continues running for 1 minute after heating. This post purge period can
be changed if desired (See § 10.3).
• The pump runs automatically for 10 seconds every 24 hours in order to
prevent seizing. This will occur at the the time of the last request for heat. To
change this time the room thermostat should be turned up briefly at the
desired time.
• The pump does not run during DHW operation.
 Loading...