13BChapter 14: Camera settings
106 TruVision DVR 11 and DVR 11c User Manual
Select one of the options from the drop-down list. Default is non-
transparent/non-flashing.
• Transparent & flashing
• Transparent & not flashing
• Non-transparent & flashing
• Non-transparent & non-flashing
6. There are two red text boxes in the camera view window; one for the camera
name and the other for the date/time. Using the mouse, click and drag a text
box to the desired position.
7. To copy the settings to other cameras, click Copy and select the desired
cameras. Click OK.
8. Click Apply to save the settings and then Back to return to live view.
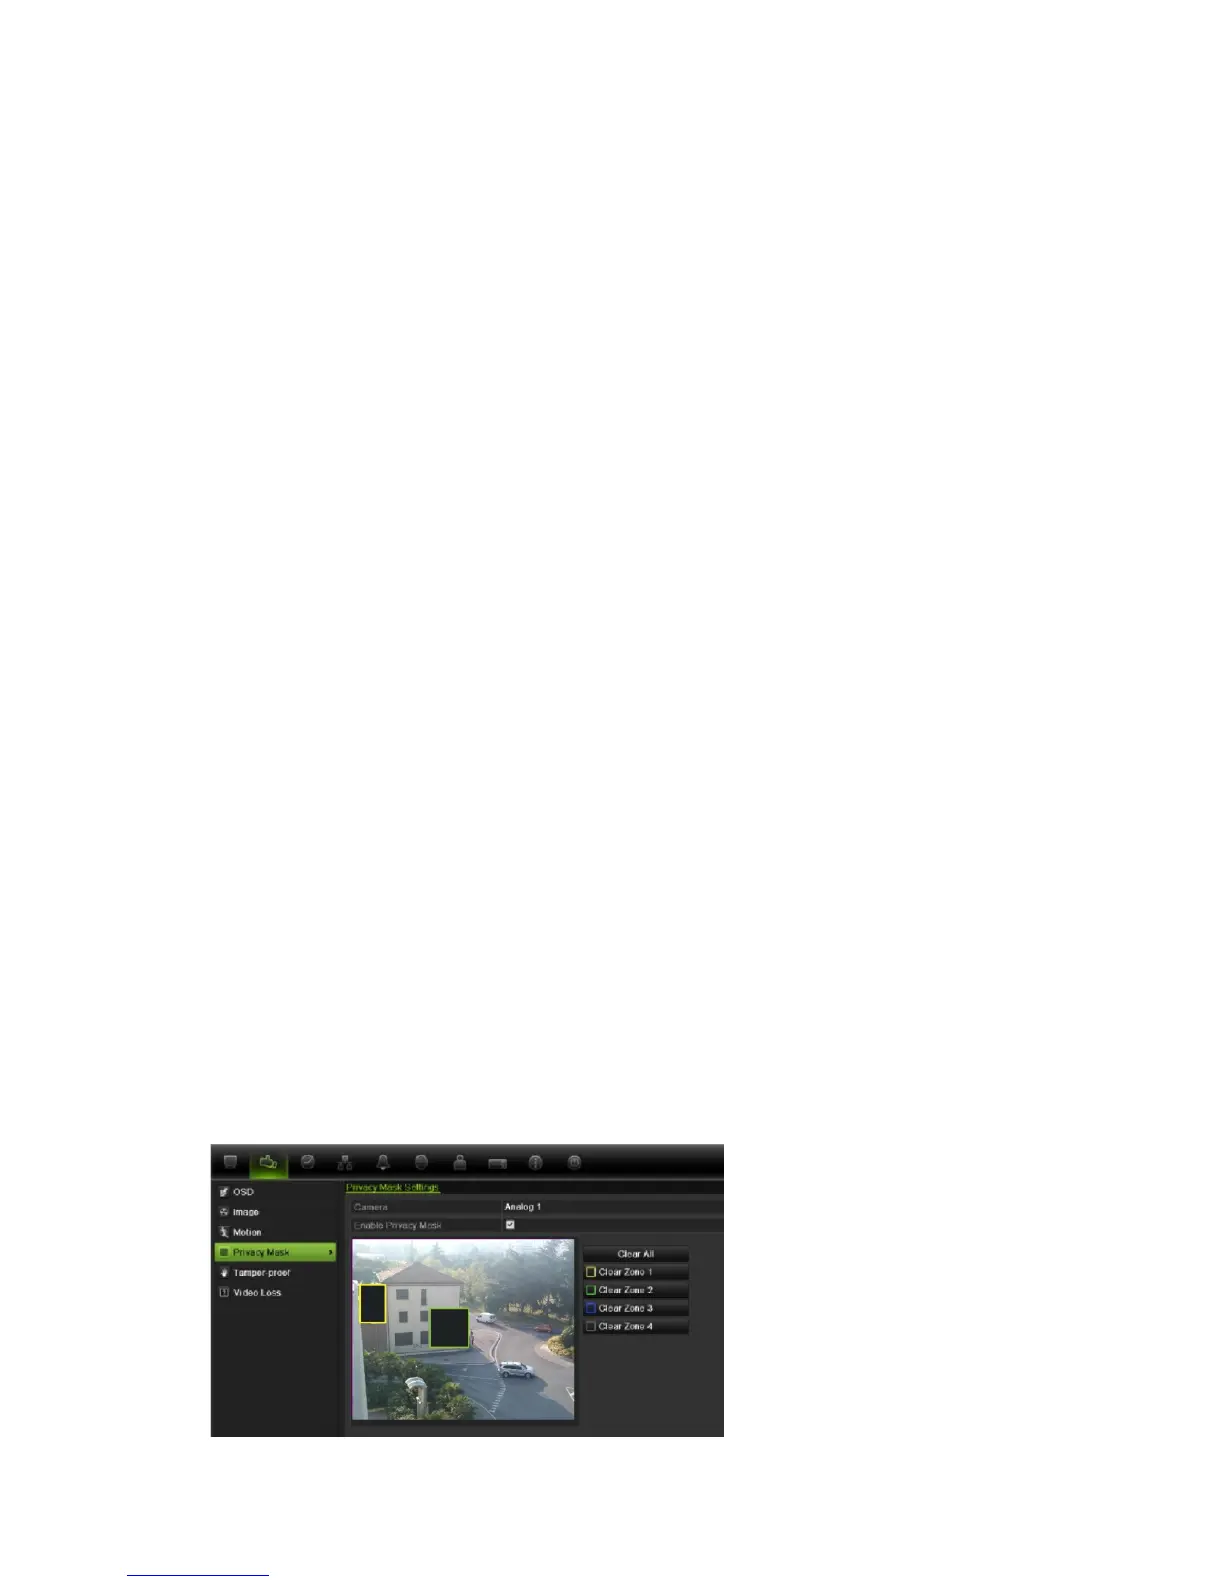
Setting up privacy masking
You can define an area on screen to remain hidden from view. For example, you
can choose to block the view of a camera when overlooking residential premises.
This hidden area is referred to as privacy masking. Privacy masking cannot be
viewed in live view or recorded mode, and appears as a blank area on the video
image.
To setup a privacy mask:
1. Click the Camera Management icon in the menu toolbar and select Privacy
mask.
2. Select the camera for which to set up privacy masking.
3. Check the Enable Privacy Mask box to enable the feature.
4. Set up the mask area. Up to four areas can be set.
Using the mouse, click and drag a privacy-mask box in the camera view
window over the desired area. You can set up to four areas for privacy
masking. Masked areas are dimmed and outlined in four different colors. Click
Apply to save settings.
 Loading...


