3BChapter 4: Recording
22 TruVision DVR 11 and DVR 11c User Manual
Daily schedules
To set up a daily recording schedule:
1. Click the Video Schedule icon in the menu toolbar and select Schedule.
2. Select a camera.
3. Check the Enable Schedule box.
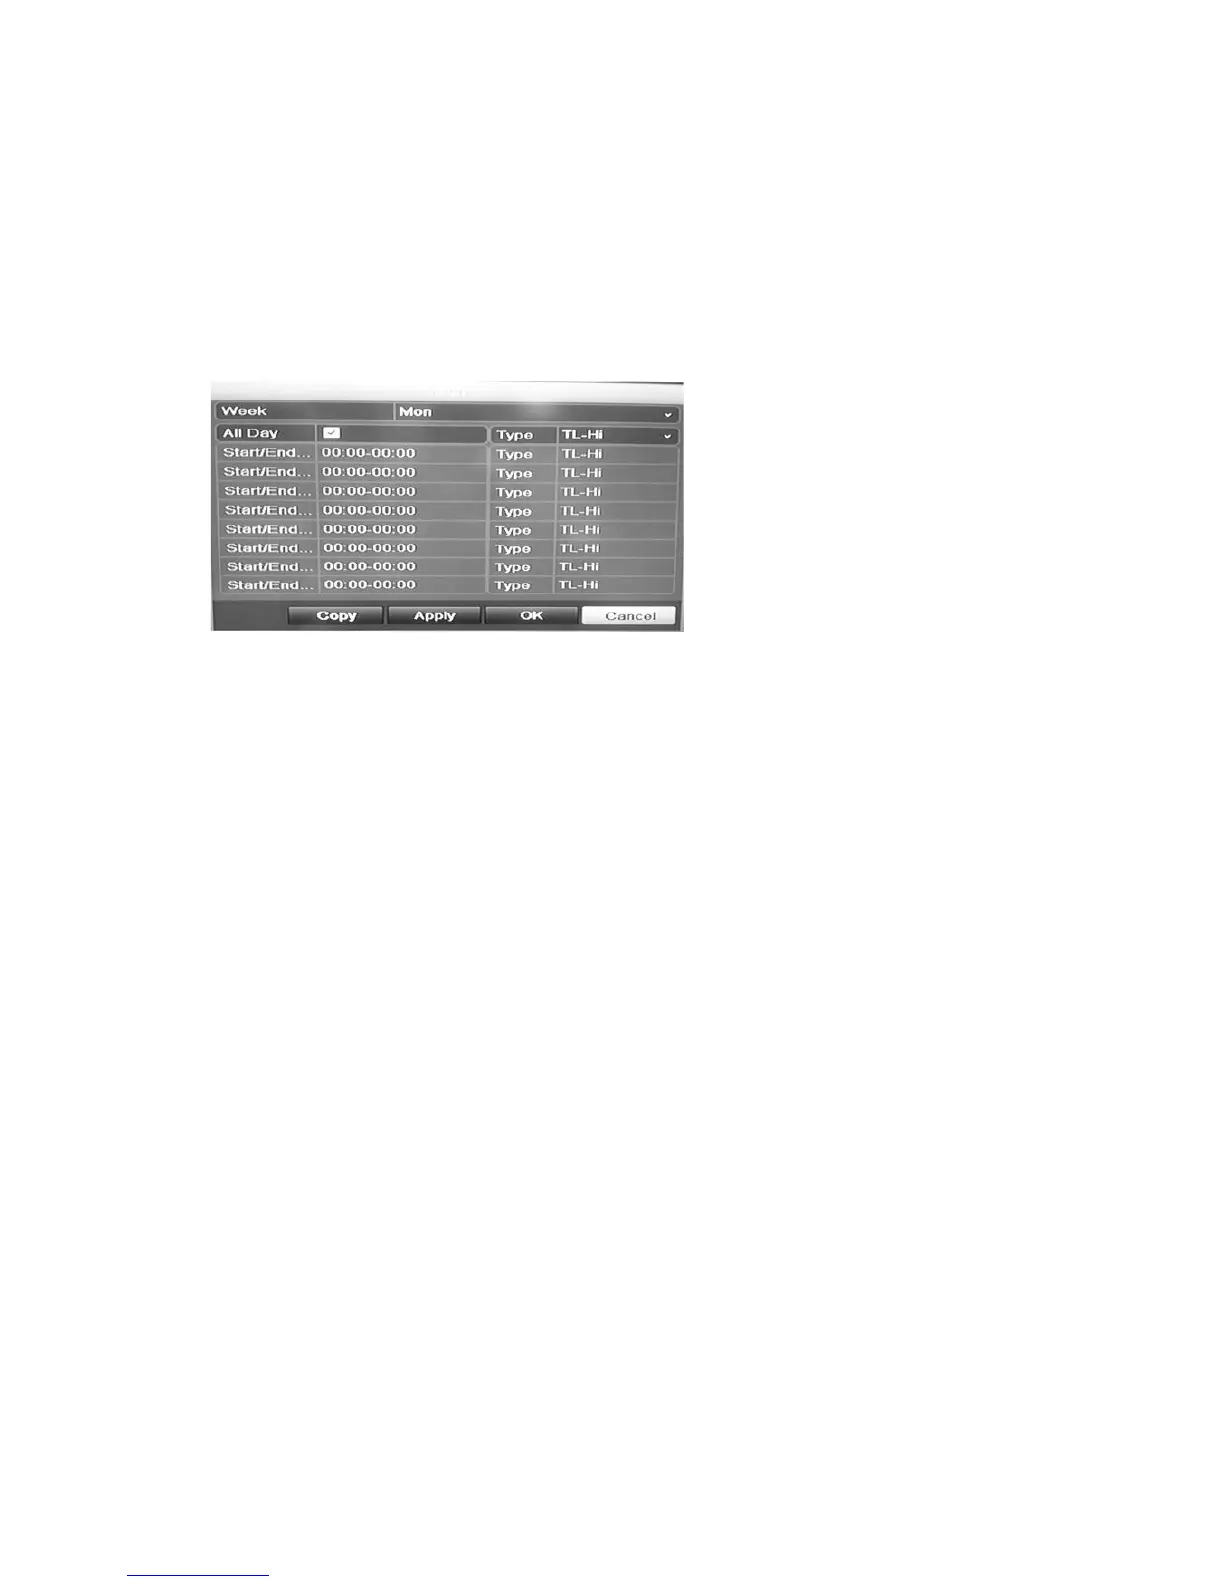
4. Click Edit. The following window is displayed:
5. Select the day of the week for which you want to set up the schedule.
You can define a different schedule for each day of the week.
6. Set the start and end time for recording.
Define a time period by entering a start (left column) and end (right column)
time. You can schedule up to eight time periods. Click All Day to record all
day.
Note: Time periods defined cannot overlap.
7. Select a recording type.
This setting instructs the DVR to begin recording when an alarm is triggered.
The recording type can be based on time and triggered by motion detection
and/or an alarm. If set to TimeLapse (TL-Hi or TL-Lo), the DVR records
continuously.
8. Click Apply to save settings
9. Repeat steps 4 to 8 for other days of the week or to copy the schedule
settings to another day.
To copy the current schedule settings to another day of the week, click Copy.
Select the number of the day of the week to which to copy the schedule. Click
OK to save changes and return to the Edit window.
10. Repeat steps 4 to 9 for other cameras.
11. Click Apply to save the settings and then OK to return to the schedule
window.
 Loading...


