4)
7-A8B®4^'t"y^©^54U,
7^F*9g|5IC®§
itiiDfSBS
(ffl) C®BI
Stffid;D±lC»5J:5lcUr<rccrU
+-t"y
^^©^54
or
<
rc^U^o
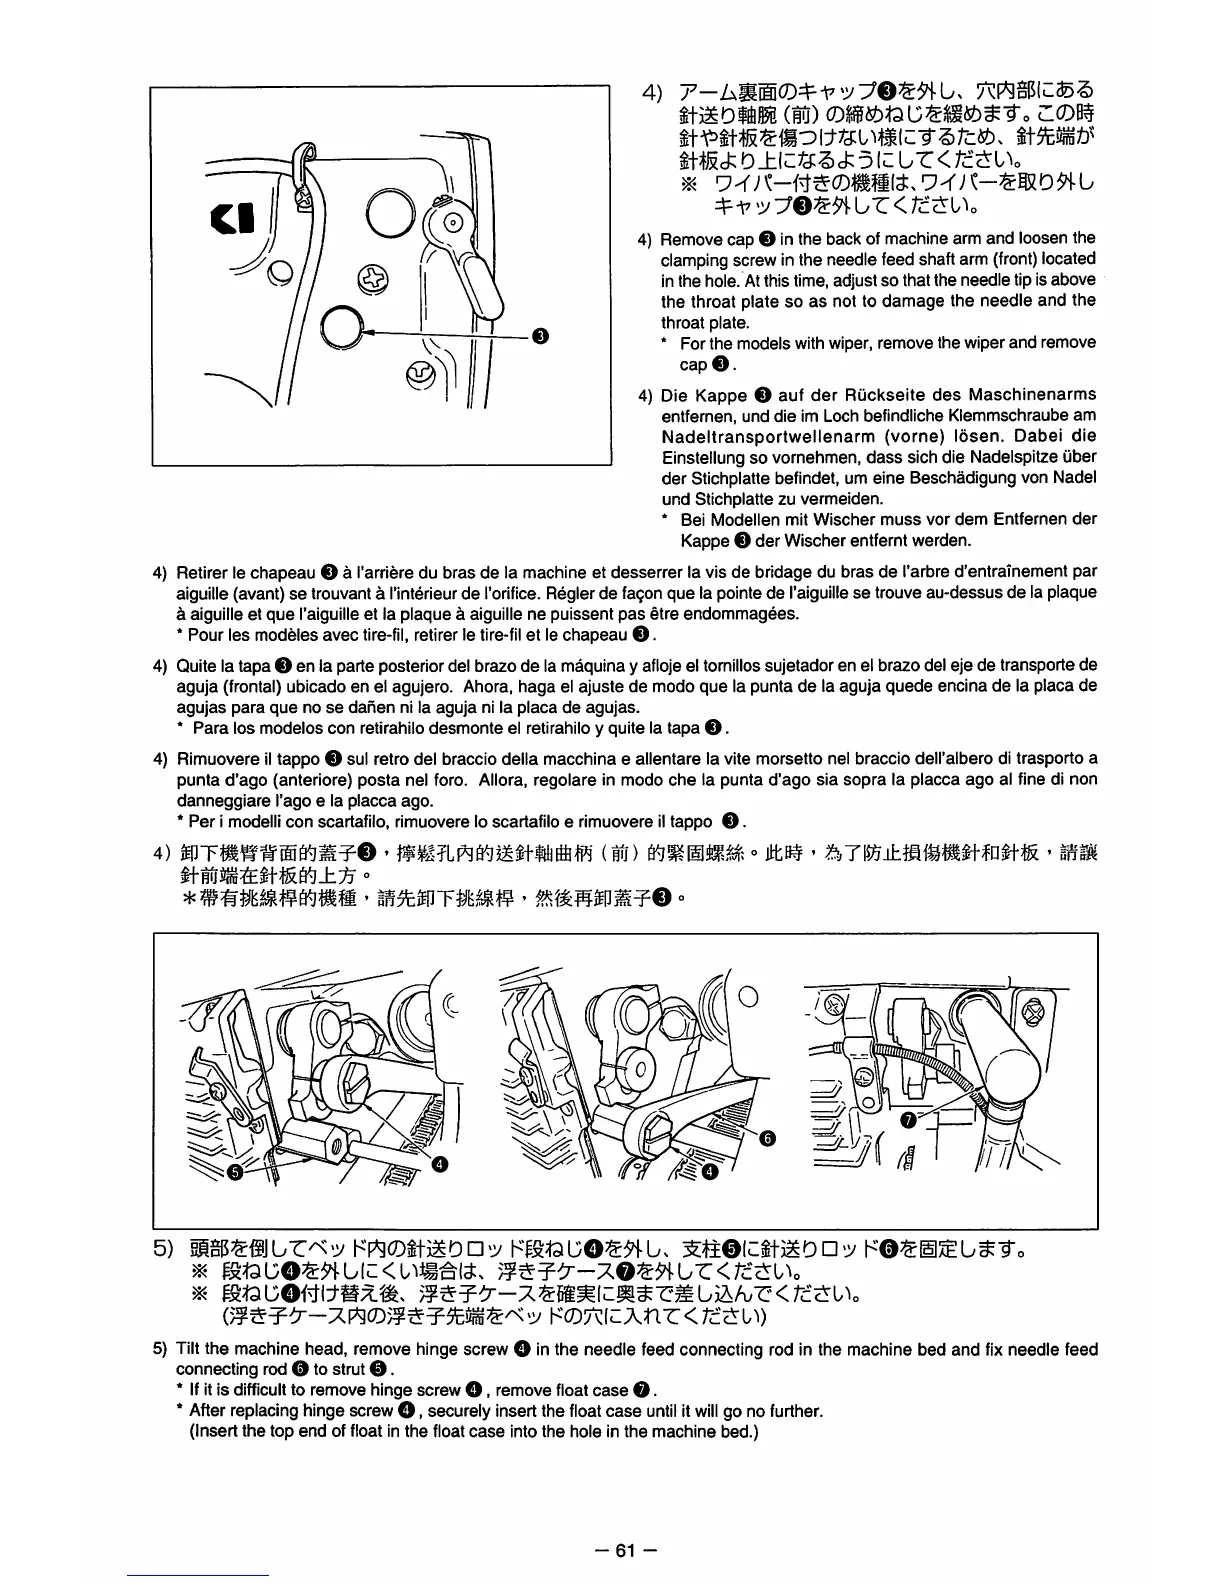
4) Removecap © in the back of machinearm and loosen the
clamping screw inthe needle feed shaft arm
(front)
located
Inthe hole. Atthis time, adjust so that the needle tip Isabove
the throat plate so
as
not to
damage
the needle and the
throat
plate.
* For the models withwiper, remove the wiper
and
remove
cap
©.
4) Die Kappe © auf
der
Riickseite
des
Maschinenarms
entfernen,
und
die
im Loch befindliche
Klemmschraube
am
Nadeltransportwellenarm
(vorne)
losen.
Dabei
die
Einstellung so vornehmen,
dass
sich die Nadelspitze uber
der Stichplatte befindet, um eine Beschadigung von Nadel
und
Stichplatte zu
vermeiden.
*
Bel
Modellen
mit
Wischer
muss
vor
dem
Entfernen
der
Kappe© der Wischerentfernt werden.
4) Retlrer le chapeau © a Tarrieredu bras de la machine et desserrer la vis de bridage du bras de I'arbre d'entraTnementpar
aiguille(avant)
se
trouvanta
Tinterieur
de
Torifice.
R§glerde fagonque la pointede
Taiguille
se
trouve au-dessus de la plaque
a aiguille et
que
I'aiguille et la plaque a aiguille ne puissent
pas
etre
endommagees.
*Pour les modeles avec
tire-fil,
retlrerle
tire-fil
et le chapeau
©.
4) Quite la tapa © en la parte posteriordel brazo de la maquina y aflojeel tomillos sujetador en el brazo del eje de transporte de
aguja (frontal) ubicado en el agujero. Ahora,
haga
el ajuste de mode
que
la punta de la aguja
quede
encina de la placa de
agujas
para
que
no
se
dahen
ni la
aguja
ni la
placa
de
agujas.
* Para los modelos con retirahilo desmonte el retirahilo y quite la tapa
©.
4) Rimuovere iltappo © sul retro del braccio della macchina e allentare la vite morsetto nel braccio dell'albero di trasporto a
punta
d'ago
(anteriore)
posta
nel foro. Allora, regolare in mode
che
la punta
d'ago
sia
sopra
la placca
ago
al fine di non
danneggiare
I'ago e la placca ago.
*Per i
modelli
con scartafilo, rimuovere loscartafiloe rimuovere
il
tappo
©.
4)
(M)
°
1.
K©^[
K®7X(cAnr<rcc:ru^)
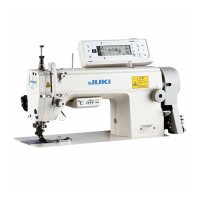
5)
Tilt
the machine head, remove hinge screw © inthe needle feed connecting rod in the machine bed and
fix
needle feed
connecting rod© to strut
©.
*
If
itis
difficult
to remove hinge screw
O,
removefloat
case
©.
*
After
replacing
hingescrew
O,
securely insertthe
float
case
until
it
will
go no
further.
(Insert the top end of float in the float
case
into the hole in the machine bed.)
-61
-