14) Instateel gancho y la lengueta de posicionamiento de la c^psula de canilla.
15) Instate la placa frontal.
16)
FInalmente,
compruebe
quela
placa
de
agujas
no
toca
el
dentado
de
transporte
cuando
se
fija
at
m^xlmo
la
escala
del
cuadrante
de
transporte.
14) Installare
it
crochet e
11
dente di posizionamento delta capsula.
15) Installare la
plastra
frontale.
16)
Alia
fine,
controllare
che la placcaago
non
sia a contatto con la
griffa
ditrasporto
quando
la scala
delta
manopola
di
regolazione dei trasporto e impostata at valore massimo.
14)
^ °
15) °
[Changing
over
procedure
from
the
bottom
feed to
the
needle
feed]
[Umrustverfahren
von
Untertransport
auf
Nadeltransport]
[Comment
passer
de
i'entramement
Inferieur a
i'entramement
par
aiguille]
[Procedimiento
de
cambio
de
transporte
inferior a
transporte
de
aguja]
[Procedura
per
ia
commutazione
dal
trasporto
inferiors ai
trasporto
a
punta
d'ago]
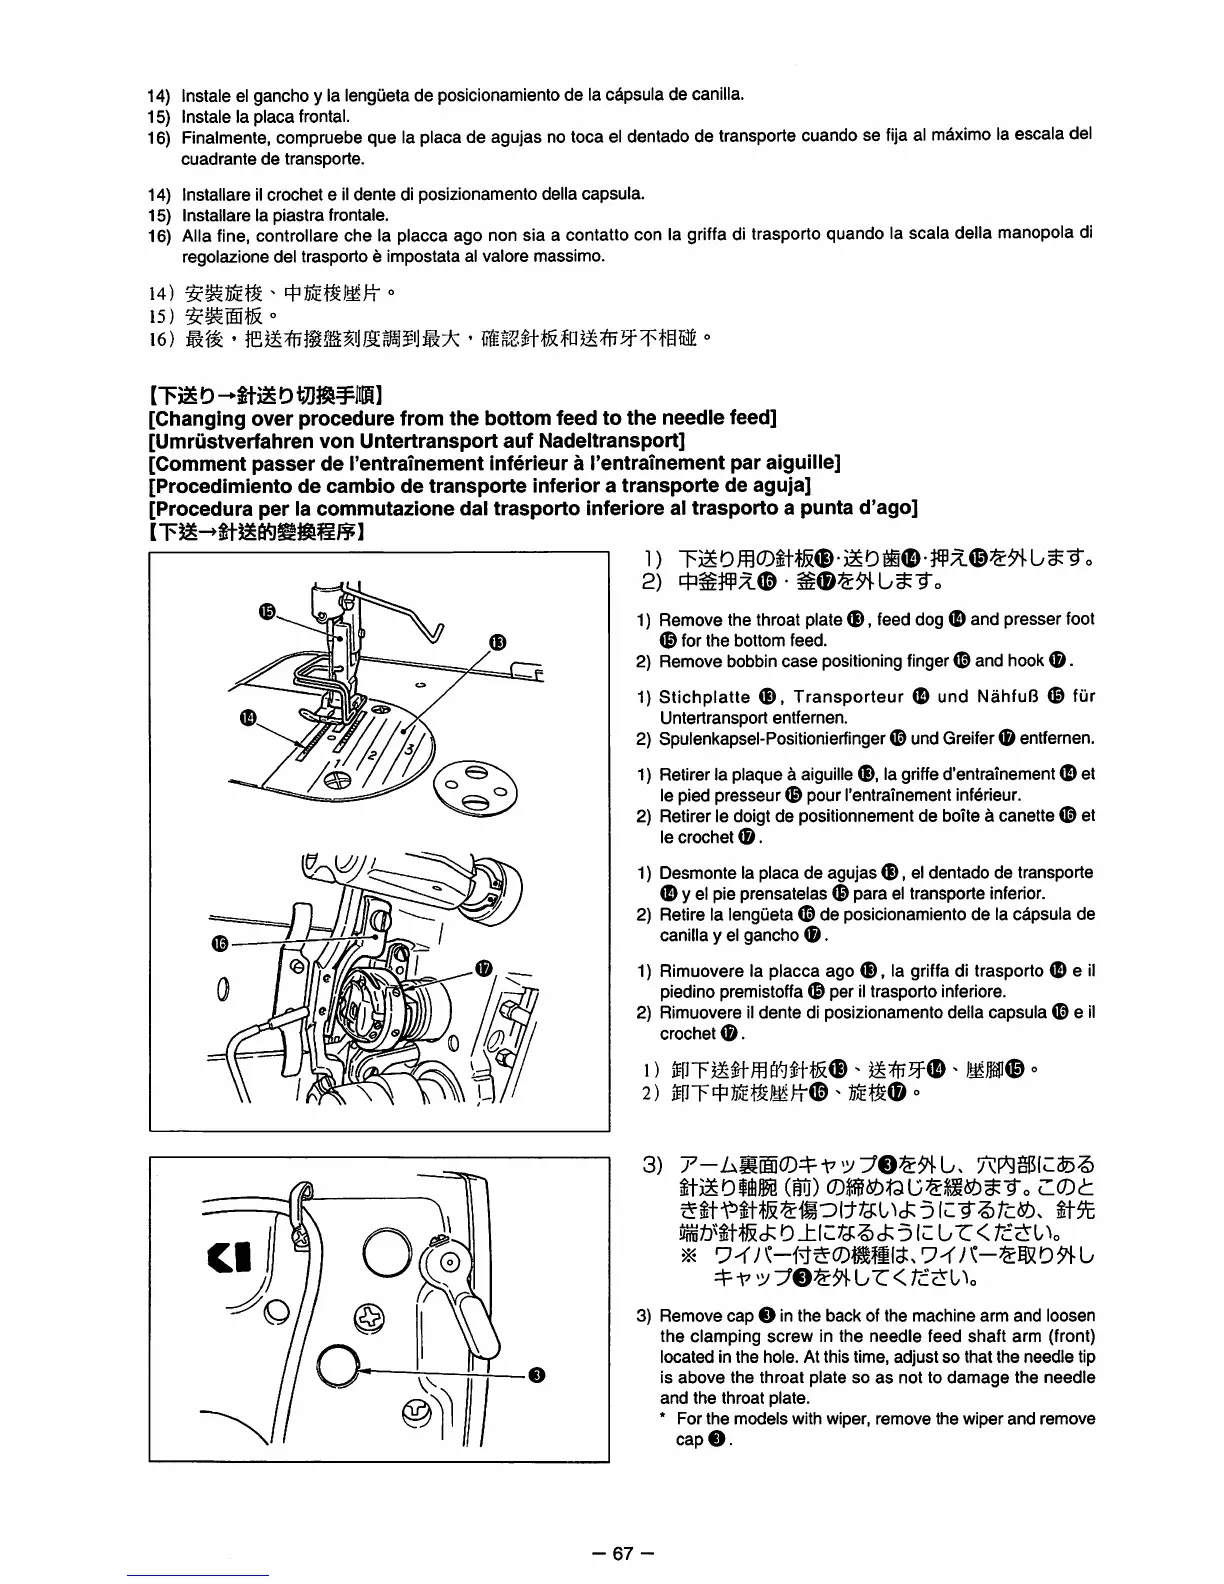
2)
1)
Remove
the throatplate
®,
feed dog
<D
and presser
foot
© for
the
bottom feed.
2)
Remove
bobbin
case
positioning
finger
© and
hook
©.
1) Stichplatte
©,
Transporteur © und NahfuB © fur
Untertransport entfernen.
2) Spulenkapsel-Positlonlerfinger © und
Greifer
© entfernen.
1)
Retirer
la
plaque
a
aiguille
©, la
griffe
d'entralnement © et
le pied presseur © pour I'entramement
inferieur.
2) Retirer le
doigt
de posltionnement de boitea canette © et
le
crochet
©
1) Desmonte la placa de agujas
©,
el dentado de transporte
© y el pie prensatelas © para el transporte
inferior.
2) Retire la lengueta © de posicionamiento de la capsula de
canillay el gancho
©.
1) Rimuovere la placca ago
©,
la
griffa
di trasporto © e
il
piedino premistoffa © per
il
trasporto
inferiore.
2) Rimuovere
il
dente di posizionamento della capsula © e
il
crochet
1) -
W®
-
2)
aiT4")!StaK)t©
-
ffits®
°
3)
itiUDiM
(ffil)
C®i
D
5IC
ur
<
+1"^
ur
<
tc.m\
3) Remove cap O in the back ofthe machine arm and ioosen
the
clamping
screw
in
the
needle
feed
shaft
arm (front)
located
in
the
hole. At this time,
adjust
so
that
the
needle
tip
is
above
the
throat
plate
so
as
not to
damage
the
needle
and
the
throat plate.
* For
the
models
with wiper,
remove
the
wiper
and
remove
cap
©.
-67-