– 14 –
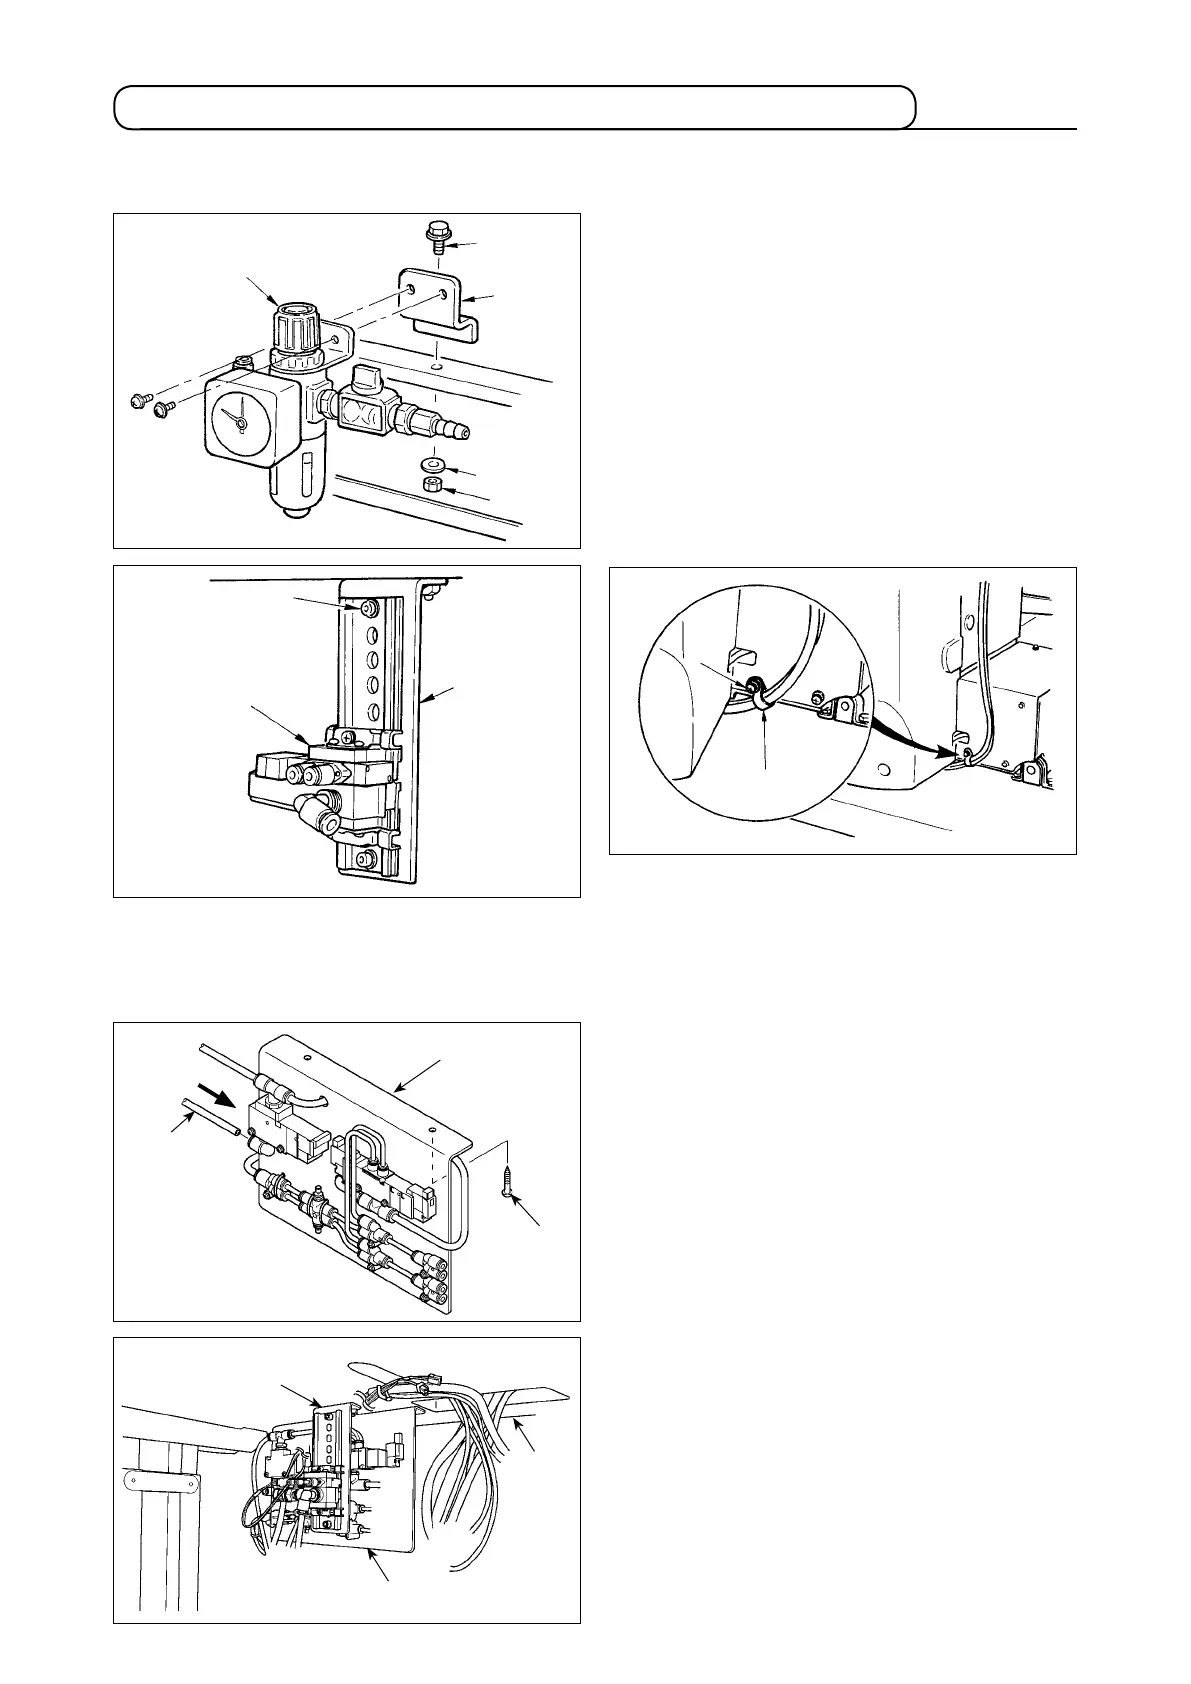
4) Fix the air tube using cable clip
9
supplied with
the machine as accessories. (For the setscrew,
use setscrew
!0
xing the motor cover.)
3) Install solenoid valve asm.
8
on solenoid
valve installing plate
6
in the direction as
shown in the gure, using screw
7
supplied as
accessories.
3-14. Connecting the pneumatic components (Pneumatic type only)
1) Install regulator
1
to installing plate
2
, and
install it to the stand with screw
3
, washer
4
and nut
5
.
2) Connect the cord coming from the regulator
with CN78 (air relay cable).
(Refer to
"
!
-3-11. [Wiring diagram of circuit board]"
p.11
.)
1
2
3
4
5
8
6
7
9
!0
!1
!3
!2
[Connection common to all areas]
When using the air-driven type model, connect the pneumatic components as described below.
5) Install solenoid valve installing plate A asm.
!1
on the table with two setscrews
!3
.
Connect solenoid valve installing plate A
asm
!1
and regulator
1
with long air tube
!2
supplied as accessories with the machine.
Attach the relevant components referring to the
illustrations.
!1
6
Table