– 3 –
3. INSTALLATION
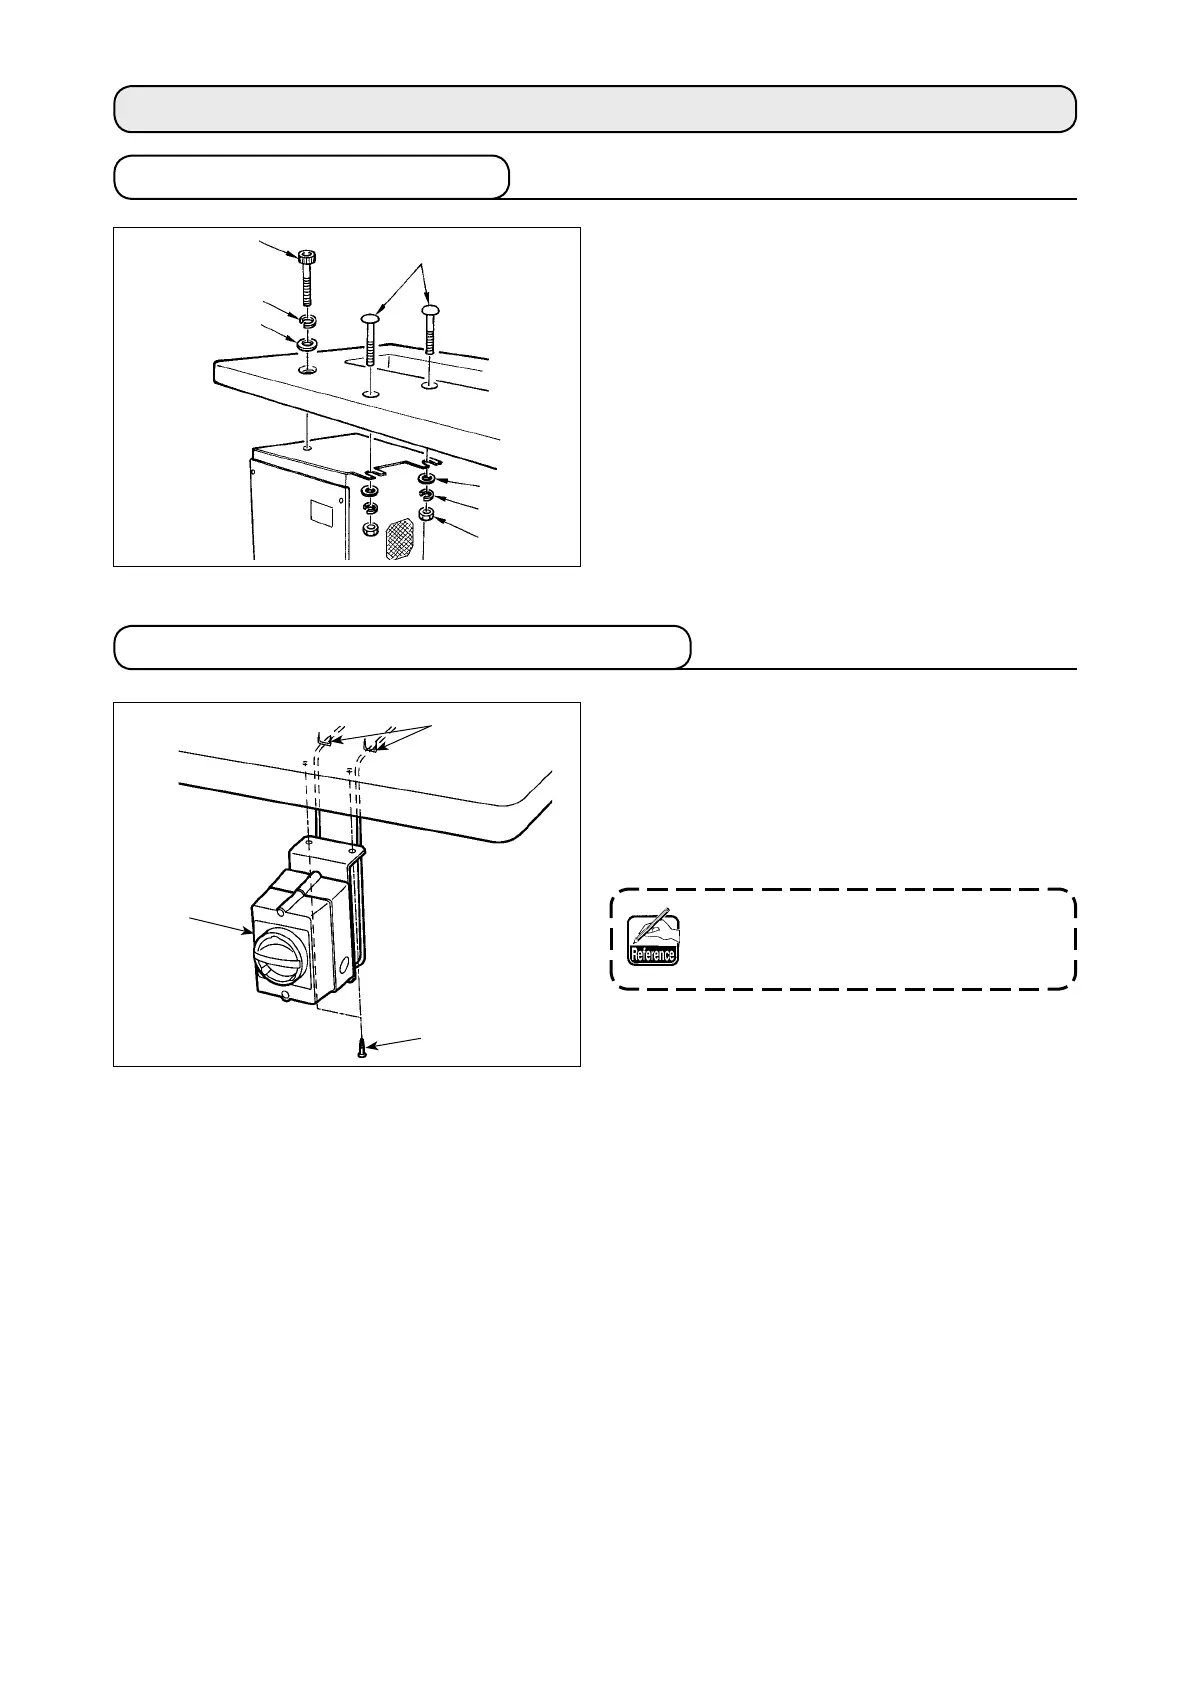
3-1. Installing the electrical box
Install the electrical box on the underside of the
table at the location illustrated using round-head
bolt
1
, plain washer
2
, spring washer
3
and nut
4
supplied with the machine, and using bolt hav-
ing hexagonal indentation on the head
5
spring
washer
6
and plain washer
7
supplied with the
machine.
1) Installing the power switch
Fix power switch
1
under the machine table
with wood screws
2
.
Fix the cable with staples
3
supplied with the
machine as accessories in accordance with the
forms of use.
Five staples
3
including the staple for
xing the operation panel cable are
supplied as accessories.
3-2. Installing and connecting the power switch
1
2
3
1
5
6
7
2
3
4