E-42
6. SETTING AND ADJUSTMENTS BEFORE SHOOTING
E-43
6. SETTING AND ADJUSTMENTS BEFORE SHOOTING
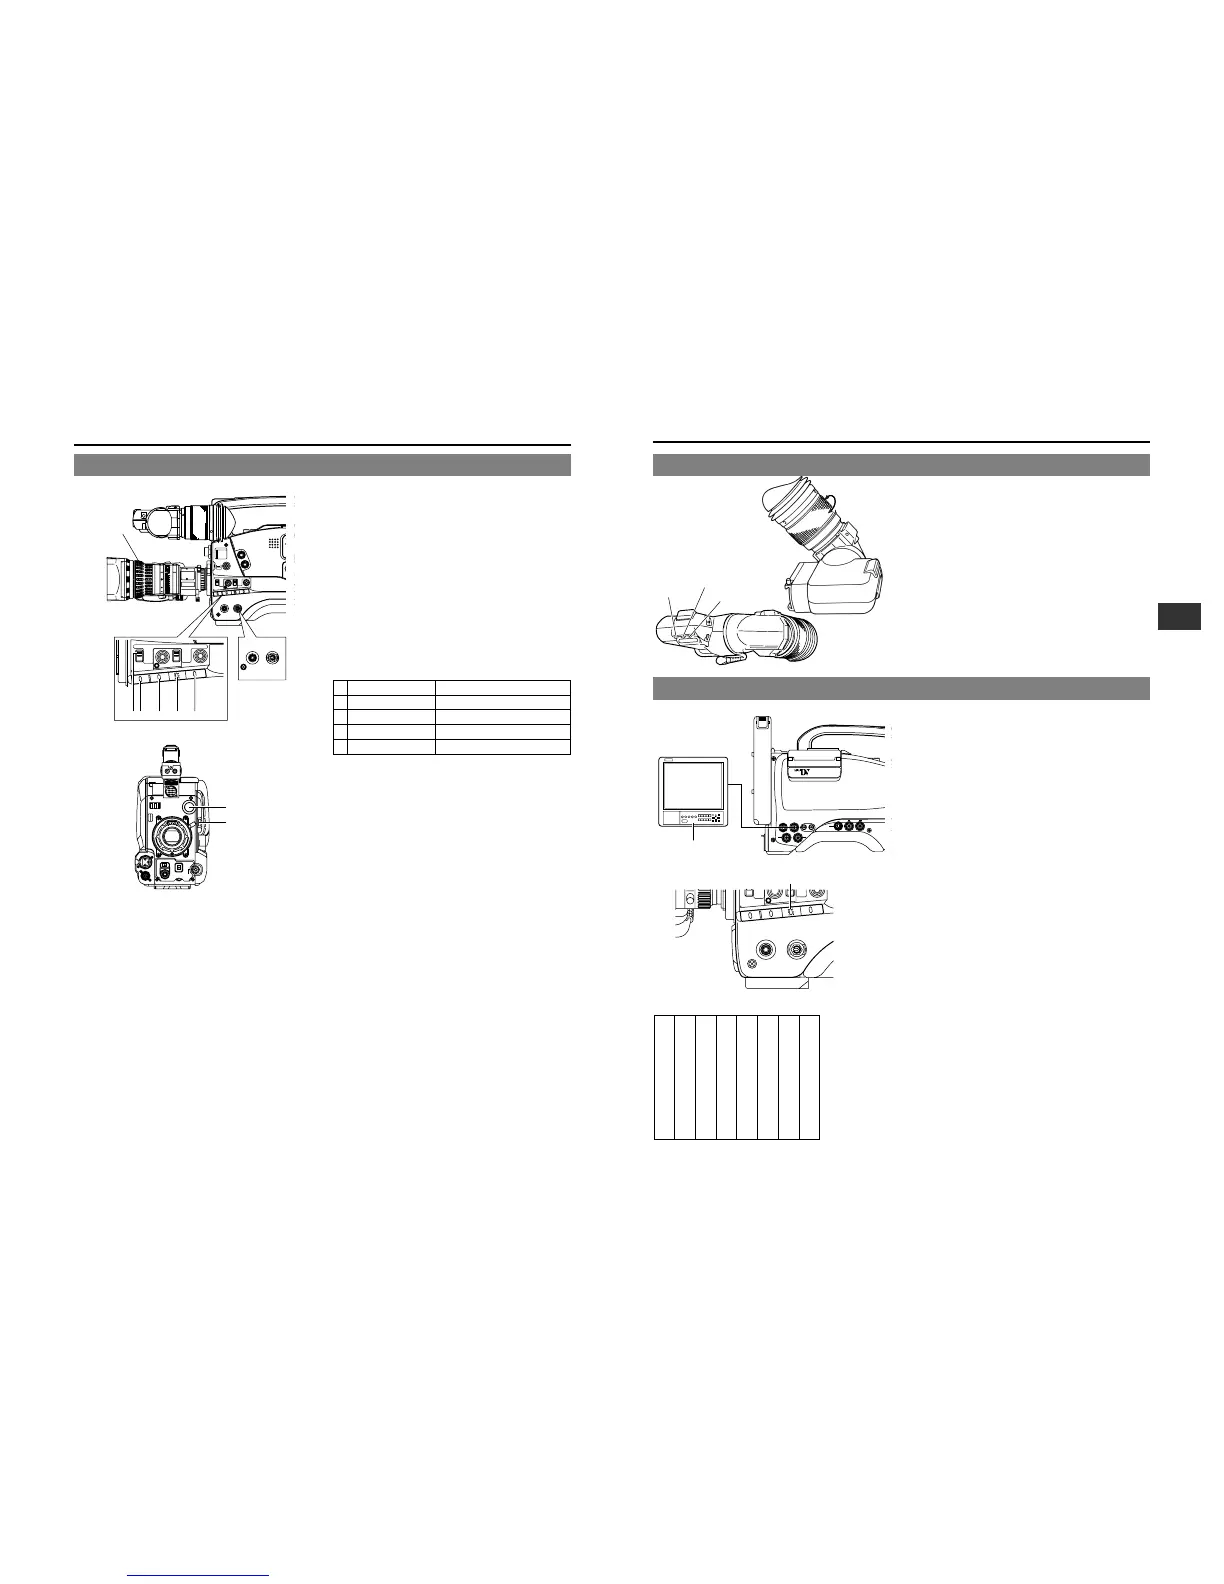
Visibility adjustment
Rotate the eyepiece focusing ring so that the viewfinder
screen image is clearly visible.
Brightness and contrast adjustment
When the ambient brightness changes, the brightness and
contrast of the viewfinder screen can be adjusted with the
CONT and BRIGHT controls.
Peaking adjustment
Turning the PEAKING (contour adjustment) control makes
the picture look sharper, making focus adjustment easier.
EBU type colour bars
6-2 Viewfinder Adjustment
6-3 External Monitor Adjustment
The colour bar screen has a configuration as shown above.
The description hereinafter refers to the positions in the colour bar
screen using the numbers.
POWER
NG
GAIN
OUTPUT
WHT.BAL
VTR
ON OFF
S
A
V
E
S
T
B
Y
H M L
B
A
R
S
C
A
M
A
U
T
O
K
N
E
E
P
R
S
T
A
B
O
N
O
F
F
SPOT L
COMPRESS
TC OUTTC IN
VTR
REMOTE
SYNC IN
MIC IN
LENS
TEST OUTPUT
Y/C OUT
MONITOR OUT
LINE OUT
CH-1 CH-2
PUSH
DV CAMCORDER
GY-DV700W
3.~8.
1.
2.
Display the camera built-in colour bar signal on the video monitor
and adjust the colours, contrast and brightness.
1.
Connect a colour video monitor to the MONITOR OUT
connector of the GY-DV700W.
2.
Set the OUTPUT switch to BARS to output the colour bar
signal (EBU type colour bars).
3.
Set the monitor's BLUE CHECK function to ON so that the
screen turns entirely blue.
4.
Adjust the CHROMA control of the monitor so that there is
no difference in brightness between the colour bars 1 and
7.
5.
With the BLUE CHECK function ON, adjust the PHASE
control of the monitor so that there is no difference in
brightness between the colour bars 3 and 5.
6.
If the phase control adjustment above causes a difference
in brightness between the colour bars 1 and 7, start again
from the CHROMA control adjustment in step
4
.
7.
Set the monitor's BLUE CHECK function to OFF to switch
the monitor back to the standard screen (R, G and B will all
appear).
RESET
OP
1.
POWER
NG
ON OFF
2.
GAIN
OUTPUT
WHT.BAL
VTR
S
A
V
E
S
T
B
Y
H M L
BA
R
S
C
A
M
A
U
TO
K
NE
E
PR
S
T A
B
O
N
OF
F
AUTO IRIS LOLUX
BACK L
NORMAL
SPOT L
STRETCH
NORMAL
COMPRESS
FULL AUTO BLACK
A CB D E
3.
AUTO
WHITE
SKIN
AREA
ACCU
FOCUS
TAKE
VTR
ZEBRA
AUDIO
LEVEL CH-1
ON
OFF
VF
4.
5.
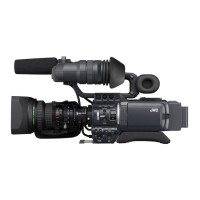
1.
POWER ON
1 First place a charged battery pack in the battery case on
the rear section of the unit. If battery pack is not used,
connect DC power to the DC INPUT connector on the
rear section of the unit using the AC power adapter (AA-
P250) to supply DC 12 V current.
2 Set the POWER switch on the unit to ON.
2.
SWITCH positions
A. Set the VTR switch to STBY.
B. AUTO IRIS switch; set to NORMAL.
C. GAIN switch; set to L. The L position is 0 dB.
D. OUTPUT switch; set to CAM\AUTO KNEE OFF.
E. WHT. BAL (Auto White Balance) switch; set to A or B.
3.
Set the lens' iris mode switch to "A" (AUTO IRIS side)
4.
Choose the proper colour temperature conversion filter.
5.
Using the SHUTTER dial, set the shutter speed to OFF.
6-1 Camera Settings
FILTER Suitable Location
1 3200K Indoors, dark outdoors
2 5600K+1/8ND Outdoors
3 5600K Outdoors
4 5600K+1/64ND Outdoors under clear sky
Visibility adjustment
PEAKING
CONT
BRIGHT
White
12345678
Yellow
Cyan
Green
Magenta
Red
Blue
Black
 Loading...