ALARM
MONITOR
P
R
ST
A
CH-1
CH-2
AUDIO
LEVEL
LOLUX
E
REV FWD
FBATT
H
HM
MSF
REMAIN
AUD LOCK
32k
CH 1
CH 2
48k
PB
AUTO OFF DEW
L iRFSERVO
HOLD
SP
MENU
OVER
OVER
40 30 20 10 0
dB
H M S F
TC GENERATOR
FREE
REC
PRESET
REGEN
CH-1
CH-2CH-1
CH-2
CH-1 CH-2
CONTINUE MENU
PRESETADVANCESHIFTHOLD
AUTO
MANUAL
FRONT
REAR
DATA SET
SELECTITEMGROUP
AUDIO SELECT
AUDIO INPUT
AUDIO
LEVEL
LITHIUM BATT.
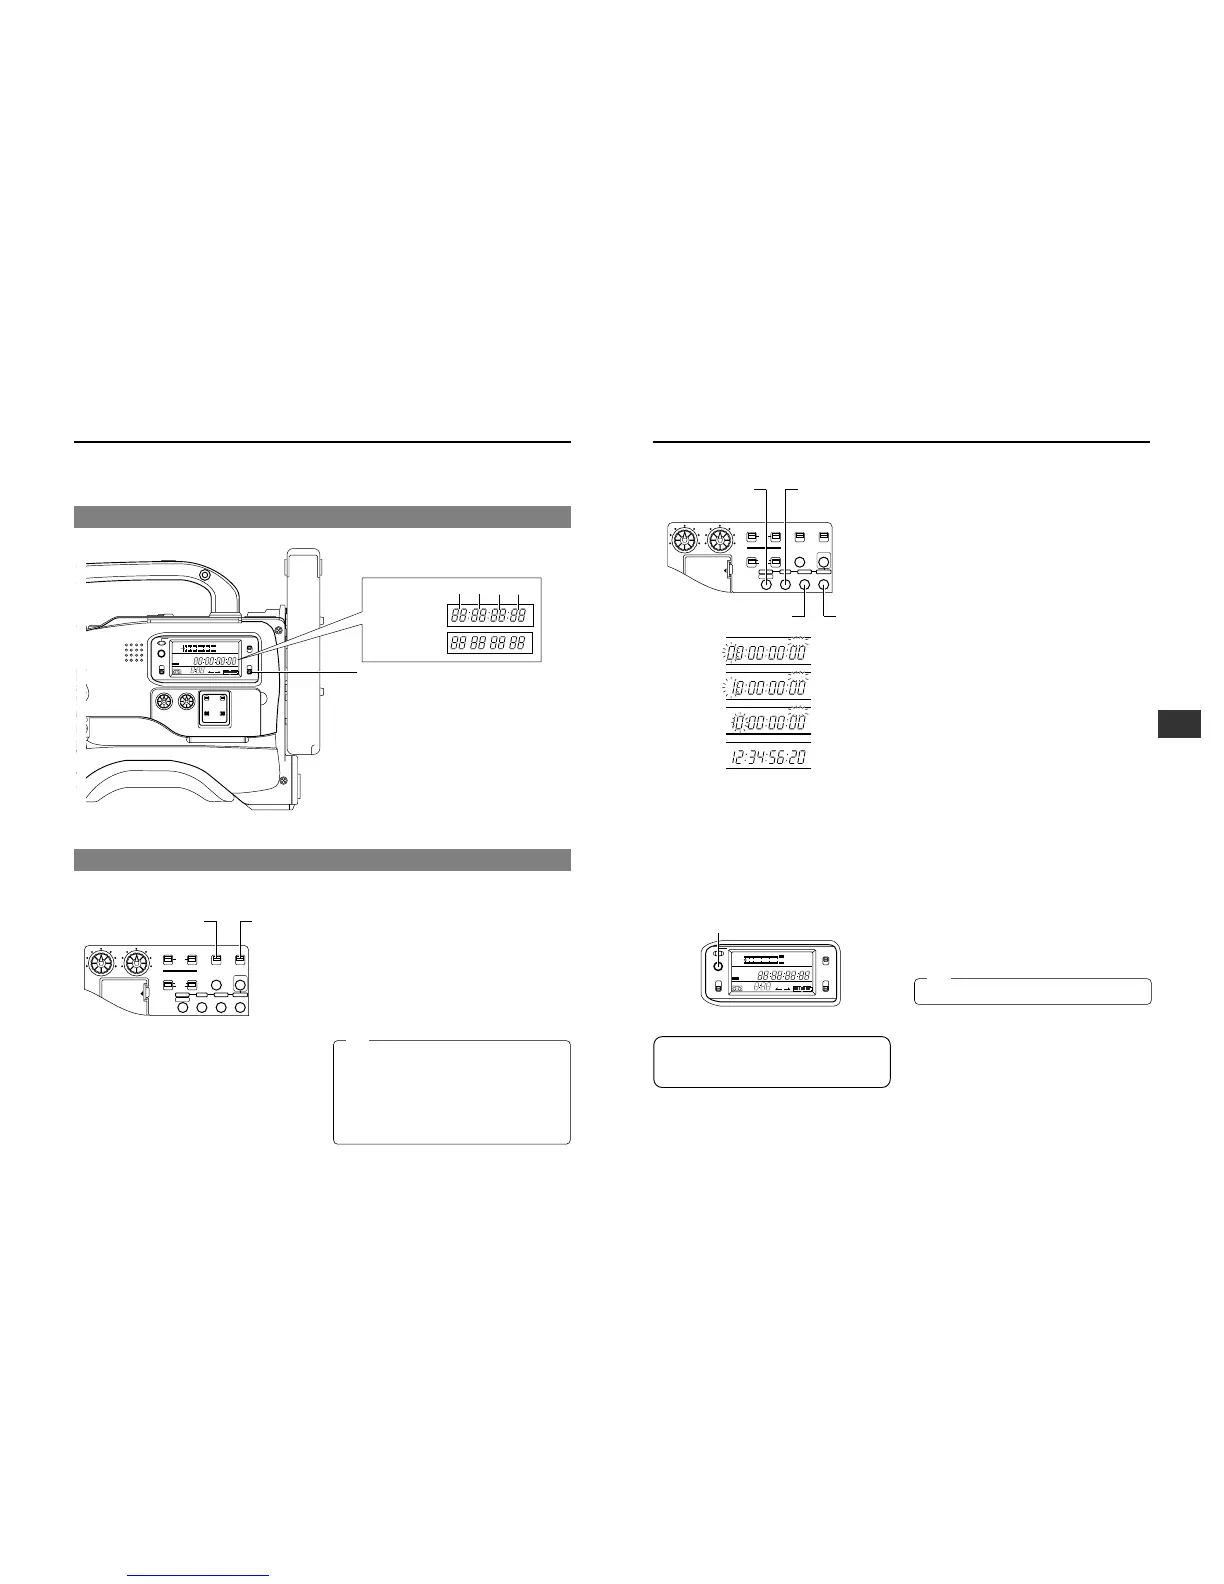
4.
SHIFT button
6.
PRESET
button
3.
ADVANCE
button
2.
HOLD button
H M S F
HOLD
H M S F
HOLD
H M S F
HOLD
H M S F
HOLD
TIME CODE PRESETTING PROCEDURE
1.
Display the time code on the counter display.
Set the COUNTER switch to "TC".
• Time code up to 23 hrs. 59 min. 59 sec. 24 frames can be
preset.
2.
Place the time code generator in preset mode.
Press the HOLD button.
• The "HOLD" indicator lights on the display to indicate
the preset mode. The first digit of the counter display
blinks.
3.
Set the value of the blinking digit.
Press the ADVANCE button.
• The value of the blinking digit changes.
4.
Change the blinking digit.
Press the SHIFT button.
• The blinking digit changes.
5.
Set the desired value for all digits.
Repeat steps
3.
and
4.
for each digit.
6.
Preset the set data in the memory.
Press the PRESET button.
• The set data is saved as the time code generator value.
Following the above operation, the "HOLD" indicator
disappears from the display, the counter stops blinking
and the time code is preset.
• If the REC/FREE switch is set to FREE, the time code
starts to run.
If you preset a wrong time code, perform steps
2
.
3
.
4
.
5.
and
6.
again.
The GY-DV700W records EBU-standard time codes and user's bits. In the play or record mode, the reproduced time codes or
user's bits are shown on the counter display.
The LTC signal from the built-in time code generator is output through the TC OUT connector.
In the play mode, the time code recorded on the tape is not output through the units connectors.
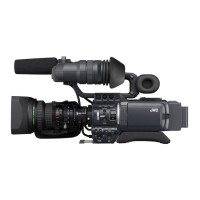
9-1 Displaying Time Code
The selected time codes can be shown on the counter display
during playback and recording as follows.
Set the VCR Setup Menu item No. 516 DISPLAY SELECT to
“TC”.
☞ See page 69.
Set the COUNTER switch to "TC" or "UB".
TC: Time codes are displayed.
UB: User's bit data of time codes are displayed.
TC GENERATOR
FREE
REC
PRESET
REGEN
CH-1
CH-2CH-1
CH-2
CH-1 CH-2
CONTINUE MENU
PRESETADVANCESHIFTHOLD
AUTO
MANUAL
FRONT
REAR
DATA SET
SELECTITEMGROUP
AUDIO SELECT
AUDIO INPUT
AUDIO
LEVEL
LITHIUM BATT.
REC/FREE
switch
PRESET/REGEN
switch
The time code or user's bit data to be recorded onto the tape can be preset to a desired value.
Setting the time code related switches
• Set the PRESET/REGEN switch to "PRESET".
• Set the REC/FREE switch.
REC : The data preset in the time code generator runs
only during recording.
Use this setting if it is required to record continual
time codes across different scenes.
* However, approximately ±1-frame variations may
occur in scene transition accuracy.
FREE : The time code starts to run from the time it is preset
in the time code generator.
9-2 Presetting and Recording of Time Code
PRESETTING USER'S BIT DATA
Display user's bit data on the counter display and perform
the same procedure as the time code presetting procedure.
• The user's bit can be specified using numerals or alphabetic
letters from 0 to F for each digit.
• Pressing the RESET button in the preset mode resets
the time code or user's bit data to 00 00 00 00.
• If you press the HOLD button by mistake, press the HOLD
button once more to return to the previous display.
COUNTER switch
Time code display
User’s bit display
Hour Min. Sec. Frame
LIGHT
ON
OFF
COUNTER
CTL
TC
UB
RESET
OPERATE/WARNING
MONITOR
SELECT
E
REV FWD
FBATT
H
HM
MSF
REMAIN
AUD LOCK
32k
CH 1
CH 2
48k
PB
AUTO OFF DEW
L iRFSERVO
HOLD
SP
MENU
OVER
OVER
40 30 20 10 0
dB
SLAVE
WIDE
RESET button
When the VCR Setup Menu item No. 398 SSF MODE is
set to CUE MODE or MARK MODE, the time code
generator’s running method is internally set to the REGEN
mode.
When this is the case and you want to enter the preset
mode, set the VCR Setup Menu item No. 398 SSF MODE
to “OFF”, or set the PRESET/REGEN switch to the
PRESET position again.
Do not set “F” to all user’s bit, or the data can not be read.
Note:
Note:
 Loading...