3-9
Software Backup and Restore, Recovery, and Updates
032-0358-EN Rev B
SmartScan STUDIO Manager Status Indicators
SmartScan STUDIO Manager displays three status indicators in the top, right-
hand corner of the display. Move the mouse over the indicator to display more
detail about the status condition.
Scanner - indicates status of the connectivity between the workstation
running SmartScan STUDIO Manager and the scanner controller.
Database -
• The first indicator shows status of the communication between
the workstation running SmartScan STUDIO Manager and the
SmartScan STUDIO Integration Services web service.
• The second indicator shows status of the communication
between the workstation running SmartScan STUDIO Manager
and the Image Root folder.
If a status check fails, the status indicator changes to a red X.
Refer to Installation Manual for more information on troubleshooting failed
status indicator conditions. Contact Technical Support if problem is not
corrected or the error persists.
Make a Backup Copy of the Software Package onto a Blank UFD
NOTE: The touch screen interface is not active in this application. Attach a mouse or use keyboard
commands (tab to move between fields, up and down arrow keys to make selections in a field,
space bar or Enter key to enter).
1. Insert the bootable UFD into an available USB port on the scanner controller.
2. Follow instructions in Boot the Scanner Controller from the Bootable UFD (page 3-5).
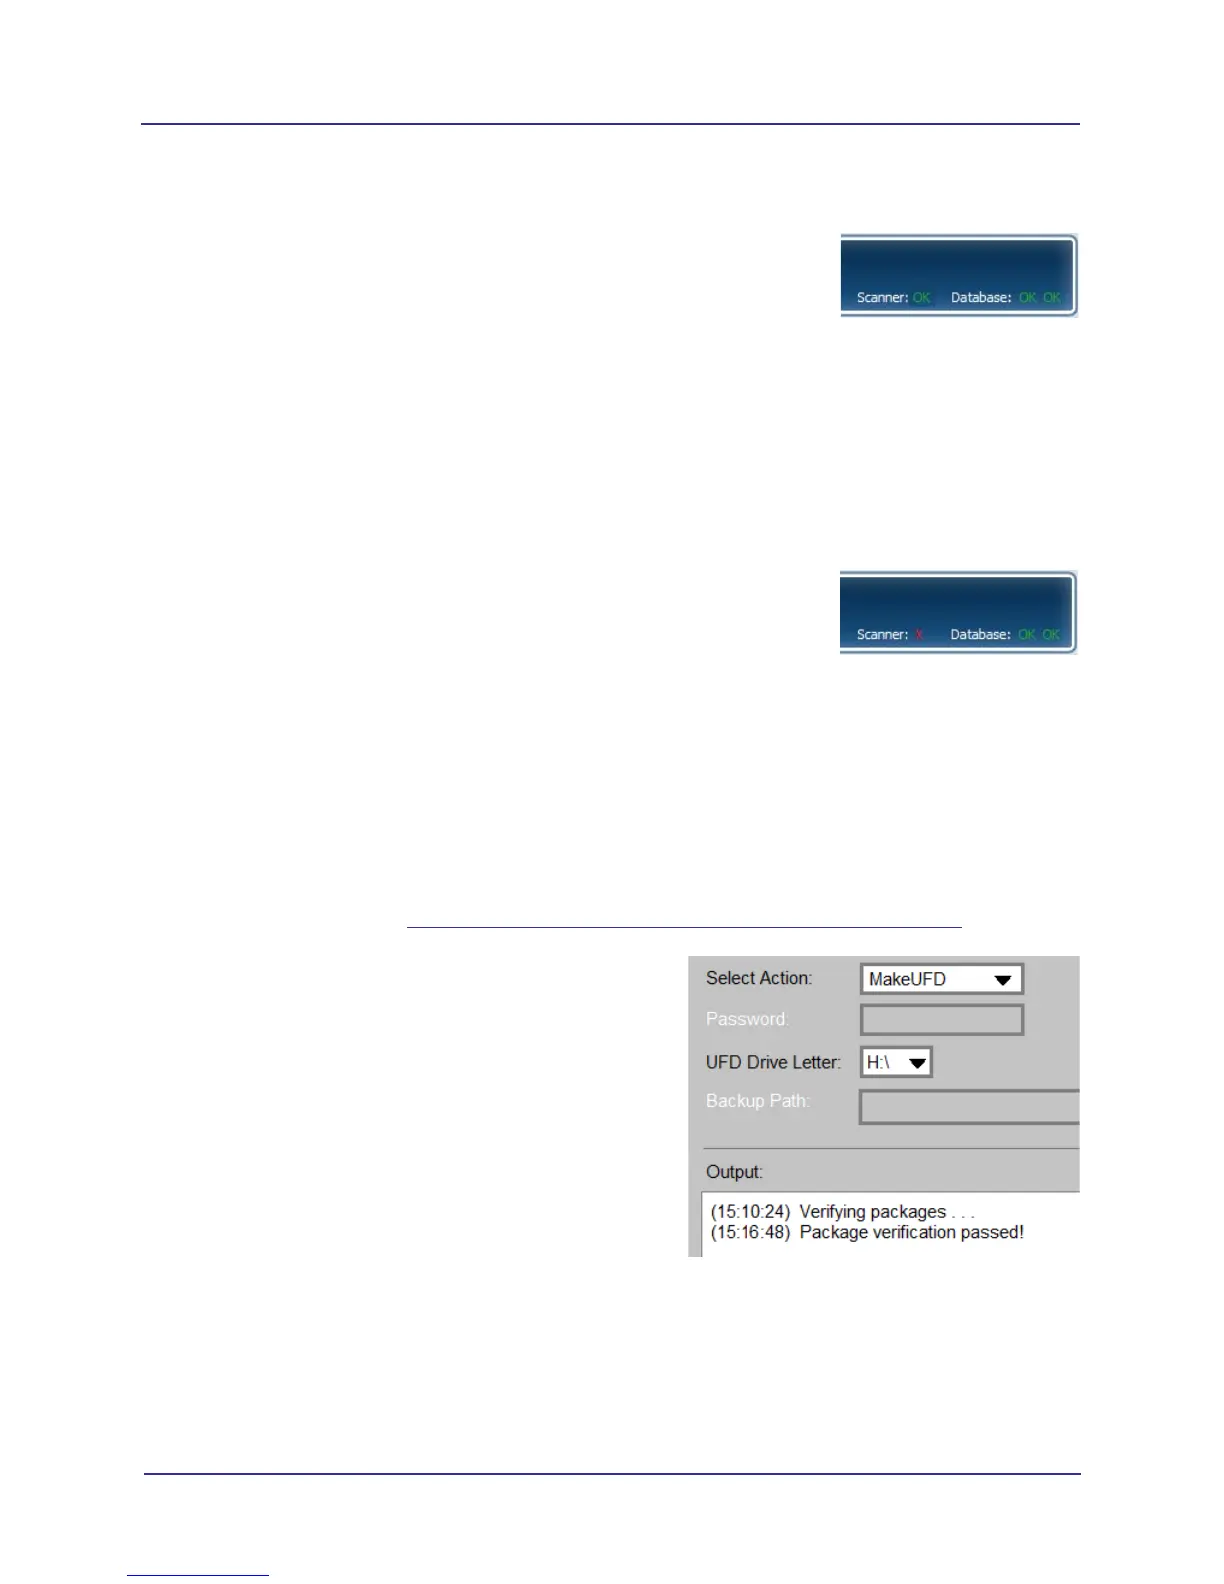
3. After the scanner controller has booted from the
UFD, the Installation Progress Monitor is displayed,
followed by a window with the message: Verifying
packages. Wait (about five minutes) until the
message Package verification passed is
displayed and options on the window become
active. If package verification fails, obtain a new
bootable UFD.
4. Select MakeUFD from the Select Action drop-down
menu.
5. Insert a blank UFD into an available USB port.
6. Select the correct drive letter for the blank UFD from the UFD drop-down menu.
7. Select Start. You are prompted to ensure a blank UFD is attached.
8. Select Continue. A warning is displayed that all contents will be lost on the UFD.
 Loading...