Do you have a question about the KaVo uniQa and is the answer not in the manual?
Read instructions before first startup to avoid misuse and prevent damage.
Explains CE mark, action requests, important information, and symbols used in the manual.
Details parameters for sterilisation using pre-vacuum and gravity displacement methods.
Contact information for technical support and complaints.
The instructions are intended for medical professionals and dental practice personnel.
Defines HAZARD, WARNING, and CAUTION levels for safety warnings.
Basic steps include cleaning, disinfection, and sterilisation, complying with national hygiene requirements.
Warnings about injury risk during cleaning, improper sterilisation, and handling chemical agents.
Details reprocessing methods, PPE use, and surface contamination removal.
Instructions for manual cleaning with brush/CaviWipes and automatic cleaning with washer disinfectors.
Guidance on manual wipe disinfection and automatic disinfection using washer disinfectors.
Procedures for manual/automatic drying, maintenance checks, and functional tests.
Details sterilisation parameters for autoclaves and storage guidelines.
Lists recommended products like OXYGENAL 6 and DEKASEPTOL Gel for cleaning and disinfection.
Warning about property damage resulting from incorrect reprocessing.
Table detailing cleaning, disinfection, and sterilisation methods for various device components.
Instructions for positioning the chair for cleaning and locking the touch screen.
CAUTION: Non-colour-fast textiles can cause permanent discoloration during cleaning.
CAUTION: Risks of product damage and malfunctions from improper disinfection methods.
CAUTION: Damage to the foot control from inappropriate use of water.
Steps for cleaning, disinfecting, and sterilising the handle and holder pad/non-slip mat.
Place instrument hoses in hygiene centre during handpiece holder cleaning and disinfection.
Instructions for removing, cleaning, and disinfecting the swing arm S-table.
Instructions for manually cleaning and wipe-disinfecting the handpiece holder.
Clean instrument hoses and couplings, then subject to wipe disinfection.
Check liquid collector weekly; drain liquid and replace O-rings if necessary.
CAUTION: Spray disinfection can damage instrument hoses.
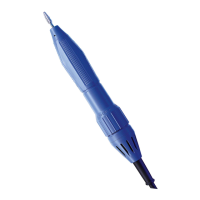
Refer to specific instructions for use for reprocessing cameras and PiezoLED.
Wipe down surfaces of kit components with a disposable cloth and approved disinfectant.
Reprocessing instructions are validated; deviations must be checked by the entity.
Allow parts to dry on room air or use washer disinfector's drying programme.
CAUTION: Do not subject the device to automated reprocessing due to liquid damage risk.
Check for cleanliness, intactness, servicing, and use sterile goods packaging.
CAUTION: Improper sterilisation can cause contact corrosion and damage.
Remove items immediately after sterilisation; allow to cool before use.
Store sterilised items hygienically, protected from dust, dry, dark, and cool.
Reprocess assistant element handpiece holder same as dentist element holder.
Clean suction hoses manually and perform wipe disinfection.
Remove connectors from the suction hoses.
Manual external cleaning and wipe disinfection of the connector.
Check sieve inserts daily; replace when suction performance decreases.
Wet O-rings with silicone grease after sterilisation; blow out air duct.
WARNING: Contaminated products are an infection hazard; take protective measures.
CAUTION: Danger of injury if the valve body is hot (risk of burn injury); allow to cool.
WARNING: Disassemble device before reprocessing to ensure complete reprocessing.
CAUTION: Never reprocess in ultrasonic cleaner; reprocess by hand or washer disinfector only.
Validated manual internal cleaning can be done with KaVo CLEANspray.
Clean parts manually; wipe contamination from tip and ports using Q-tip/nozzle needle.
WARNING: Incomplete disinfection is an infection hazard; use verified procedures.
CAUTION: Never reprocess with chloride-containing products; causes malfunction/damage.
CAUTION: Never reprocess with chloride-containing products.
Use KaVo DRYspray for subsequent drying of air and water ducts.
NOTE: Cannula can be automated; adapters are needed. CAUTION: Never use ultrasonic cleaner.
Use washer disinfectors with alkaline cleaning agents (max pH 10).
Drying procedure is usually part of the washer disinfector's cleaning programme.
Comply with washer disinfector instructions; ensure device is dry internally/externally.
CAUTION: Improper care can cause malfunction or property damage; do not use oil/maintenance spray.
Sterilise with triple pre-vacuum at 134°C; store reprocessed items protected from dust.
Reprocess the tumbler as specified by the manufacturer.
CAUTION: Water in device can cause material damage from leaking.
Clean filler/holder manually; wet O-ring with silicone grease for servicing.
CAUTION: Damage from inappropriate cleaning agents; do not use acid, sand, or foaming agents.
Add DEKASEPTOL gel to spittoon bowl, allow to act, then clean thoroughly with a brush.
CAUTION: Health damage due to germ formation and infection hazard.
Rinse water drain lines, purge air/water lines with air before initial start-up or after downtimes.
Display shows 'Oxygenal empty' or 'Replace DEKASEPTOL Gel bottle' when needed.
Tap the 'Cleaning' tab to open the 'Cleaning' menu.
Remove hygiene centre cover and tap the button of the desired cleaning programme.
Cannulas of three-function and multifunctional handpieces must be removed for cleaning programmes.
Place handpieces in correct holders; place instrument hoses and suction hoses in designated places.
NOTE: All water regulation mechanisms on motor, instruments, MULTIflex couplings must be open.
Place suction hoses over arm system; use navigation buttons to move through cleaning steps.
Lock swing arm into position or use lock to ensure handpiece is removed.
'After treatment' program for hydro-mechanical cleaning of drainage/separation systems with fresh water.
'After treatment' program prevents protein coagulation and removes particles.
'Morning' and 'Evening' programs for hydro-mechanical cleaning/disinfection of suction hoses, drainage, separation systems.
'Morning' program rinses water system/instruments for 2 mins, includes tumbler filling.
'Evening' program rinses instruments for 20 secs; cleans/disinfects suction system with DEKASEPTOL Gel.
DEKASEPTOL gel aspirated automatically; display shows status when bottle empty.
Return instruments/hoses to holders, or switch off unit; 'Morning' program starts automatically on restart.
Tap 'Settings' menu to adjust rinsing times for Morning, Evening, and After treatment programmes.
Default times for 'After treatment'/'Evening' (20s) and 'Morning' (2 min) programmes.
NOTE: This programme is not available with the water block.
'Weekly' program prevents microorganism formation during extended downtimes.
Run additional 'Weekly' program for extended downtimes (>4 weeks); displays need automatically.
NOTE: Suction cannot be used while cleaning programme is in progress.
NOTE: Workflow is discontinued if amalgamate separator malfunctions during 'Weekly' cleaning.
Tap 'Weekly' to start; wait for completion or switch off centre; progress bar indicates steps.
Wait for completion or switch off centre; program continues automatically if centre was switched off.
Run 'Weekly' cleaning during extended downtimes to flush components and replace germ reduction liquid.
Start 'Weekly' program, switch off during exposure phase; remove hoses; restart unit for automatic cycle completion.
KaVo recommends additional 'Weekly' cleaning during semester breaks to flush components.
Tap the 'x' button to discontinue a cleaning programme.
NOTE: If 'Weekly' program discontinued, systems rinsed with lower OXYGENAL 6 concentration.
Automatic cleaning programs are available in the water bottle system; OXYGENAL 6 dosed manually.
If water bottle used, OXYGENAL 6 must be dosed manually per program.
NOTE: After 'Morning' program, water bottle may need refilling due to longer rinsing times.
Confirm preparation of water bottle with standard OXYGENAL 6 concentration.
Press 'Yes' to confirm correct concentration; press 'Continue' to start programme.
Press 'Continue' to start the cleaning programme.
'Weekly' program runs intensive germ reduction at higher OXYGENAL 6 concentration.
Details required amounts of OXYGENAL 6 for 1.5 L water bottle and dosing instructions.
Confirm preparation of water bottle with higher OXYGENAL 6 concentration.
Press 'Continue' to start the cleaning programme.
After exposure phase, remove remaining water; refill bottle with standard OXYGENAL 6.
The cleaning programme proceeds automatically.
Place hoses in holders after completion of the 'Weekly' cleaning programme.
Confirm preparation of water bottle with standard OXYGENAL 6 concentration.
Press 'Yes' to confirm correct concentration; press 'Continue' to start programme.
The cleaning programme proceeds automatically.
Place hoses in holders after completion of the 'Weekly' cleaning programme.
CAUTION: Damage caused by inappropriate cleaning agents; do not use acid, sand, or foaming agents.
Check drain for damage; clean/disinfect handpiece holder in washer disinfector as needed.
The handpiece holder is thermodisinfectable; inserts stay mounted.
Subject the holder of the hygiene centre insert to wipe disinfection.
Lists systems for amalgam separation; regular use of cleaning programs ensures optimal servicing.
Systems include 'Dürr' Amalgam separator and external wet suction system connection.
Turn off the treatment centre before replacing the amalgam container.
Remove cover; replace amalgam container according to instructions for use.
CAUTION: Product damage due to improper disinfection.
Use approved disinfectant, perform wipe disinfection only, do not immerse in liquids.
Clean surfaces with cloth/water, then wipe-disinfect with KaVo-approved disinfectant.
CAUTION: Product damage due to improper disinfection.
Use approved disinfectant, perform wipe disinfection only, do not immerse in liquids.
NOTE: Remove handle to improve cleaning properties by pressing buttons and pulling.
Norm tray and non-slip mat can be sterilised.
CAUTION: Damage caused by defective water bottle.
Do not use bottle if scratched, deformed, discoloured; note maximum useful life.
Do not wash bottle in dishwasher or rinse with water hotter than 50°C.
Slowly turn the water bottle counterclockwise to take it off.
Turning the bottle allows over-pressure to be released slowly.
NOTE: Change water daily; KaVo recommends reprocessing water with OXYGENAL 6.
For cleaning, rinse water bottle with water below 50°C.
KaVo recommends BC-San 100 liquid by Alpro for manual internal disinfection.
CAUTION: Working with agents requires diligence; follow labels and use PPE.
DEKASEPTOL gel aspirated automatically; replace bottle when empty.
Device must be turned on when changing DEKASEPTOL Gel bottle.
Unscrew lid, remove empty bottle, transfer connector to new bottle, insert.
NOTE: Before using OXYGENAL 6, check the expiry date of the product.
Only KaVo OXYGENAL 6 is permissible for KaVo water germ reduction units.
Display shows 'Oxygenal empty' when OXYGENAL 6 needs replenishing.
Wipe up spilled OXYGENAL immediately to prevent surface discolouration.
Remove cover, unscrew lid, swing out empty bottle, press new bottle onto adapter, swing into base.
Check OXYGENAL 6 concentration occasionally for function and expiration date.
Dosing attachment: (Mat. no. 1.002.0287)
Remove protective hose, guide tube, screw device tightly, rotate orifice to 1.5L level.
Compress OXYGENAL 6 bottle until liquid rises above red marker for exact dosing.
Place OXYGENAL 6 bottle in water bottle, ensuring spout is above opening.
Then fill-up the water bottle with tap water.
NOTE: Substances in dosing head are not contamination but deposited agents; dissolve after dosing.
Screw bottle tightly clockwise; apply compressed air.
Check OXYGENAL 6 concentration occasionally for function and expiration date.
Check OXYGENAL 6 concentration occasionally for function and expiration date.
Test 200ppm concentration: Fill 40ml cup with 39ml water, 1ml treated water, immerse test strip.
Compare colors and read value: 5 mg/l shown for 200ppm concentration.
Table for testing other concentrations, including 2500ppm intensive germ reduction.
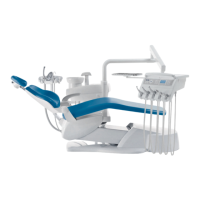
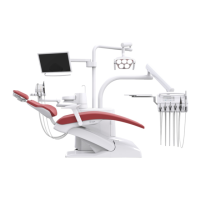
| Model | uniQa |
|---|---|
| Type | Dental Unit |
| Manufacturer | KaVo |
| Power Supply | 230 V AC ±10%, 50/60 Hz |
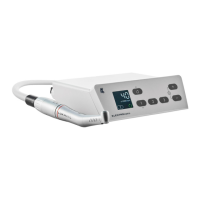
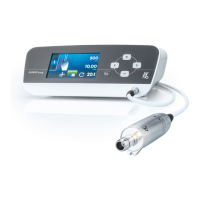
| Instrumentation | scaler |
| Control System | Touchscreen control panel |
| Hygiene Standards | Complies with international hygiene standards |
| Water Unit | Integrated water management system |
| Hygiene System | Autoclavable instruments, anti-retraction valves |
| Operating Light | LED light with adjustable intensity |
| Patient Chair | Ergonomic design with multiple positioning options |
| Integration | Compatible with digital imaging and practice management software |
| Air Supply | Connected to compressed air supply (5-7 bar) |