Do you have a question about the KaVo OP 3D Pro and is the answer not in the manual?
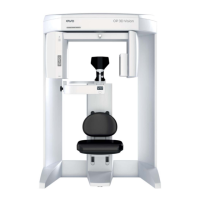
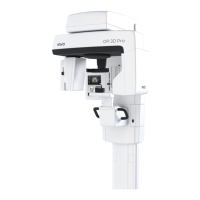
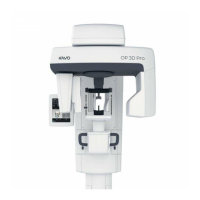
Overview of the dental X-ray system and its capabilities.
Describes the system's purpose for dental radiography and imaging.
Details critical safety instructions and preventative measures for using the unit.
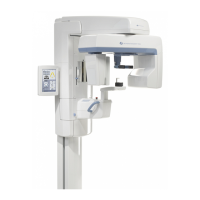
Identifies and labels the primary components and controls of the unit.
Explains the function and placement of lights used for patient alignment.
Describes the location and function of the emergency stop mechanism.
Details available panoramic imaging modes and exposure settings.
Outlines 3D imaging options with small field of view and resolutions.
Guides users on choosing appropriate resolution and field of view for 3D imaging.
Explains the layout and functions of the main touch screen interface.
Details the display of exposure parameters and available settings.
Step-by-step guide for performing panoramic imaging procedures.
Instructions for capturing cephalometric images, including positioning.
Guide to performing 3D imaging, including FOV selection and scouting.
Addresses common patient positioning issues and their solutions for image quality.
Helps diagnose and resolve problems related to image brightness and contrast.
Identifies image artifacts and provides solutions for their removal or prevention.
Outlines the recommended maintenance schedule and procedures for the unit.
Instructions for proper cleaning and disinfection of the unit and its parts.
Procedures for calibrating the panoramic imaging geometry and pixel data.
Steps for calibrating the 3D imaging geometry and pixel data.
Procedures for calibrating the cephalometric imaging system.
Details the product's technical specifications and compliance standards.
Information on the unit's EMC performance and environmental requirements.
Specifies the hardware and software prerequisites for the acquisition workstation.
Information on the required dental imaging software and its compliance.
| Type | Cone Beam Computed Tomography (CBCT) |
|---|---|
| 3D Imaging Modalities | CBCT, Panoramic, Cephalometric (optional) |
| Voxel Size | From 0.08 mm to 0.3 mm (depending on FOV and resolution settings) |
| Software | KaVo Imaging Software |
| Power Supply | 220-240 V, 50/60 Hz |
| Resolution | High resolution imaging |
| Reconstruction Time | Varies depending on FOV and resolution; typically less than 60 seconds |
| Cephalometric Arm | Optional |
| X-ray Tube Voltage | 60-90 kV |
| X-ray Tube Current | Up to 10 mA |
| Detector Type | Flat panel detector |