3 Getting Started
46 Keysight N6700 User’s Guide
Turning the Unit On
After you have connected the line cord, turn the unit on with the front
panel power switch. The front panel display will light up after a few
seconds.
A power-on self-test occurs automatically when you turn the unit on. This
test assures you that the instrument is operational. If the self-test fails,
the front panel
indicator comes on. Press the Error key to display the
list of errors on the front panel. Refer to the Service Guide for further
information.
When the front panel display appears, you can use the front panel
controls to enter voltage and current values.
Selecting an Output Channel
Press
to select the output channel that you wish to program.
Entering an Output Voltage Setting
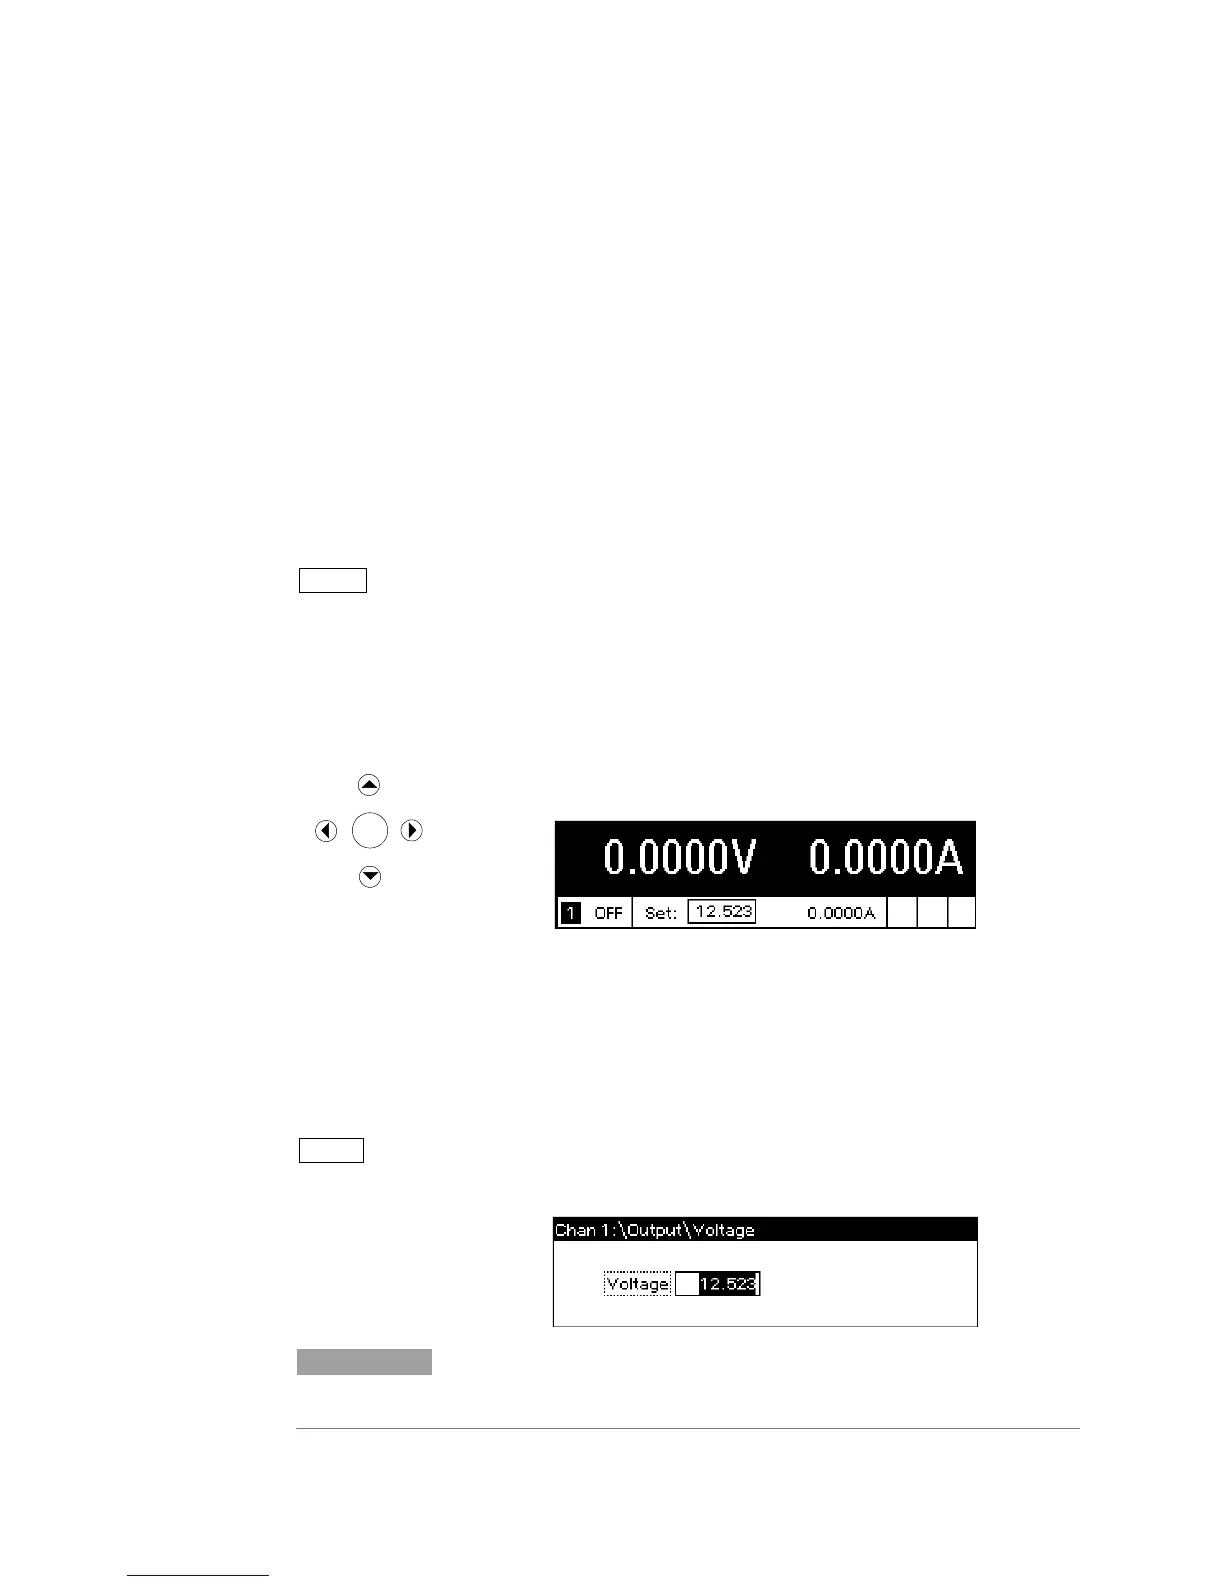
Method 1 – Use the Navigation and Arrow Keys
Use the left and right navigation keys to navigate to the setting that
you wish to change. In the display below, channel 1’s voltage setting
is selected. Enter a value using the numeric keypad. Then press Enter.
You can also use the arrow keys to adjust the value up or down, and
switch between + and − limits on Model N6784A. When the output is
on and the unit is operating in CV mode, the output voltage changes
immediately. Otherwise, the value will become effective when the
output is turned on.
Method 2 - Use the Voltage key to enter a value
Press
to select the voltage entry field. In the display below,
channel 1’s voltage setting is selected. Enter the desired setting using
the numeric keypad. Then press Enter.
If you make a mistake, either use the backspace key to delete the
number, press
to back out of the menu, or press
meter mode.