SECTION 9
HYDRAULIC SYSTEM
Dec 2002
Page 9-7
05114640
9.3.1 Motor Service
1. Locate the two zerk fittings, they are located at each end of the motor,
remove their plastic caps.
2. Apply one or two strokes of grease. Replace caps on zerk fittings.
3. Run motor a few minutes.
9.3.2 Manifold Service
1. Check operating pressure.
2. If pressure adjustment is necessary:
3. Adjust high pressure control valve. Turn locking nut counterclockwise, then
turn the knob clockwise to increase pressure, counterclockwise to decrease.
4. Adjust low pressure control valve. Turn locking nut counterclockwise with
open end wrench. Turn the hex clockwise to increase pressure, and
counterclockwise to decrease. Lock in place with nut.
9.3.3 Motor/ Pump Coupling – Spline Lubrication—
(Recommended Annual Service Procedure)
Special Tools and Supplies:
• Optimal Spline Lubricant- (P/N 10184802)
• Cleaning Solvent
• Miscellaneous Wooden Blocks
• Shop Rags
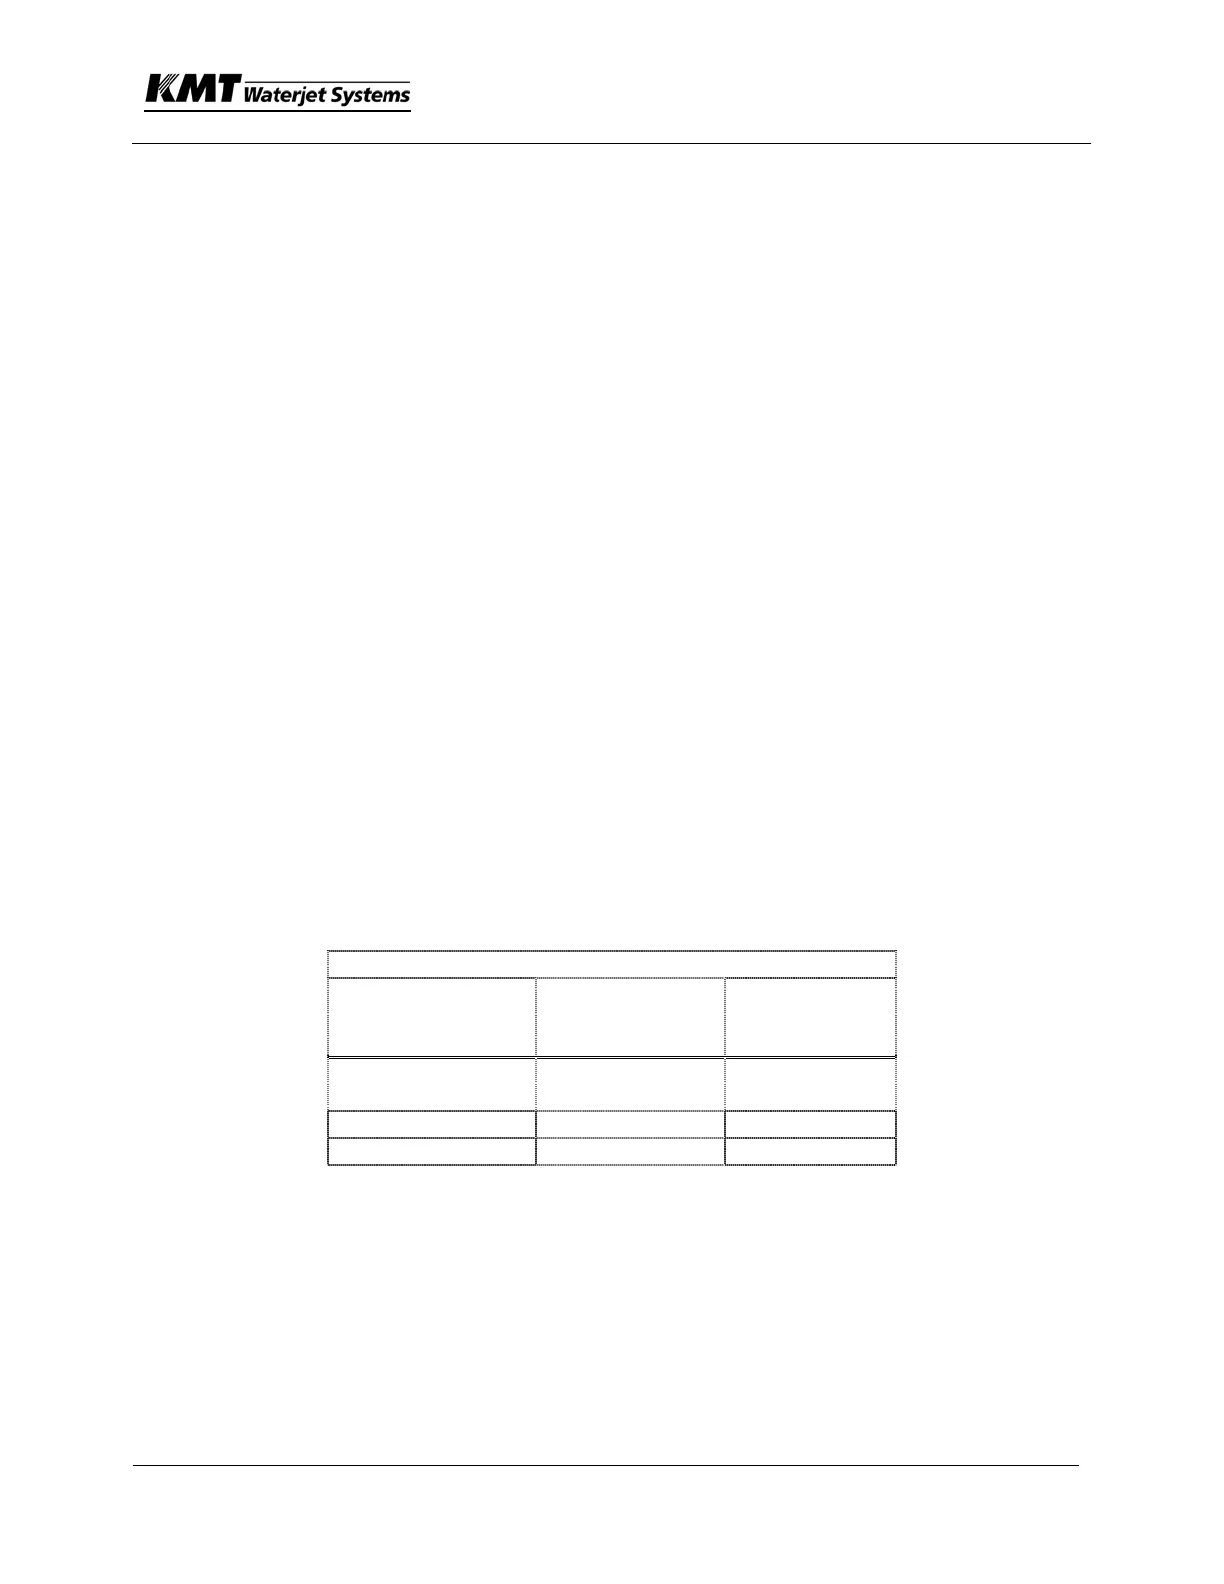
• Spare Shaft Seal—(See Table Below)
Shaft Seal Part No’s -- Hydraulic Pumps
Model/ kW (hp)
Piston Pump
Displacement
(cc’s/rev)
Shaft Seal –
Part No.
SL4/22 (30) &
S30-OEM
45 05096011
SL4/37 (50) 71 05088083
SL4/75 (100) 140 49831159
1 Lock out electrical power to prevent inadvertent motor start
2 Unbolt motor vibration mounts from frame base plate (4 ea socket head cap
screws).
3 Support hydraulic pump assembly while leaving all hose connections
undisturbed. Use wooden blocks to support pump/ manifold assembly.
4 Remove bolts attaching piston main pump to electric motor.
5 Slide electric motor away from hydraulic pump package, revealing spline
coupling.
 Loading...