Change wearing parts
6.3.
Subject to errors and technical changes!
Labormaster Version 2.6.3 SW 2.2 from 03/2016 Page 61 of 82, March 1, 2016
• Set the sealing time to 99 seconds.
Finger protection (“Finger protection” p. 12). The device may not be used without this finger protection
• Loosen the screws in the sealing jaw close to the sealing rail using the T-bolt supplied.
• Make sure that the temperature sensors are not stuck.
Operating instructions and technical description
First you have to remove the finger guard. To do this, use the included hex key.
• Take out the sealing rail and press in the new sealing rail.
• Slide in the temperature sensors and attach the leaf springs to the temperature sensors
6.3.1.
• Use a screwdriver to lift the sealing rail to the side in the groove of the sealing jaw
Only have it carried out by trained personnel!
Hexagonal key on the back of the sealing jaw.
• Tighten the screws for clamping the sealing rails.
operate!
• Loosen the leaf spring screws for the temperature sensors using the 3 mm provided
• Place a 1mm thick rubber on the sealing rail.
Caution: Danger of crushing and burns!
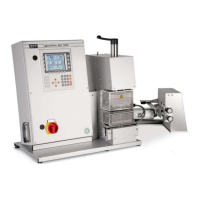
Seal seam strength tester Labormaster HCT 3000
• Check whether the temperature sensor can be pushed in, otherwise you will have to move the
sealing rail to the side.
Be sure to always install it after any service work has been carried out
to press into the bottom of the hole.
You should handle removed sealing rails with care and store them carefully packaged. Ideal for
storage: the rail case available as an accessory.
carefully.
• Pull out the temperature sensors.
Page - 61 -
• Open the sealing jaws.
• Close the sealing jaws.
Replace sealing rails
Socket wrench.
Note: If the sealing rails are no longer absolutely flat, contact the service
department of the manufacturer.
Phone +49.7153.9510-0
Inh. Ludwig P. Goals
Fax +49.7153.9510-100
E-Mail: sales@kopp-online.de
Ulmer Straße 51 – 53
Willi Kopp e. K
http://www.kopp-online.de
D-73262 Reichenbach/Fils
Packaging systems
Machine Translated by Google