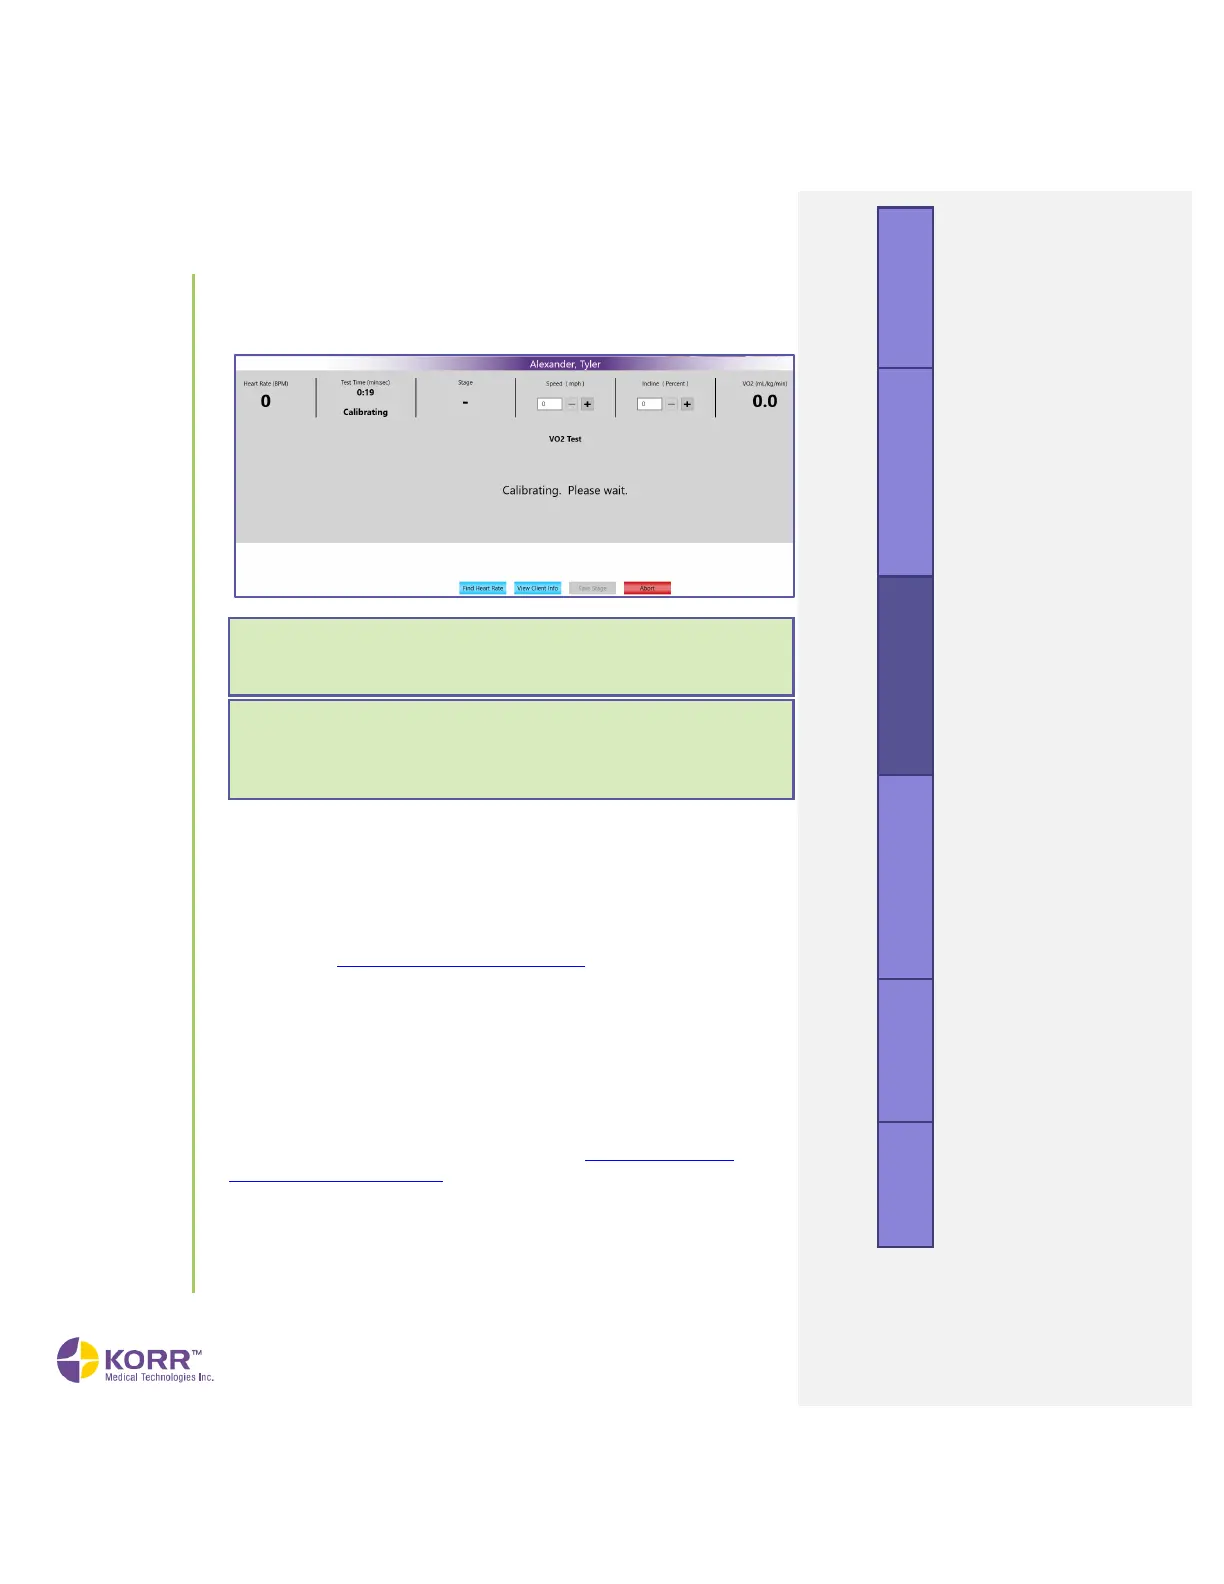
3. Calibration Cycle. Calibration automatically begins at the start of a new
test. A fan noise will be heard. CardioCoach displays a screen similar
to the one shown below.
4. Check Ports. Determine that the RMR port is plugged and that air is
flowing via the VO
2
port. A green light should appear over the VO
2
port.
If not, check the center of the screen to make sure the Test Type
indicated is VO2.
5. Place Mask on Client. While the device is calibrating, it is a good time
to place the well-fitted mask, Y-valve and VO
2
hose on the client as
shown in the Client Preparation upon Arrival section of this manual.
Allowing clients to breathe through this apparatus for a few minutes
while at rest helps them become accustomed to the sensation and
avoids the poor data collection caused by hyperventilation.
6. Calibration Complete. When the calibration is complete, the device
beeps and a
Waiting for First Breath
message displays.
7. Check [equipment name]. When software-controlled equipment has
been selected, this option appears. Checks the connection to the
equipment. If the error “[equipment name] Not Ready” appears, end
the test and check the equipment setup (see Setting Up Exercise
Equipment in CardioCoach).
8. Verify the Heart Rate Signal. Check the Heart Rate Signal located in the
first column of live data.
a) To connect with a BLE heart rate monitor, click the Heart Rate
Device button. Locate your heart rate monitor by name or model
number from the list of visible signals. Click your heart rate
Note: If the airflow is constricted, an error message will show
briefly and the light above the VO
2
MAX port will flash, prompting
you to remove the restriction. The calibration can then be
resumed.