PLMNL0232 REV. H Effective Date: 01/14/19 28 FiberCUT
®
2D Operation Manual
For steps 2 and 3, see Figure 29.
2. Click on the Port drop down
menu in the upper left corner
and choose the appropriate
port.
3. Click Connect.
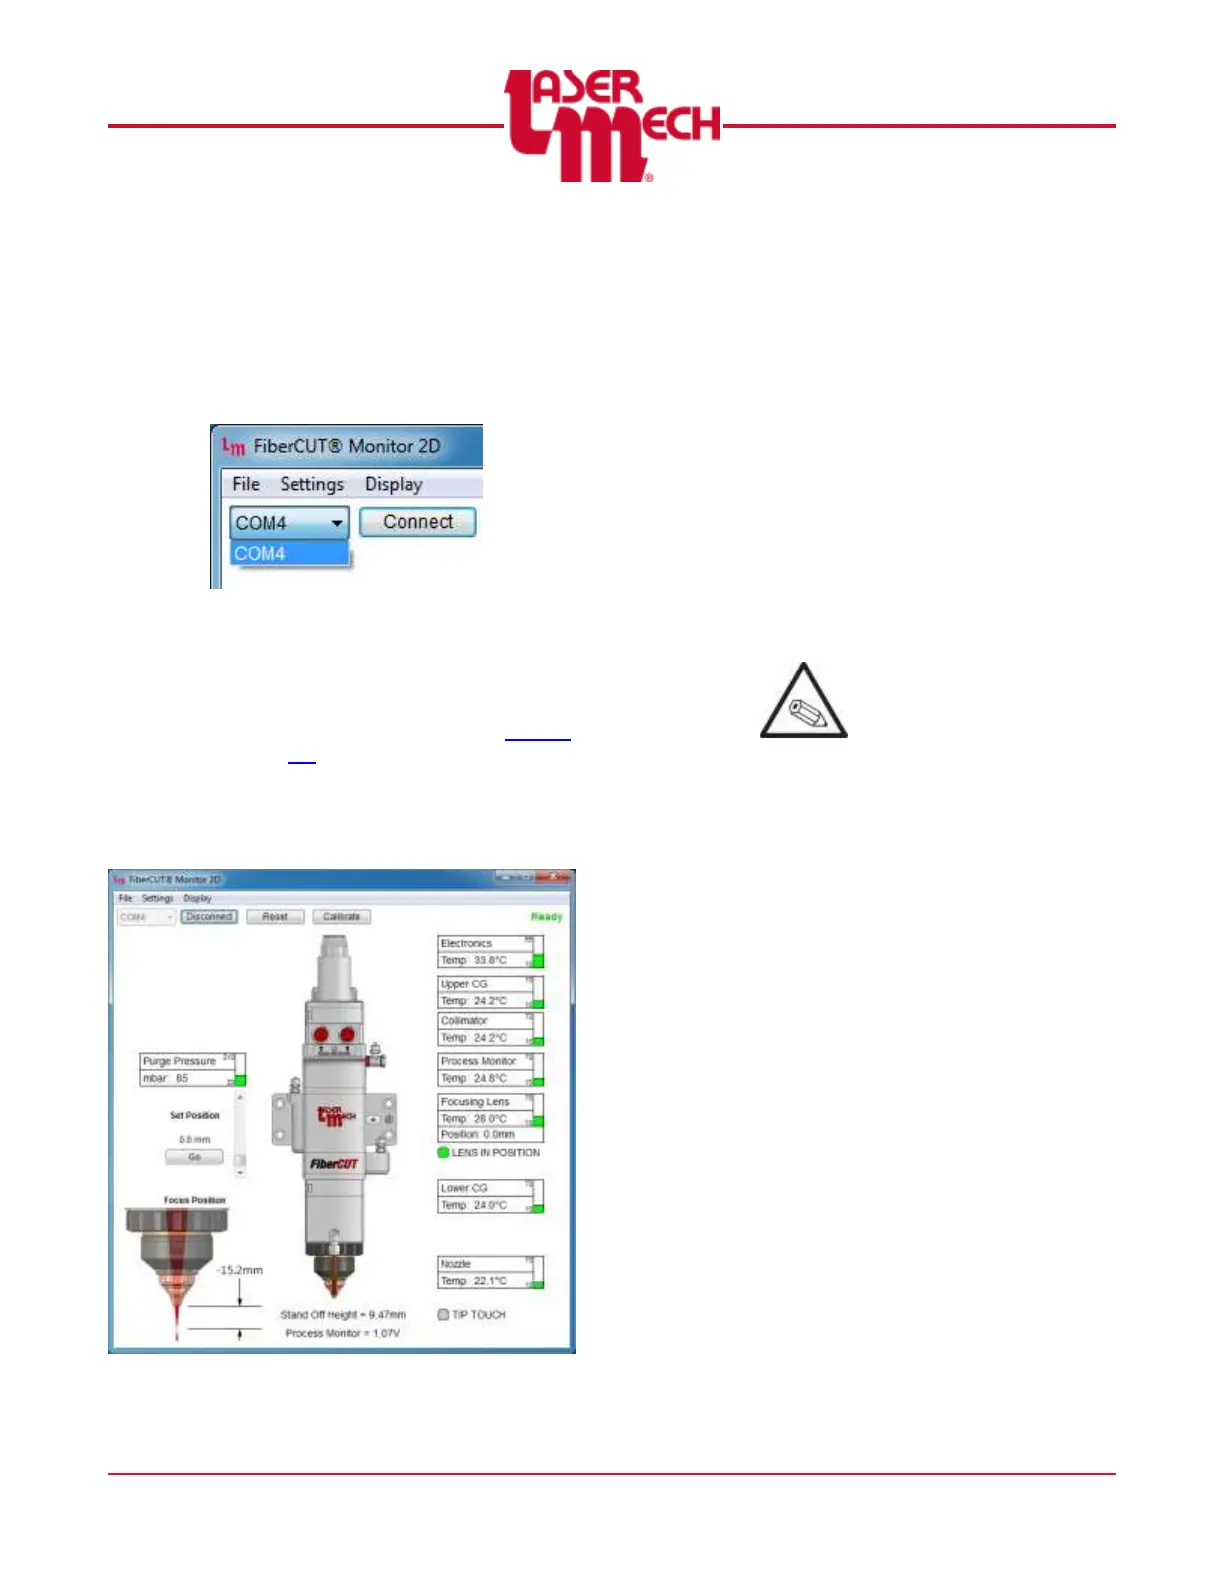
Figure 29
The Main screen appears. See
Figure 30 for an example.
4. Update any settings, as
necessary, according to Section
4.4.
4.3.2 System Controls
See Figure 30 (the Main screen).
Figure 30
1. Click the following, as
necessary:
Click the Reset button to
move the lens to the zero
position and clear a Lens
Fault.
To modify the Set Position
o Use the slider bar on
the right to update the
Set Position value.
o Click the Go button to
apply the new value.
Click the Calibrate button to
recalibrate the HSU.
Perform calibration at 12
mm above the material
surface.
o Use the Calibrate button
to clear a Tip or Cable
Break fault.
o An alternate method to
recalibrate the
FiberCUT
®
Monitor is to
click the Settings menu
in the upper left corner
of the Main screen and
select Calibrate. See
Figure 31.