PLMNL0232 REV. H Effective Date: 01/14/19 9 FiberCUT
®
2D Operation Manual
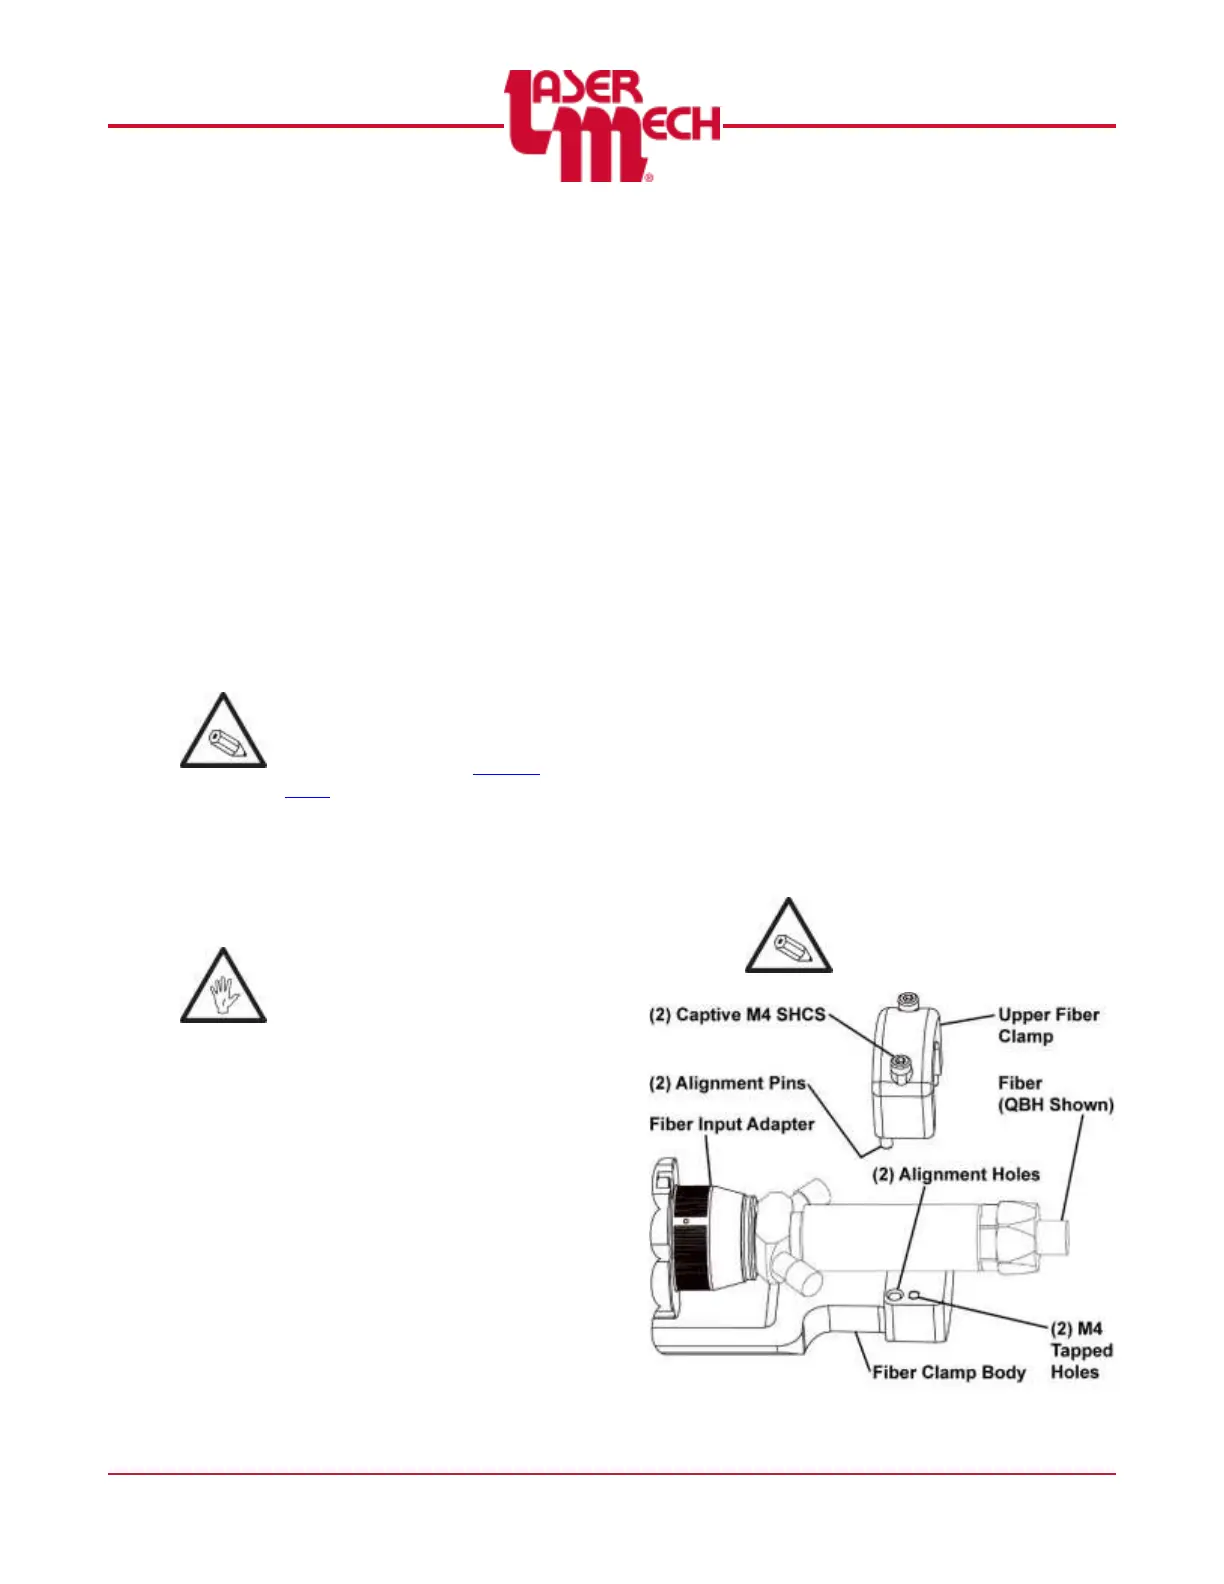
2.2.1 Upper Fiber Clamp
The fiber clamp provides added
stability to the fiber connection.
It is necessary to remove the upper
fiber clamp to install or remove the
fiber. See Figure 4.
To remove the upper fiber
clamp:
1. Position the head so it is
horizontal. See Figure 3.
2. Loosen the (2) captive M4
SHCS and remove the upper
fiber clamp.
To install the fiber and upper
fiber clamp:
If the water cooling fittings on
the fiber interfere with the fiber
clamp, rotate the fiber input
adapter according to Section
2.2.2.
3. Verify the upper cover glass is
in place.
4. Verify the fiber and connector
are thoroughly clean.
Failure to complete steps 5 to 7
may result in damage to the
fiber.
5. Remove the protective covers
on the fiber receiver and fiber
end.
6. Inspect the fiber end according
to the fiber manufacturer’s
instructions.
7. Install the fiber according to the
fiber manufacturer’s
instructions.
For steps 8 to 10, see Figure 4.
8. Align the upper fiber clamp so:
The (2) alignment holes are
in-line with the alignment
pins in the fiber clamp body.
The (2) captive M4 SHCS
are in line with the M4
tapped holes in the fiber
clamp body.
9. Tighten the (2) captive M4
SHCS loosened in step 2.
Tighten the SHCS on one
side of the clamp one turn.
Tighten the SHCS on the
other side of the clamp one
turn.
Repeat the process until the
SHCS are tight on both
sides.
10. Verify the gap between the
upper fiber clamp and the fiber
clamp body is the same on both
sides of the upper fiber clamp.
Otherwise, the fiber may be
pushed out of alignment.
Figure 4