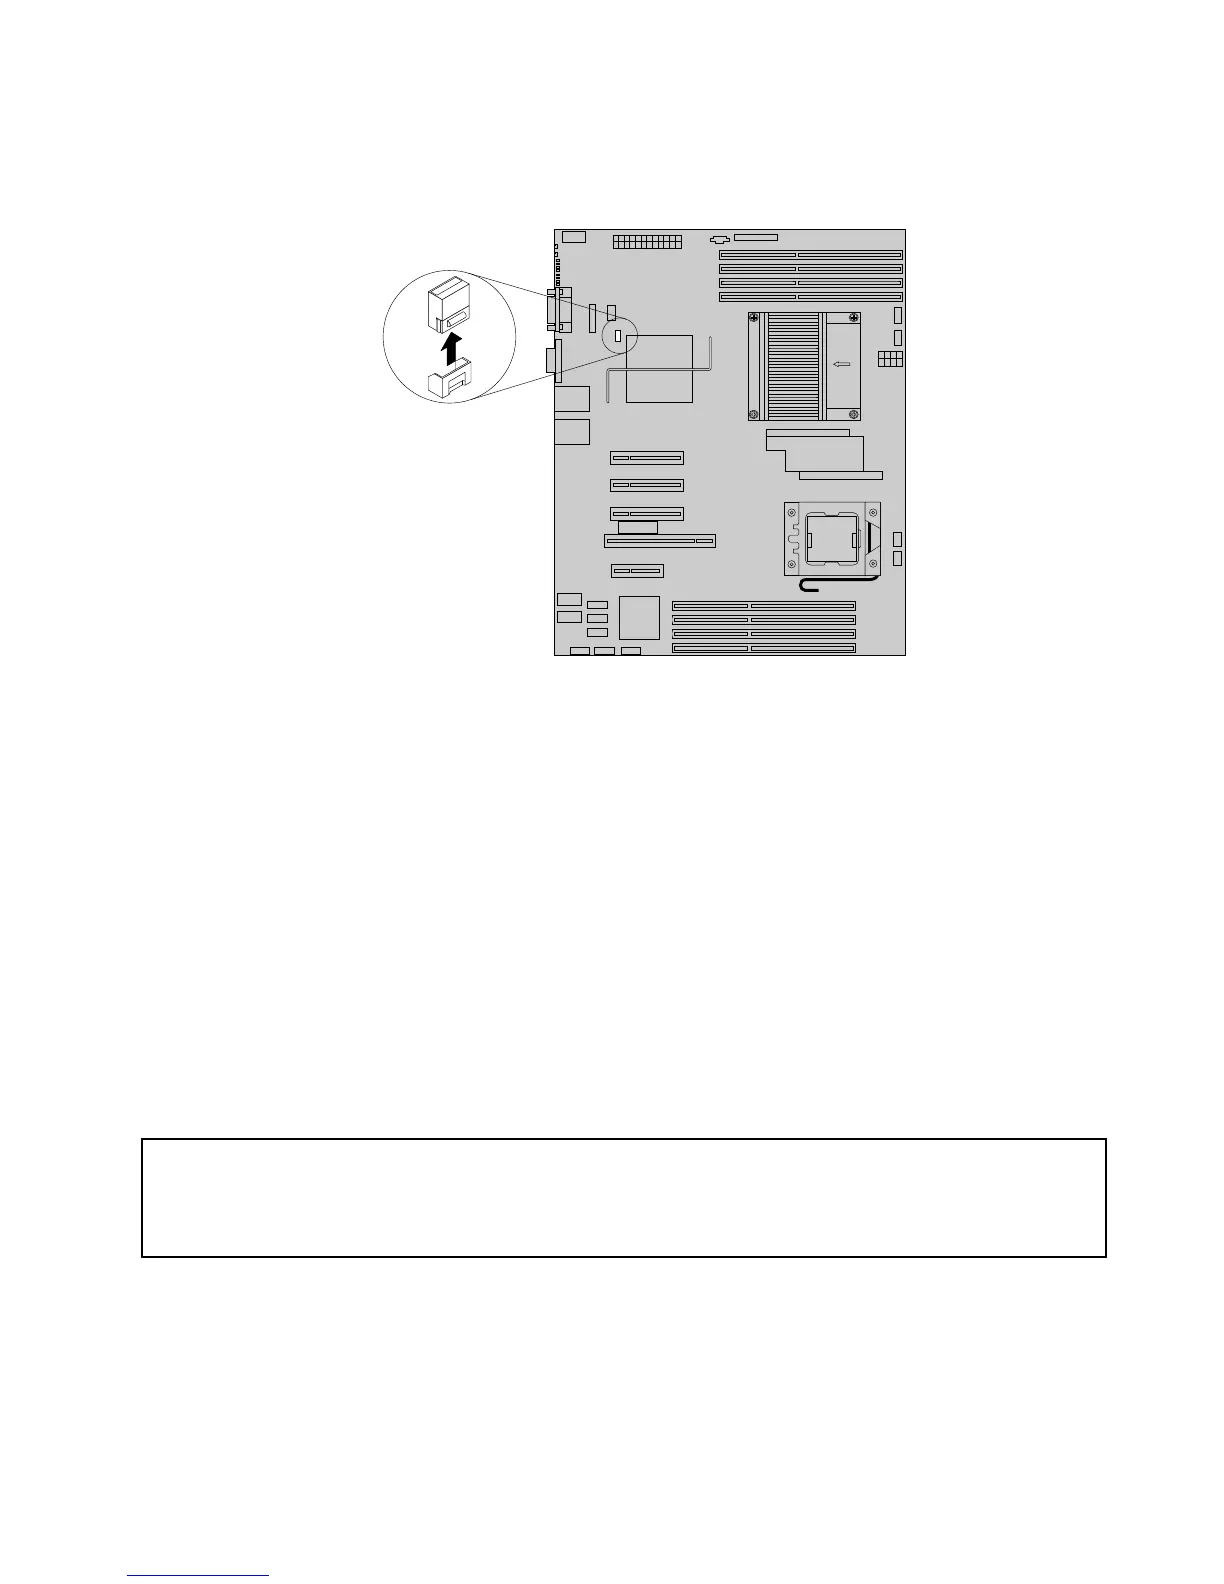
4.RemovetheRAID5keyfromtheSATAkeyconnectoronthesystemboard.See“Locatingpartsonthe
systemboard”onpage33.
Figure47.RemovingtheRAID5key
5.IfyouareinstructedtoreturntheremovedRAID5keytothemanufacturer,followallpackaging
instructionsanduseanypackagingmaterialsthataresuppliedtoyouforshipping.
Whattodonext:
•Toworkwithanotherpieceofhardware,gototheappropriatesection.
•Tocompletetheremovalprocedure,goto“Completingthepartsreplacement”onpage122.
InstallingorremovingtheThinkServerRAID500UpgradeKeyfor
AdvancedRAID
ThissectionprovidesinstructionsonhowtoinstallorremovetheThinkServerRAID500UpgradeKeyfor
AdvancedRAID(hereaftercalledtheTR500key).IfyourserverhasaThinkServerRAID500Adapter
installedandyouwanttoenabletheRAID5congurationfunctionforthisadapter,youneedtoinstall
theTR500keyontheadapter.
InstallingtheTR500key
Attention:
DonotopenyourserverorattemptanyrepairbeforereadingandunderstandingtheSafetyInformationandthe
WarrantyandSupportInformationontheThinkServerDocumentationDVDthatcamewithyourproduct,and
“Guidelines”onpage39
.Toobtainacopyofthepublications,goto:
http://www.lenovo.com/support
ThissectionprovidesinstructionsonhowtoinstalltheTR500key.
ToinstalltheTR500key,dothefollowing:
Attention:Electrostaticdischarge(ESD)candamagetheTR500key.Alwaysgroundyourselfandusea
groundstrapbeforetouchingtheoption.PerformthefollowingprocedureatanESD-safeworkstation.
Chapter5.ReplacingFRUs79

 Loading...


