1.Removeallmediafromthedrivesandturnoffallattacheddevicesandtheserver.Then,disconnectall
powercordsfromelectricaloutletsanddisconnectallcablesthatareconnectedtotheserver.
2.Removetheservercover.See“Removingtheservercover”onpage43.
3.Laytheserveronitssideforeasieroperation.
4.TheRAIDcardshouldbeinstalledintotheappropriatePCIExpressx8slotonthesystemboard(callout
31inFigure7“Locatingmajorpartsonthesystemboard”onpage34).
5.Touchthestatic-protectivepackagethatcontainstheRAIDcardtoanyunpaintedsurfaceonthe
outsideoftheserver.Then,removetheRAIDcardfromthepackage.
6.DependingonyourRAIDcard,youmightneedtoinstalltheThinkServer8708EM2RAIDBattery.See
“InstallingtheThinkServer8708EM2RAIDBattery”onpage92andfollowthoseinstructionstoinstall
thebatterycardassembly.
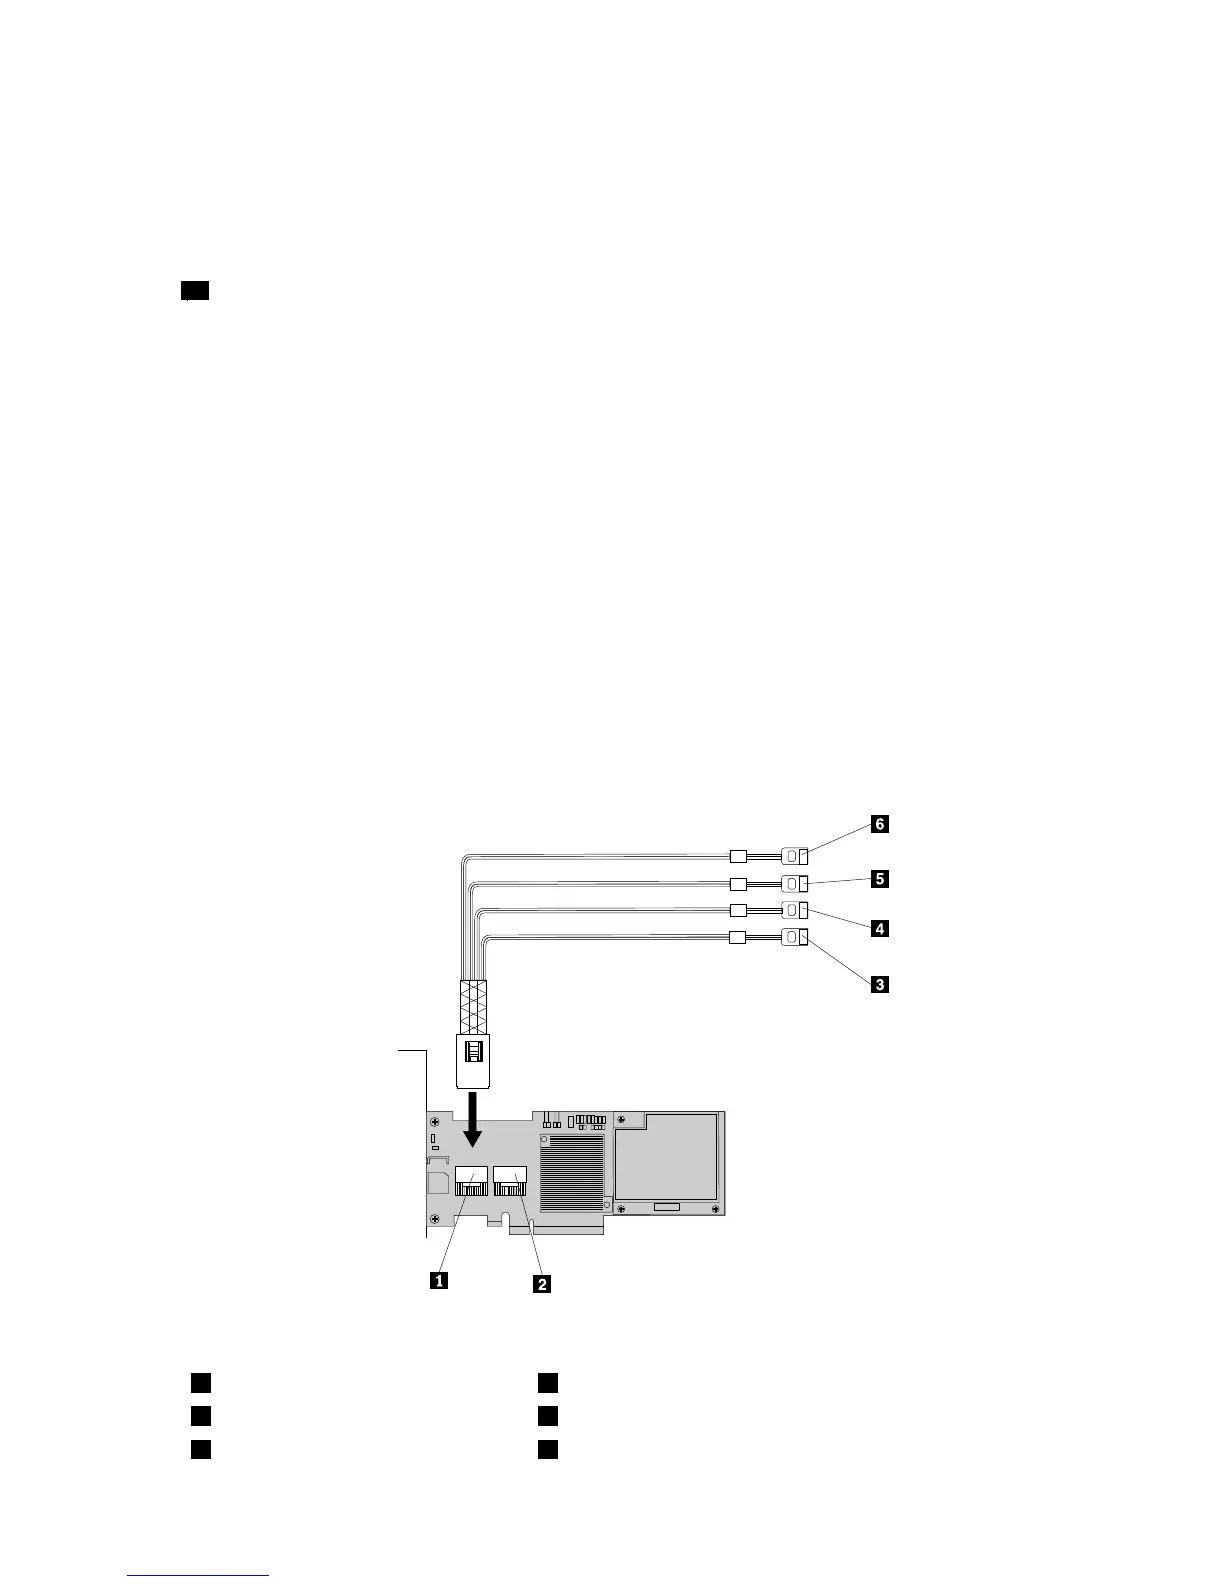
7.ConnecttheminiSASsignalcabletotheminiSASsignalcableconnector0ontheRAIDcard.See
Figure57“ConnectingtheminiSASsignalcables”onpage91
.
Note:TheminiSASsignalcablelengthis880mm(34.65inches).
8.TheRAIDcardisakindofPCIcard.See“InstallingaPCIcard”onpage73andfollowthoseinstructions
toinstalltheRAIDcard.TakecautionwhenhandlingtheminiSASsignalcabletoavoiddamaging
theminiSASsignalcableconnector.
9.ConnecttheminiSASsignalcables(port0toport3)tothecorrespondingSATA/SASsignalconnectors
(connector0toconnector3)onthehot-swapharddiskdrivebackplanes.See“Locatingconnectorson
thehot-swapharddiskdrivebackplanes”onpage37.
Note:EachminiSASsignalcablemighthavealabelattached.Thenumberonthelabelindicates
theportnumber.
Figure57.ConnectingtheminiSASsignalcables
1MiniSASsignalcableconnector4–74MiniSASsignalcable-port1
2MiniSASsignalcableconnector0–35MiniSASsignalcable-port2
3MiniSASsignalcable-port06MiniSASsignalcable-port3
Chapter5.ReplacingFRUs91

 Loading...


