EasyManuals Logo

Lenovo ThinkSystem SR860 V2 Setup Guide

Lenovo ThinkSystem SR860 V2
260 pages
To Next Page IconTo Next Page
To Previous Page IconTo Previous Page
Page #192 background imageLoading...
Page #192 background image
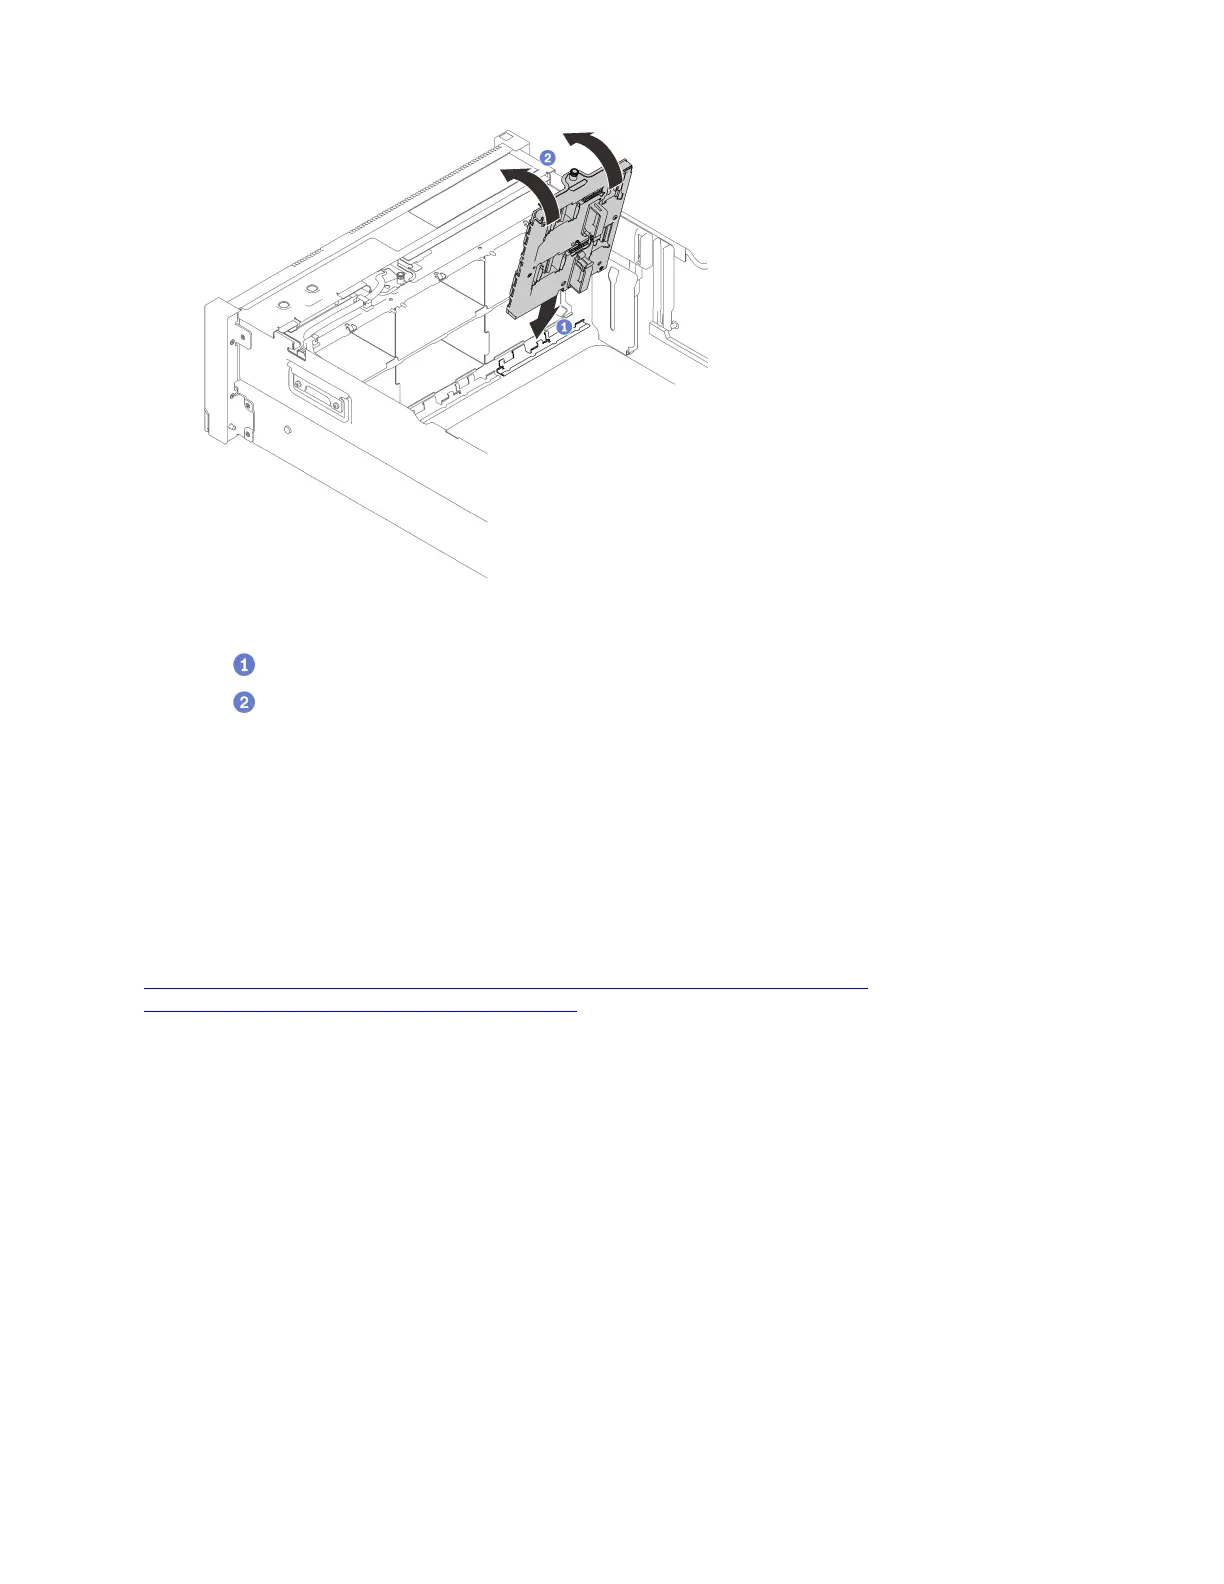
Figure 76. Installing the drive backplane carrier assembly
Align the bottom of the carrier to the slot in the server.
Pivot the top of the carrier until it clicks into place.
Step 3. Installed all the other backplanes and carriers you plan to install, and see Chapter 3 “Internal cable
routing” on page 43 to do corresponding cable routing.
Remove the PCIe riser assembly
Follow instructions in this section to remove the PCIe riser assembly.
About this task
Watch the procedure. A video of this procedure is available from the following links:
https://www.youtube.com/playlist?list=PLYV5R7hVcs-C6QgmsUMRG6ul0bHzrGmsG
https://list.youku.com/albumlist/show/id_54461099
Procedure
Step 1. Grasp and lift the PCIe riser assembly to remove it from the system board.
184
ThinkSystem SR860 V2Setup Guide

Table of Contents

Other manuals for Lenovo ThinkSystem SR860 V2

Questions and Answers:

Question and Answer IconNeed help?

Do you have a question about the Lenovo ThinkSystem SR860 V2 and is the answer not in the manual?

Lenovo ThinkSystem SR860 V2 Specifications

General IconGeneral
Expansion SlotsUp to 8 PCIe 4.0 slots
RAID SupportRAID 0, 1, 5, 6, 10, 50, 60
NetworkMultiple 1Gb, 10Gb, or 25Gb Ethernet options
Power SupplyRedundant hot-swap power supplies
Operating System SupportWindows Server, Red Hat Enterprise Linux, SUSE Linux Enterprise Server, VMware vSphere
ManagementLenovo XClarity Controller (XCC)

Related product manuals