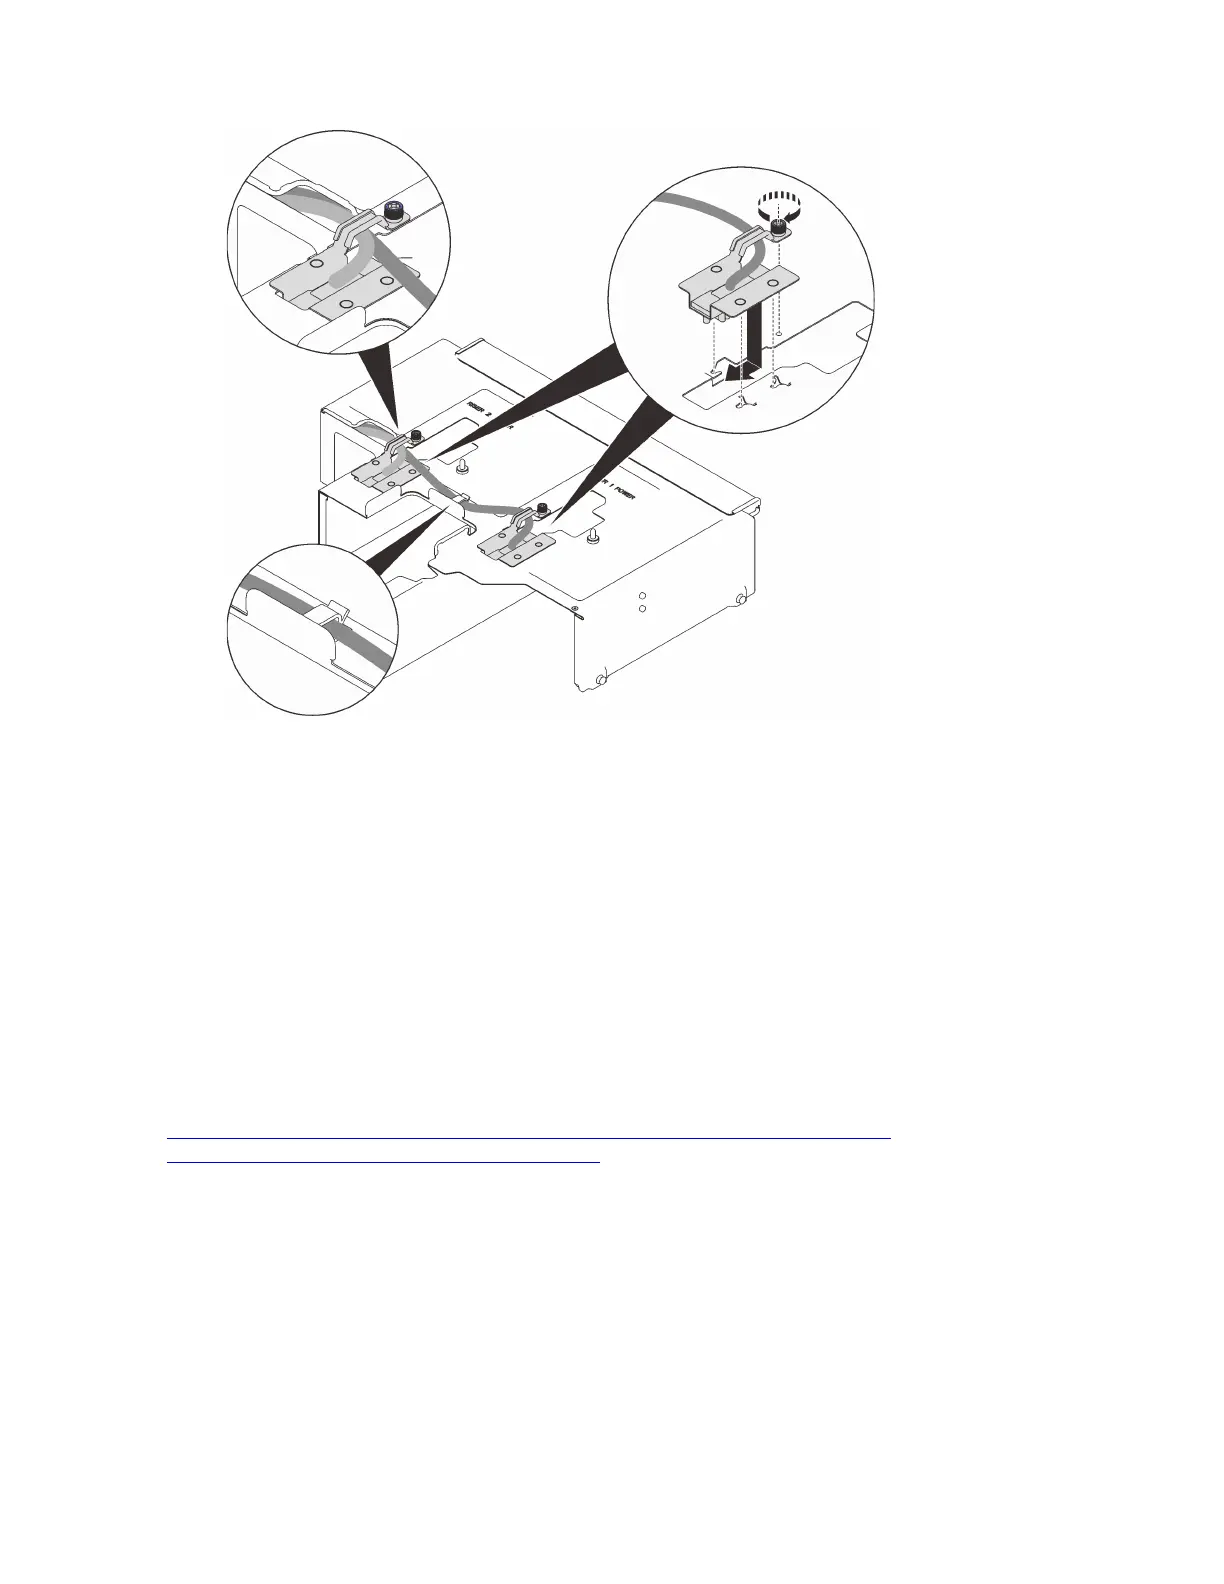
Figure 102. Installing the 4U PCIe riser power cable assemblies
Step 4. Fasten the captive screw on the module to secure it to the expansion tray.
Notes:
• Make sure the longer (320 mm) cable is routed through the middle cable clip.
• Make sure both cable are routed through the side cable clip and the side opening as illustrated.
Install the 4U PCIe expansion tray
Follow instructions in this section to install the 4U PCIe expansion tray.
About this task
Watch the procedure. A video of this procedure is available from the following links:
•
https://www.youtube.com/playlist?list=PLYV5R7hVcs-C6QgmsUMRG6ul0bHzrGmsG
• https://list.youku.com/albumlist/show/id_54461099
Procedure
Step 1. Make sure both 4U PCIe riser power cable modules are installed to the expansion tray. If not, install
both of them (see “Install the 4U PCIe riser power cable assembly” on page 207).
Step 2. Aligned the nailheads with the slots on both sides of the server, and lower the tray into the server.
Chapter 5. Server hardware setup 209

 Loading...


