4-60 Service Manual
5022-xxx
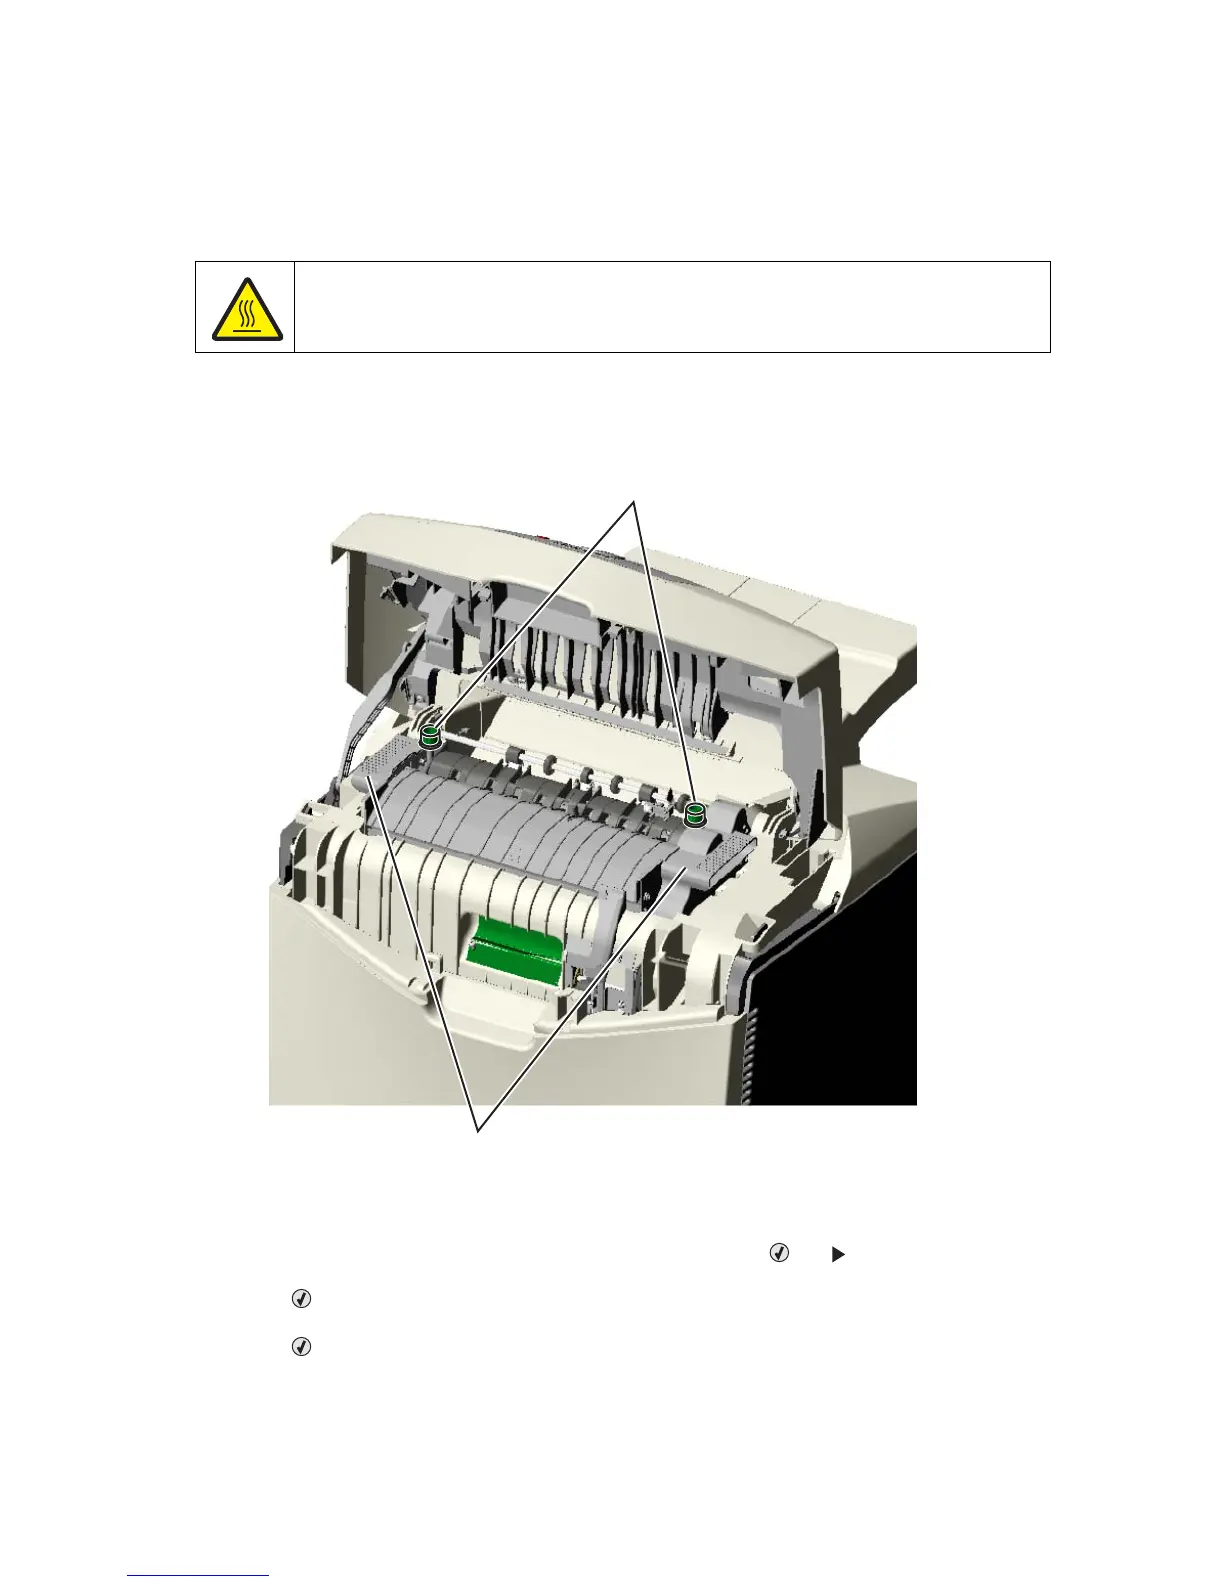
Fuser removal
See “Fuser assembly, 115 V” on page 7-15, “Fuser assembly, 230 V” on page 7-15, or “Fuser assembly,
100 V” on page 7-15 for the part number.
1. Turn off the printer.
2. Open the top access door.
3. Rotate the fuser thumbscrews (A) counterclockwise until loosened.
4. Grasp the handles (B), lift the fuser straight up and away from the printer.
Installation note: If you install a new fuser, be sure to reset the fuser counter in the Configuration Menu. To
reset the counter:
1. Enter the Configuration Menu. (Turn off the printer, press and hold and , turn on the printer, and
release the buttons when the clock graphic displays.)
2. Press for the Reset value.
Resetting Fuser Count Value appears.
3. Press to select Motor Calibration from the CONFIG MENU. Calibrating displays, and the printer
prints several blank pages and then returns to the CONFIG MENU.
4. Select Exit Config Menu.
See “Page Counts” on page 3-16.
CAUTION
The fuser can be extremely hot. Use care when handling to avoid burns.
A
B