52
MULTI V 5 Outdoor Unit Service Manual
Due to our policy of continuous product innovation, some specifications may change without notification.
©LG Electronics U.S.A., Inc., Englewood Cliffs, NJ. All rights reserved. “LG” is a registered trademark of LG Corp.
Upon successful completion of the auto addressing function, an unintentional compressor
start can occur unless the communications cable to the indoor units is removed from the
outdoor unit terminals IDU(A) and IDU(B). Do NOT open the service valves or attempt
to start outdoor unit compressors or until directed by the LG trained commissioner. Major
damage to the unit piping and compressors will occur, and there is a risk of explosion,
suffocation, physical injury, and / or death.
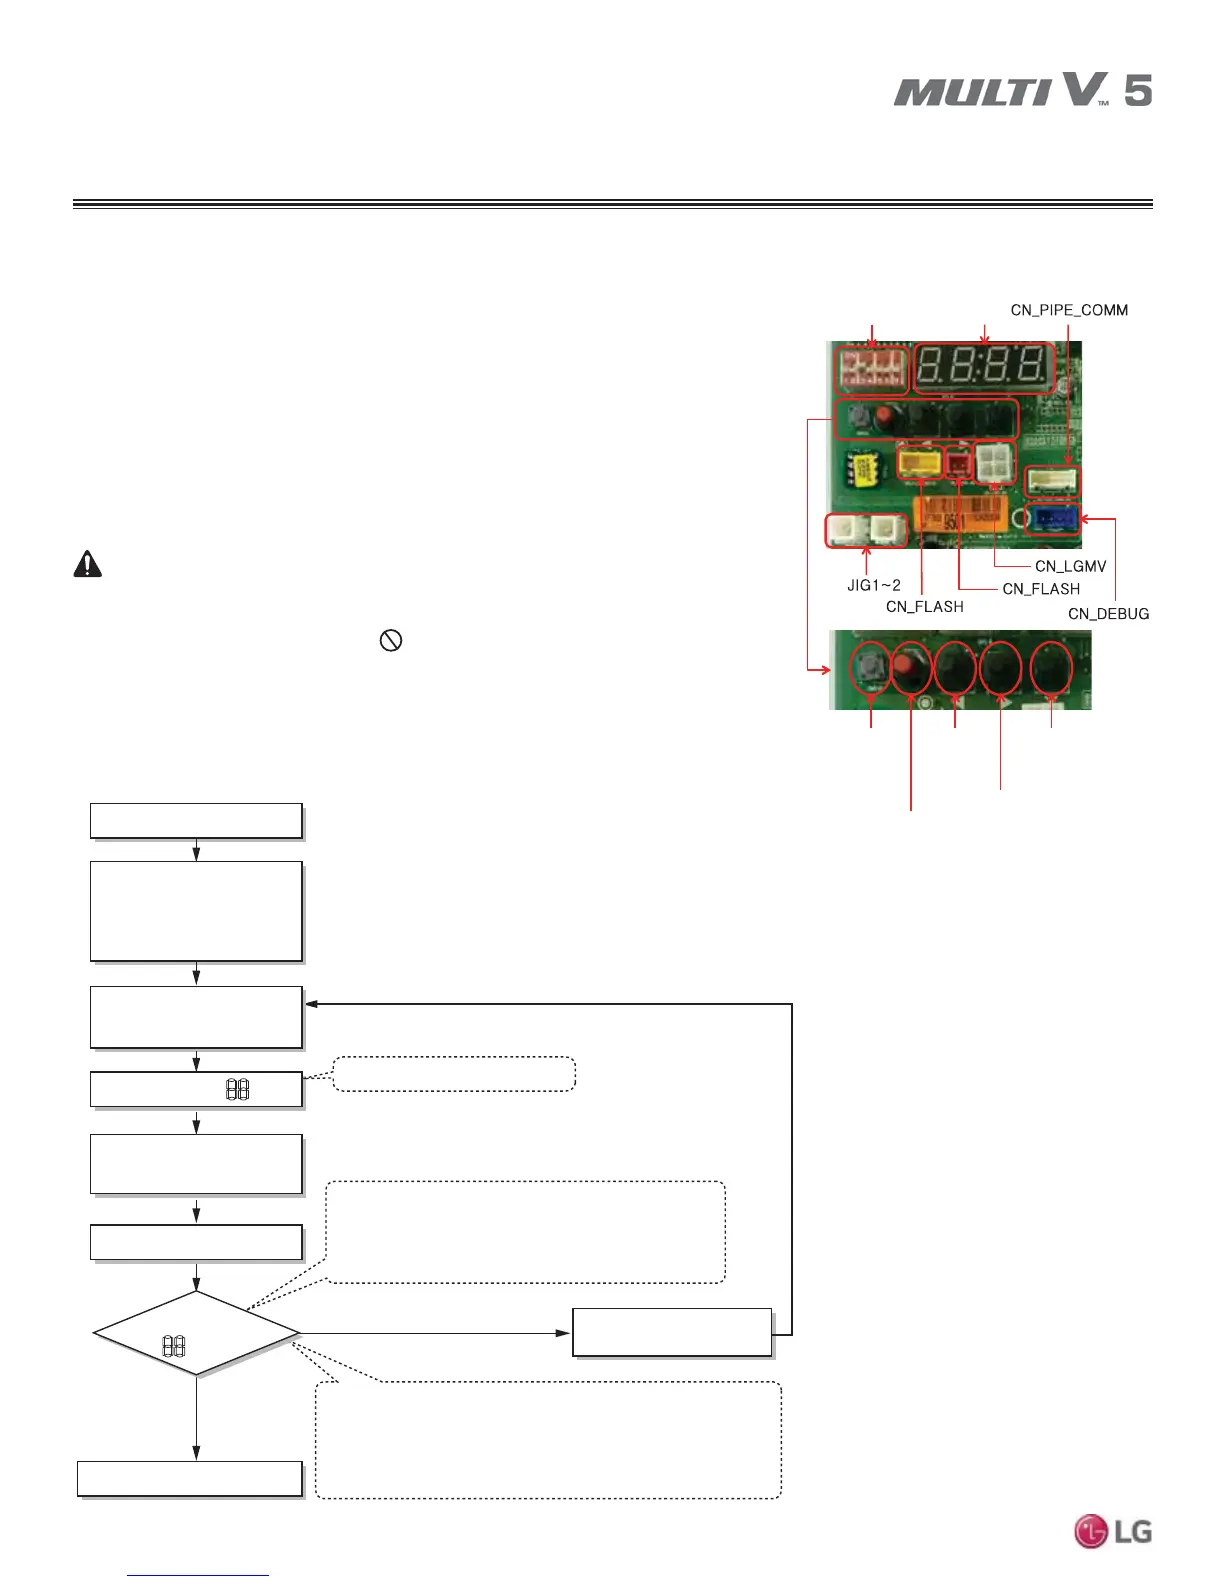
Indoor Unit Auto Addressing Procedure, continued.
DIP-SW01
SSD
SW01C
(Confirm / Automatic
Address Setting Button)
SW01D
(Reset Button)
SW02C
(ŻBackward
Button)
SW03C
(ŹForward
Button)
SW04D
(x Cancel
Button)
Figure 3: Auto Addressing Button Location on
Outdoor Unit PCB.
WARNING
Auto addressing procedure is complete. The number of indoor units
that have successfully completed the auto addressing procedure
will display on the LED for thirty (30) seconds.
Auto Addressing Procedure Starts.
Wait Three (3) Minutes While
Outdoor Unit Sequences
Through Self-Diagnostics Check.
Proceed when LED is Blank.
Turn Power On
Press and Hold RED SW01C
Button for Five (5) Seconds.
LED Displays = 88
Release RED SW01C Button.
Wait Three (3) to Seven (7) Minutes.
LED Displays
YES
NO Check the communication
cable connections.
= 88
Auto Addressing Procedure Ends.
The address number of each indoor unit is shown on the wired controller display
or on the indoor unit display (this is not an error message). The address number
will disappear after pressing the ON / OFF button on the wired remote controller.
If 01, 02, ... 15 is displayed, then it means that 15 indoor units are recognized as
connected and have been successfully auto addressed.
Figure 4: Auto Addressing Flowchart.
13. After recording the system addresses assigned to each device, open the outdoor unit
disconnect. Remove the outdoor unit to indoor unit communications cable from terminals
IDU(A) and IDU(B). Protect conductors by placing electrical tape over the bare ends.
14. Close the disconnect to reapply power to the outdoor unit and energize the compressor
crankcase heater. Once again, verify that the outdoor unit to indoor unit(s) communica-
tions cable is not connected to terminals IDU(A) and IDU(B) of the outdoor unit.
15. Replace the control panel door.
OTHER CONTROLS
Initial Setup