Quick Start Tutorial
2
C-DiGit User Manual 2-5
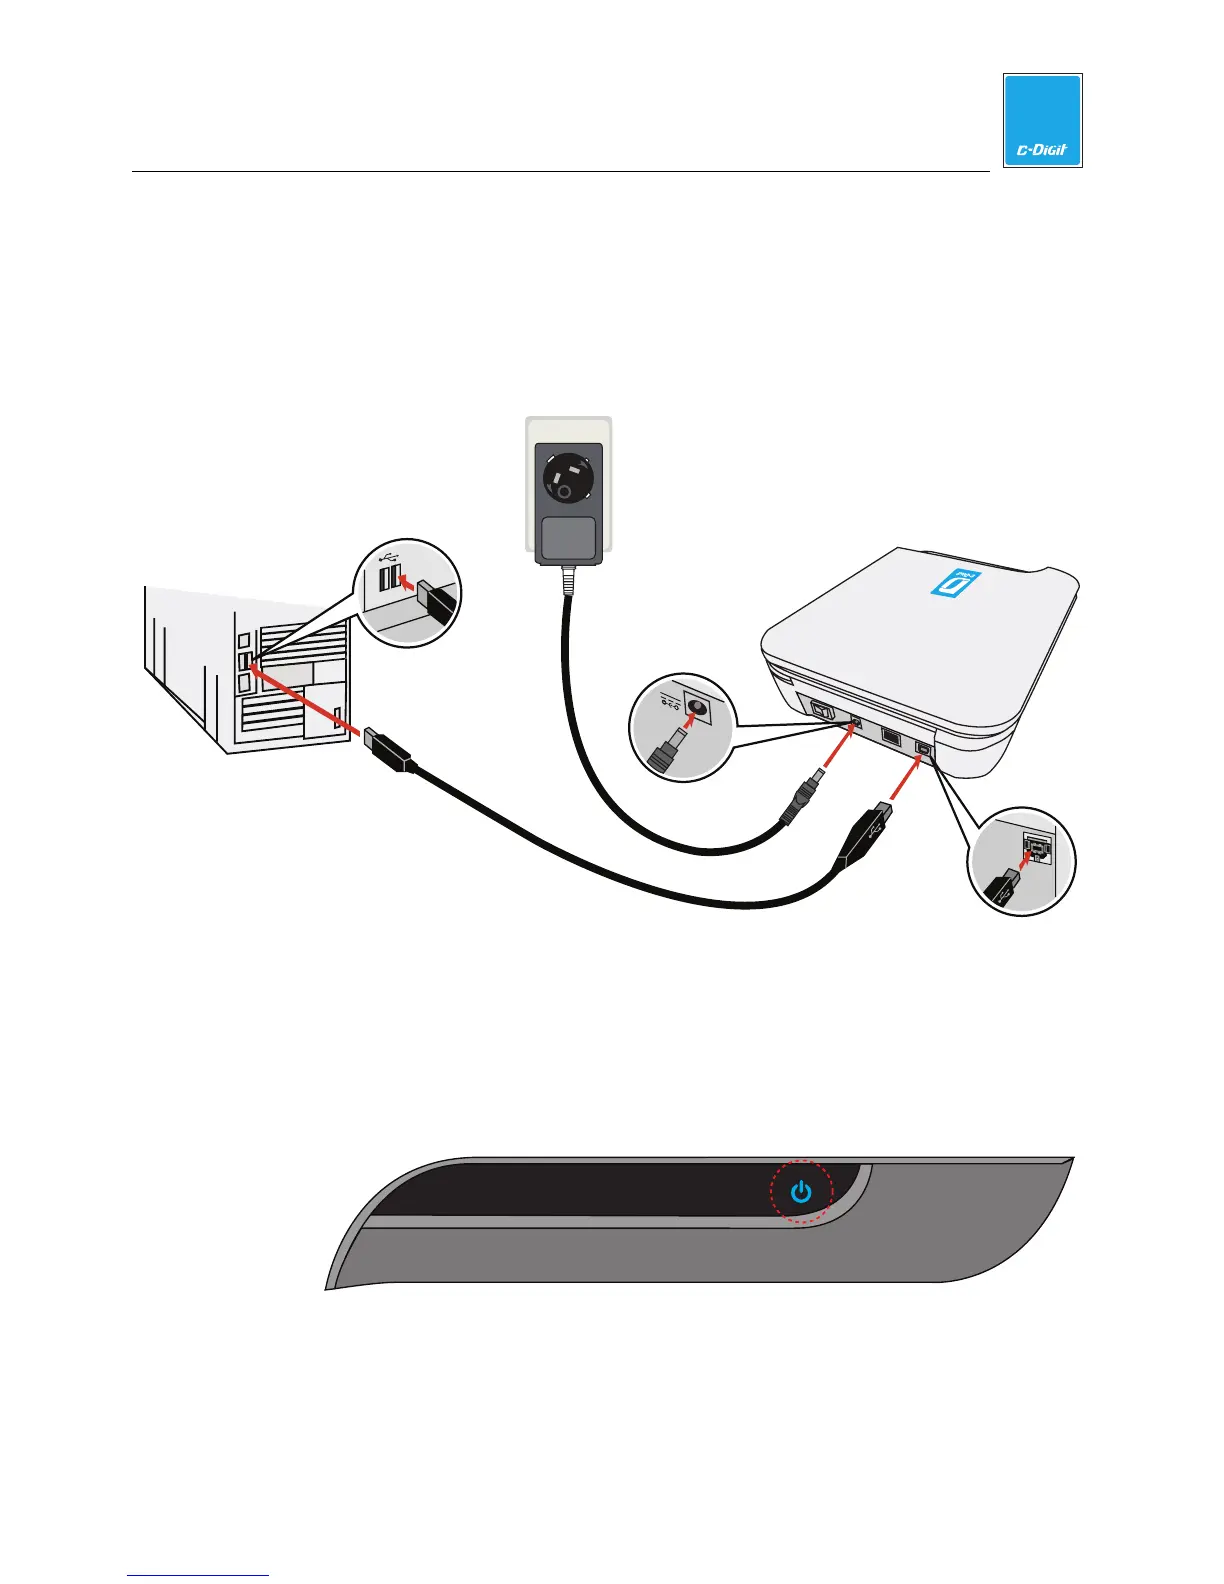
6. Connect the USB and Power Cables
Plug the power supply into the wall outlet, and plug the power cord into the
receptacle on the C-DiGit back panel (below). Connect the flat (Type A)
connector on the USB cable to your computer, and the square (Type B)
connector to the C-DiGit Blot Scanner back panel at the connector labeled
‘USB’.
P
U
S
H
LOCK
OPE
N
AC Power
C-DiGit Blot Scanner
Computer
USB Connection
C-DiGit
USB Connection
C-DiGit
Power Connection
USB
12VDC
1A
7. Turn on C-DiGit Blot Scanner
Power C-DiGit Blot Scanner on with the power switch on the back panel. The
blue power light on the instrument front panel (below) illuminates and blinks
when the instrument is first powered on, and stops blinking when the
instrument has fully started up and is ready to use.
8. Wait While USB Drivers Install
When C-DiGit is powered on and connected to the computer for the first time,
drivers are automatically installed on the computer. Allow up to 5 minutes for
the drivers to install before starting the Image Studio software in Step 9