4. Installation MMX8x4-HT series – User's Manual 35
section.
Step 5. Connect the microphone.
a) In case of dynamic or wireless microphone: Skip this step and follow the instructions with Step 4.
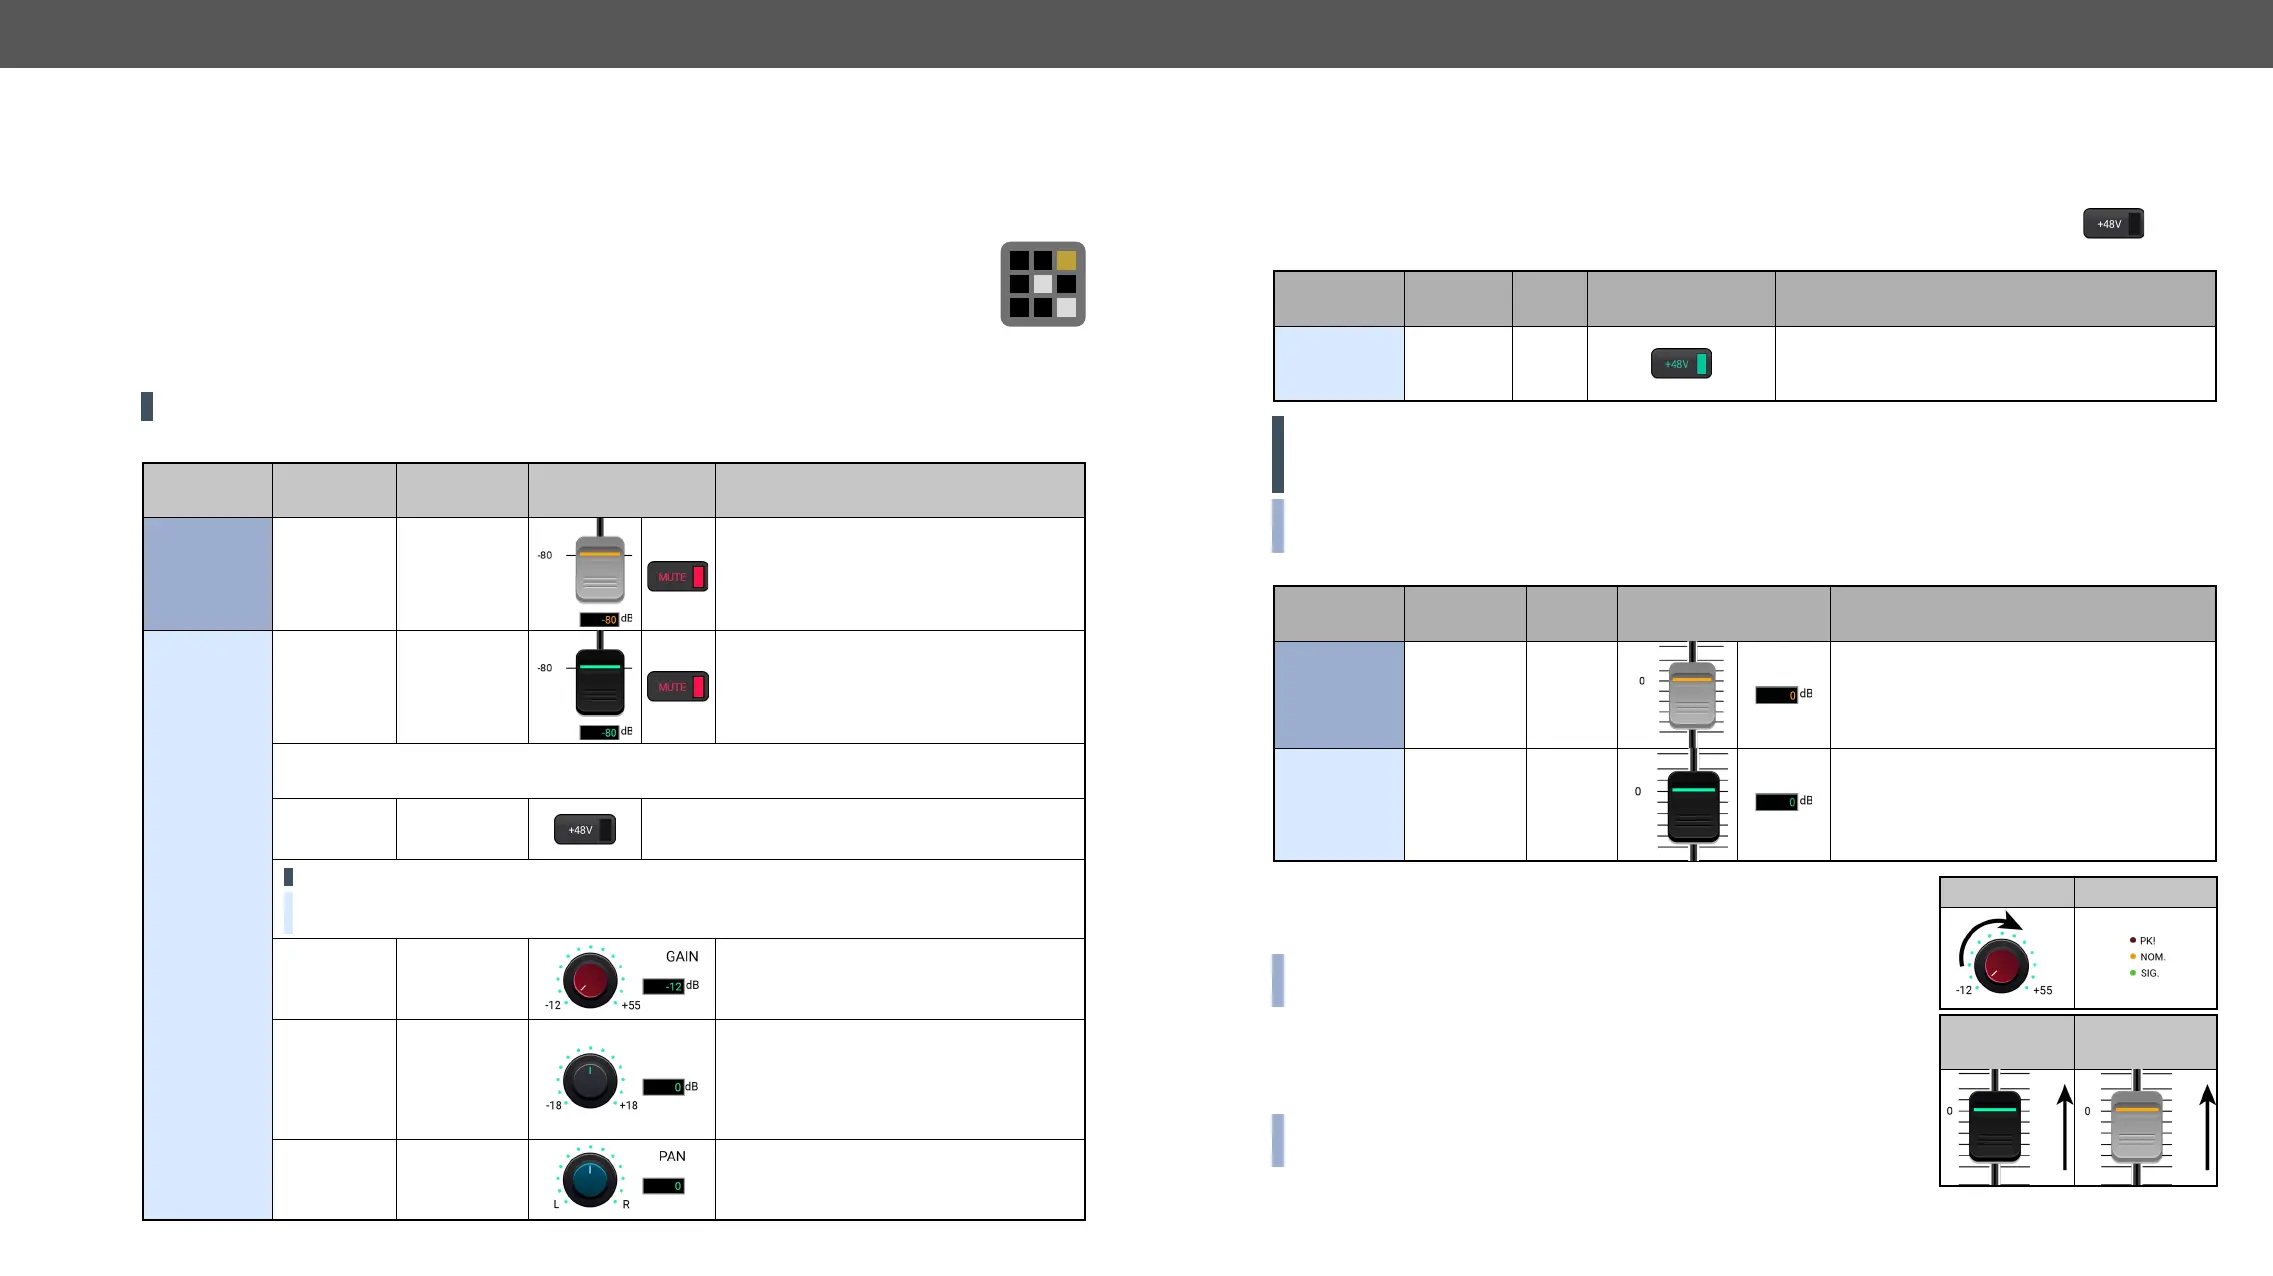
b) In case of condenser microphone: Switch on the phantom power. Keep pressed the button
more than 2 seconds to activate phantom power.
Port Property Value
Lightware Device
Controller
LW3 command
Microphone
input
(MIC IN)
Phantom
power
On
ç
WARNING! Phantom power supplies the condenser microphone by 48V via the microphone cable which
is necessary for normal operation of the condenser microphone. Application of the phantom power can
cause a damage if dynamic or wireless microphone is connected.
INFO: Always switch on the phantom power when the cabling and connecting have already done. Do not
disconnect the microphone when the phantom power is switched on!
Step 6. Set these properties below:
Port Property Value
Lightware Device
Controller
LW3 command
Advanced
audio output
(AUDIO OUT)
0dB
ç
Microphone
input
(MIC IN)
0dB
ç
Step 7. Talk to the microphone continuously. Increase the microphone
input gain slowly and check the signal indicator chart. It gives a
feedback about the optimal signal level.
INFO: Take care that peak led (PK!) never lights up! See more details in
Panorama or Balance Settings section.
Step 8. If the signal level is low, set the optimal volume both the
microphone input and balanced output channel. Always check the
signal indicator chart for the optimal level!
INFO: Take care that peak led (PK!) never lights up! See more details in
Panorama or Balance Settings section.
MIC input gain MIC signal
MIC input
volume
Output volume
Installation Guide for Connecting a Microphone
#balance#volume#advanced#audio#mic#microphone
The device features a dedicated Special Audio Input Block for microphone. Before connecting a microphone
to the matrix device please read the instructions below.
These settings can be done from a computer using the
Controller www.lightware.com, install it on a
Step 3. Always check the correct wiring of the microphone cable. See more details in the
section. Microphone cable should be shielded with 2x0,22mm conductor, max. 50m long.
WARNING! Never apply phantom power with unbalanced cable, because it may harm the devices!
Step 4. Before the connection, please set these properties below:
Port Property Value
Lightware Device
Controller
LW3 command
Advanced
audio output
(AUDIO
OUT)
or Mute
ç
ç
Microphone
input
(MIC IN)
or Mute
ç
ç
ATTENTION! Skipping the volume or mute setting can cause serious damage in the
speaker or the external sound system when phantom power is turned on!
Phantom
power
Off
ç
ATTENTION! Always turn off the phantom power before connecting the microphone!
is switched on.
Input gain -12dB
ç
(High,Hmid,
0
ç
ç
ç
ç
Panorama
(Balance)
0
ç

 Loading...