Performing a test
RET
eval
Device User Manual 12
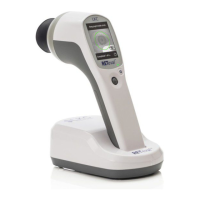
Performing a test
Step 1. Remove the RET
eval
device from the docking station.
Step 2. Confirm the protocol is the one desired by looking at the protocol title at the bottom of
the screen. If not, select Protocol on the device to change. See manual section Choosing
a protocol on page 20.
Step 3. Select New Test on the device.
Step 4. Enter patient information as prompted by the device (name or identifier and date of
birth). Pressing the barcode symbol enables patient information to be scanned
from an external display such as a PC monitor. Scanning is automatic and does not
require the joystick to be pressed. The free data barcode application which runs on
Windows (https://bit.ly/retevalbarcodereader) and smartphones (search for RETeval on
your phone’s app store). The barcode application does not use the internet and does
not store any patient information. If the RET
eval
device has trouble scanning the
barcode, ensure the eyecup is on or very close to the display and the display brightness
is set to maximum.
Step 5. Confirm that the protocol and patient information are correct.
Step 6. Select a Sensor Strip packet and scan the packet barcode by placing the eyecup of the
device on or very near the barcode on the Sensor Strip packet. Scanning is automatic
and does not require the joystick to be pressed. Use a new set of Sensor Strips for each
test.
Step 7. Ask the patient to remove their eyeglasses. Contact lenses may be left in place.
Step 8. Place both the right and left Sensor Strips on the patient. Proper placement is shown
below. Alternatively, you may find it easier to place just the right Sensor Strip, test that
eye, then place the left Sensor Strip and test that eye. Handle the Sensor Strips by the
connection tab as the hydrogel is very sticky.
If you are using Small Sensor Strips, both strips must be applied to read either eye.