Receiver Overview
6
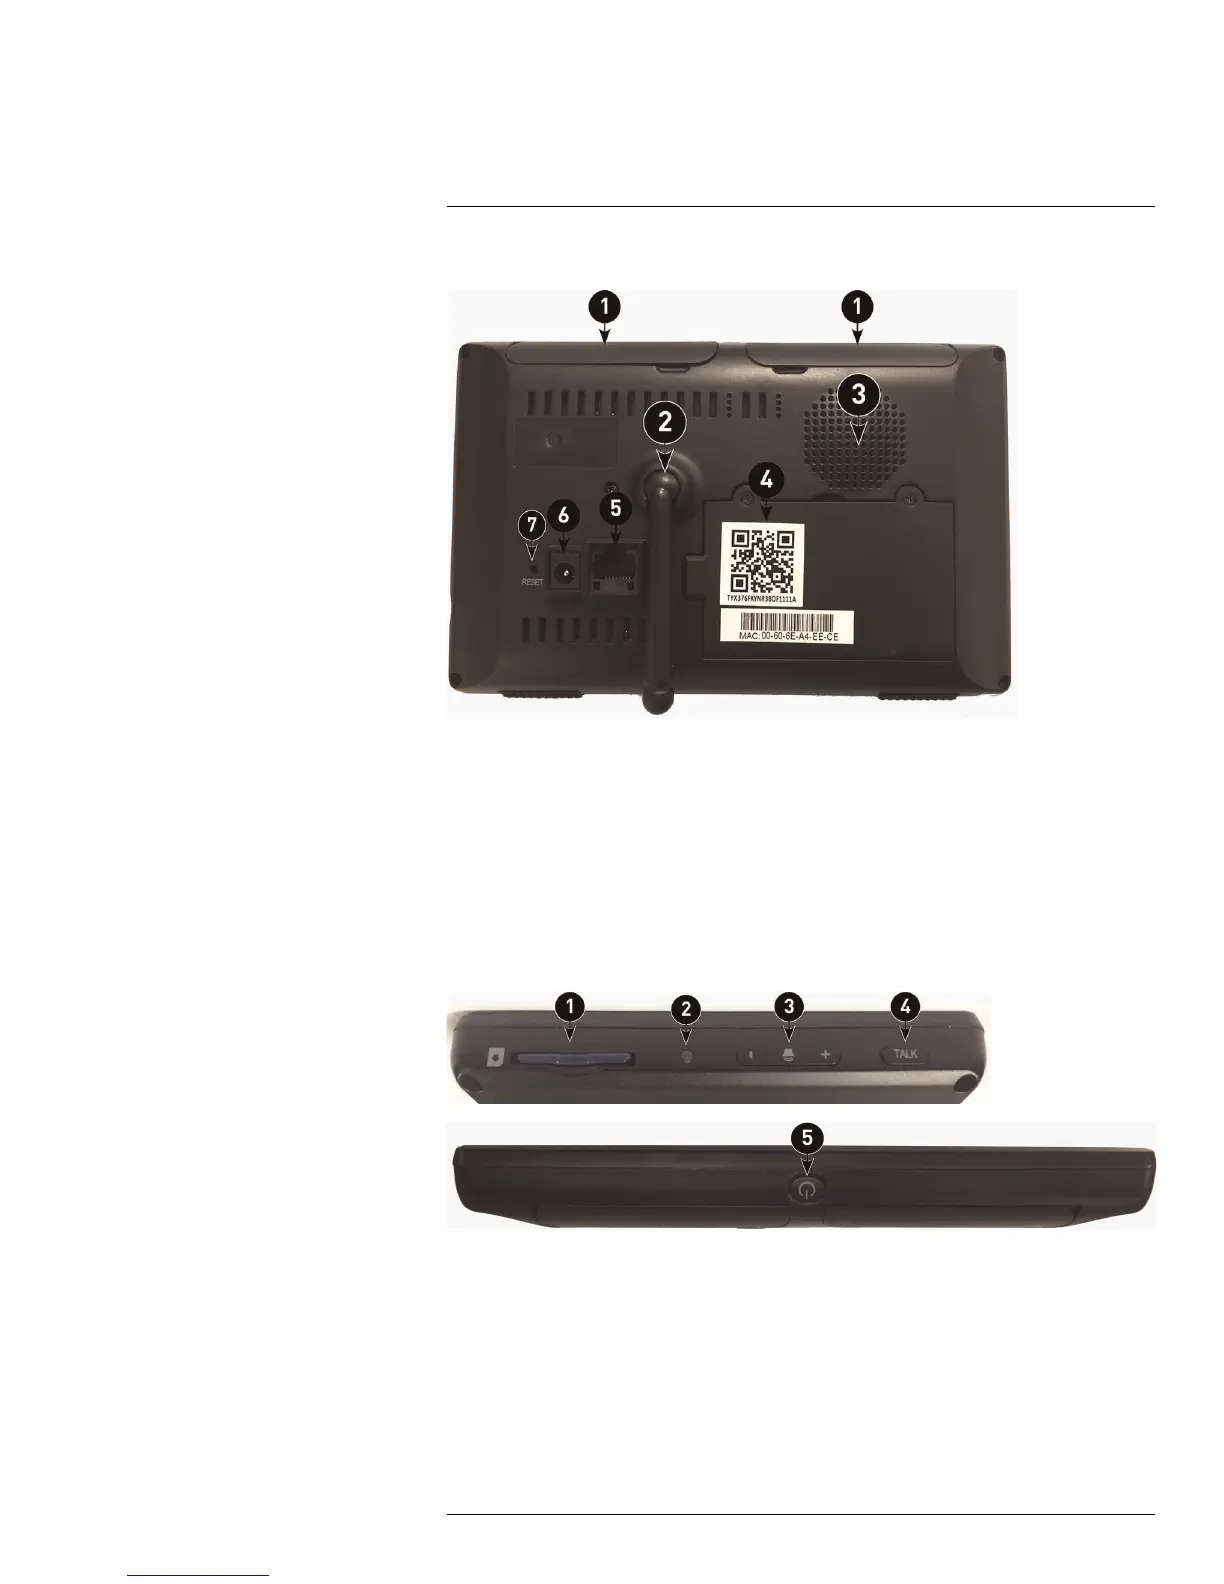
6.1 Rear Panel
1. Wireless Antennas: Position the antennas as needed for best reception.
2. Receiver Stand
3. Speaker
4. UID Number / QR Code: Unique ID number for remote viewing setup.
5. Ethernet Port (RJ45): Connect the receiver to your router using the included Ethernet
cable to enable smartphone / tablet connectivity.
6. Power Port: Connect to a local power outlet using the included power adapter.
7. Reset: Using a paper clip or other thin object, push the reset button to reboot the
device.
6.2 Side Panel
1. SD Card Slot: Insert up to 64GB SD card.
2. Power Indicator LED: Blinks when receiver battery is critically low. Glows when re-
ceiver is in scan mode.
3. Volume Controls: Turn the receiver volume up and down.
4. Talk button: Press and hold to activate intercom (two-way audio).
5. Power Button: Press and hold to turn the receiver on / off. Press and release while the
unit is powered on to turn Scan mode on / off. See 11 Scan Mode, page 38.
#LX400069; r.28523/28523; en-US
13

 Loading...