Lucent Technologies -48V CPS4000/CPS4000 PLUS Cabinet Power System
Issue 13 December 2000 Installation and Testing 5 - 1
5 Installation and Testing
Preparation
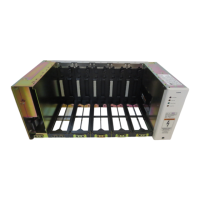
Introduction This section outlines the sequence for installing the CPS shelf and
plug-in modules and provides a test procedure for verifying the integrity
of the installation.
Safety Please review all safety warnings in Section 4 before beginning the
installation process. Observe all warnings and labels on the equipment.
Installation Tools You will need the following tools to install and test the CPS shelf and
plug-in modules:
• 3/16 inch Allen wrench (one provided with each shelf)
• Wire cutters and strippers
• Heat shrink gun
• Torque wrench (0-70 in-lbs)
• 5/16 inch hex driver
• 7/16 inch hex driver
• 48V test load
• Digital meter with an accuracy of ± 0.02%
• Small screw driver
• Test cable
• ESD wrist strap
Hardware Mount the CPS shelves and battery modules in the frame using the
12-24 x 5/8 hex-head self-tapping screws provided in the output lug kits.
Screws are required in all mounting holes and should be torqued to a
minimum of 30 in-lbs.