2-90 Published 11-22-2016, Control # 345-12
HYDRAULIC SYSTEM RT9130E-2 SERVICE MANUAL
Assembly
NOTE: Lubricate seals and rings with clean hydraulic oil.
Make sure the gaps of the two wear rings are 180
degrees apart.
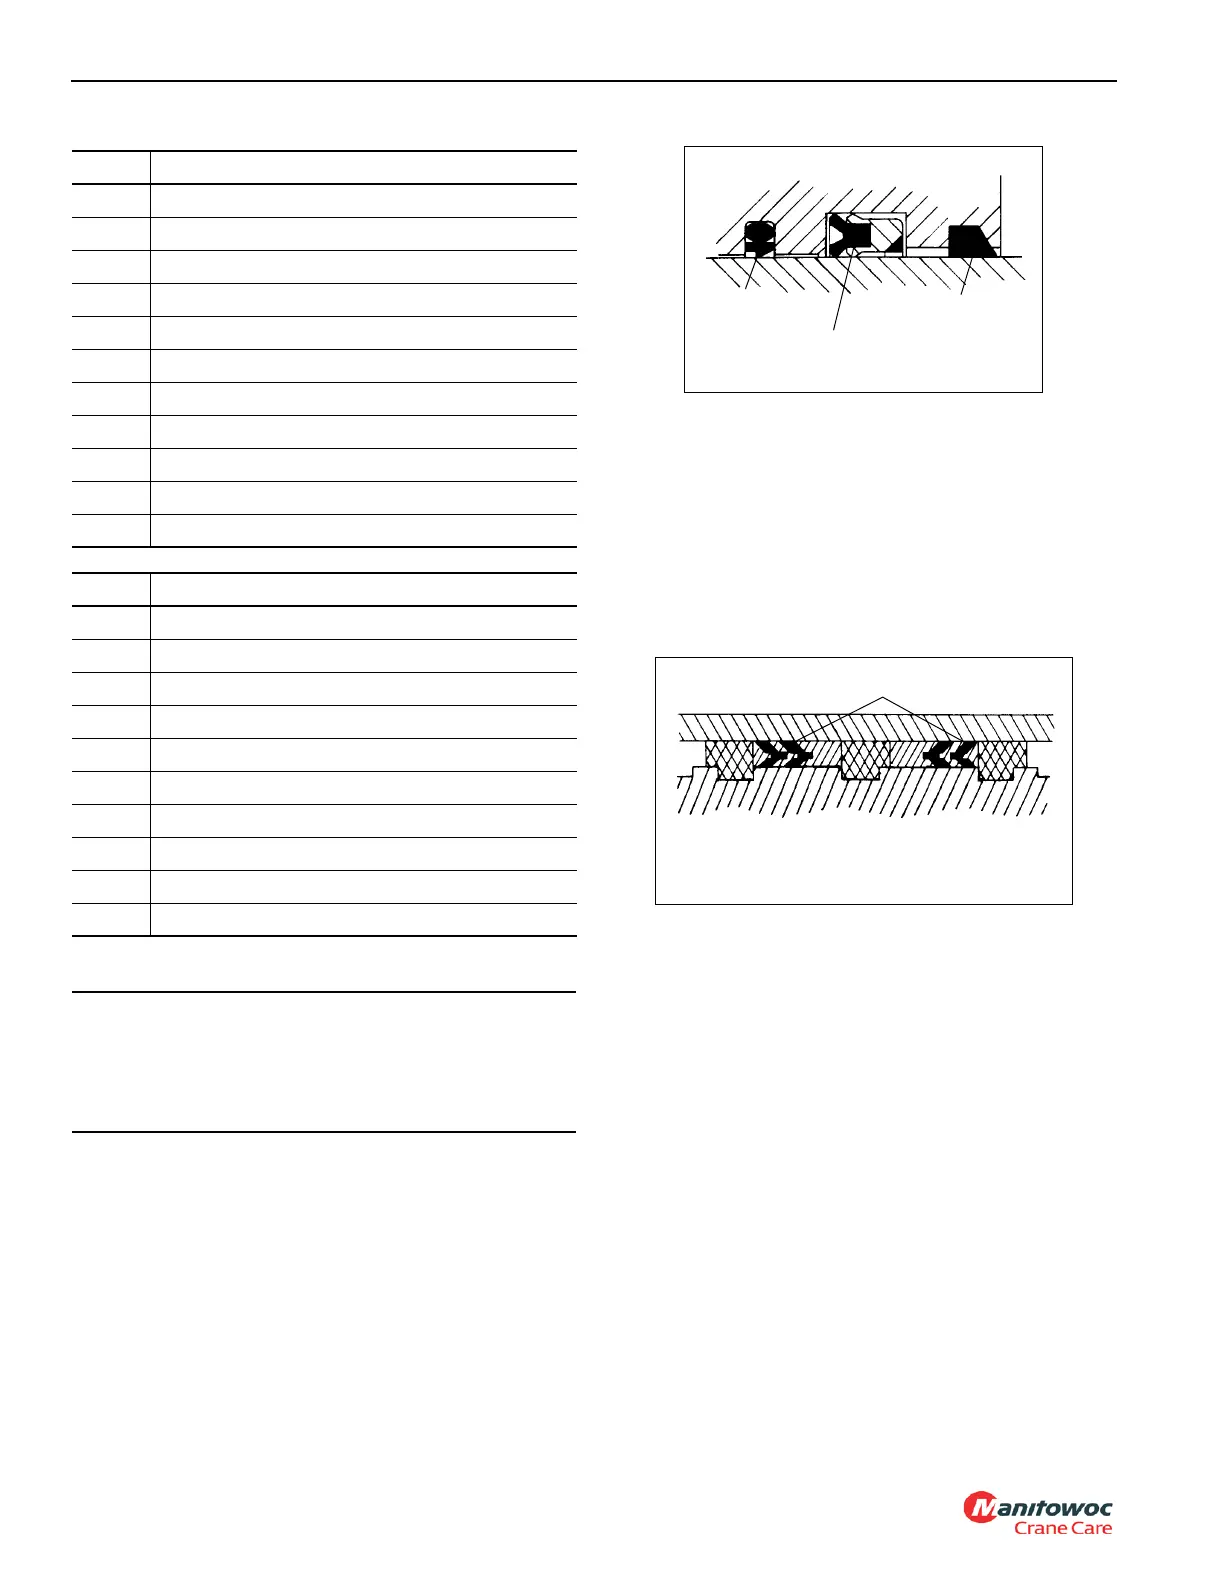
1. Install the replacement wear rings, buffer seal, rod seal
and wiper ring in the inside of the head Figure 2-54.
Make sure the buffer seal’s step is away from the wear
rings. Make sure the deep Z rod seal rim groove is closer
to the wear rings.
2. Install the replacement O-ring and the backup ring on
the outside of the head.
3. Install the replacement O-ring and backup rings in the
inside of the piston.
4. Install one replacement hydrolock seal on the outside of
the piston Figure 2-55. Leave the other hydrolock seal
off for now so there is still access to the piston’s set
screw hole.
5. Lubricate the rod with clean hydraulic oil.
6. Slide the head, larger OD end first, onto the rod.
7. Slide the spacer onto the rod.
8. Screw the piston onto the rod until it can go no farther.
Hold the piston in place with the set screw.
9. Install the other replacement hydrolock seal on the
outside of the piston over the set screw. Make sure the
“vees” on the two hydrolock seals point at each other.
10. Lubricate all parts freely with clean hydraulic oil.
Item Description
1Barrel
2Rod
3 Head
4Piston
5 Spacer
6 Check Valve
7 Setscrew
8 Insert
9Plug
10 Plug
11 Wiper Ring
Item Description
12 Rod Seal
13 Buffer Seal
14 Wear Ring
15 O-ring
16 Backup Ring
17 Seal
18 O-ring
19 Backup Ring
20 Setscrew
21 Insert
CAUTION
When installing new seals and rings, avoid stretching
seals or scratching the grooved or gland surfaces. Make
sure parts are clean before and during assembly. Make
sure seals and rings are installed in the proper order.
Wiper Ring
Deep Z Rod Seal
Buffer Seal
FIGURE 2-54
Hydrolock Piston Seals
FIGURE 2-55

 Loading...


