Grove Published 11-22-2016, Control # 345-12 3-17
RT9130E-2 SERVICE MANUAL ELECTRICAL SYSTEM
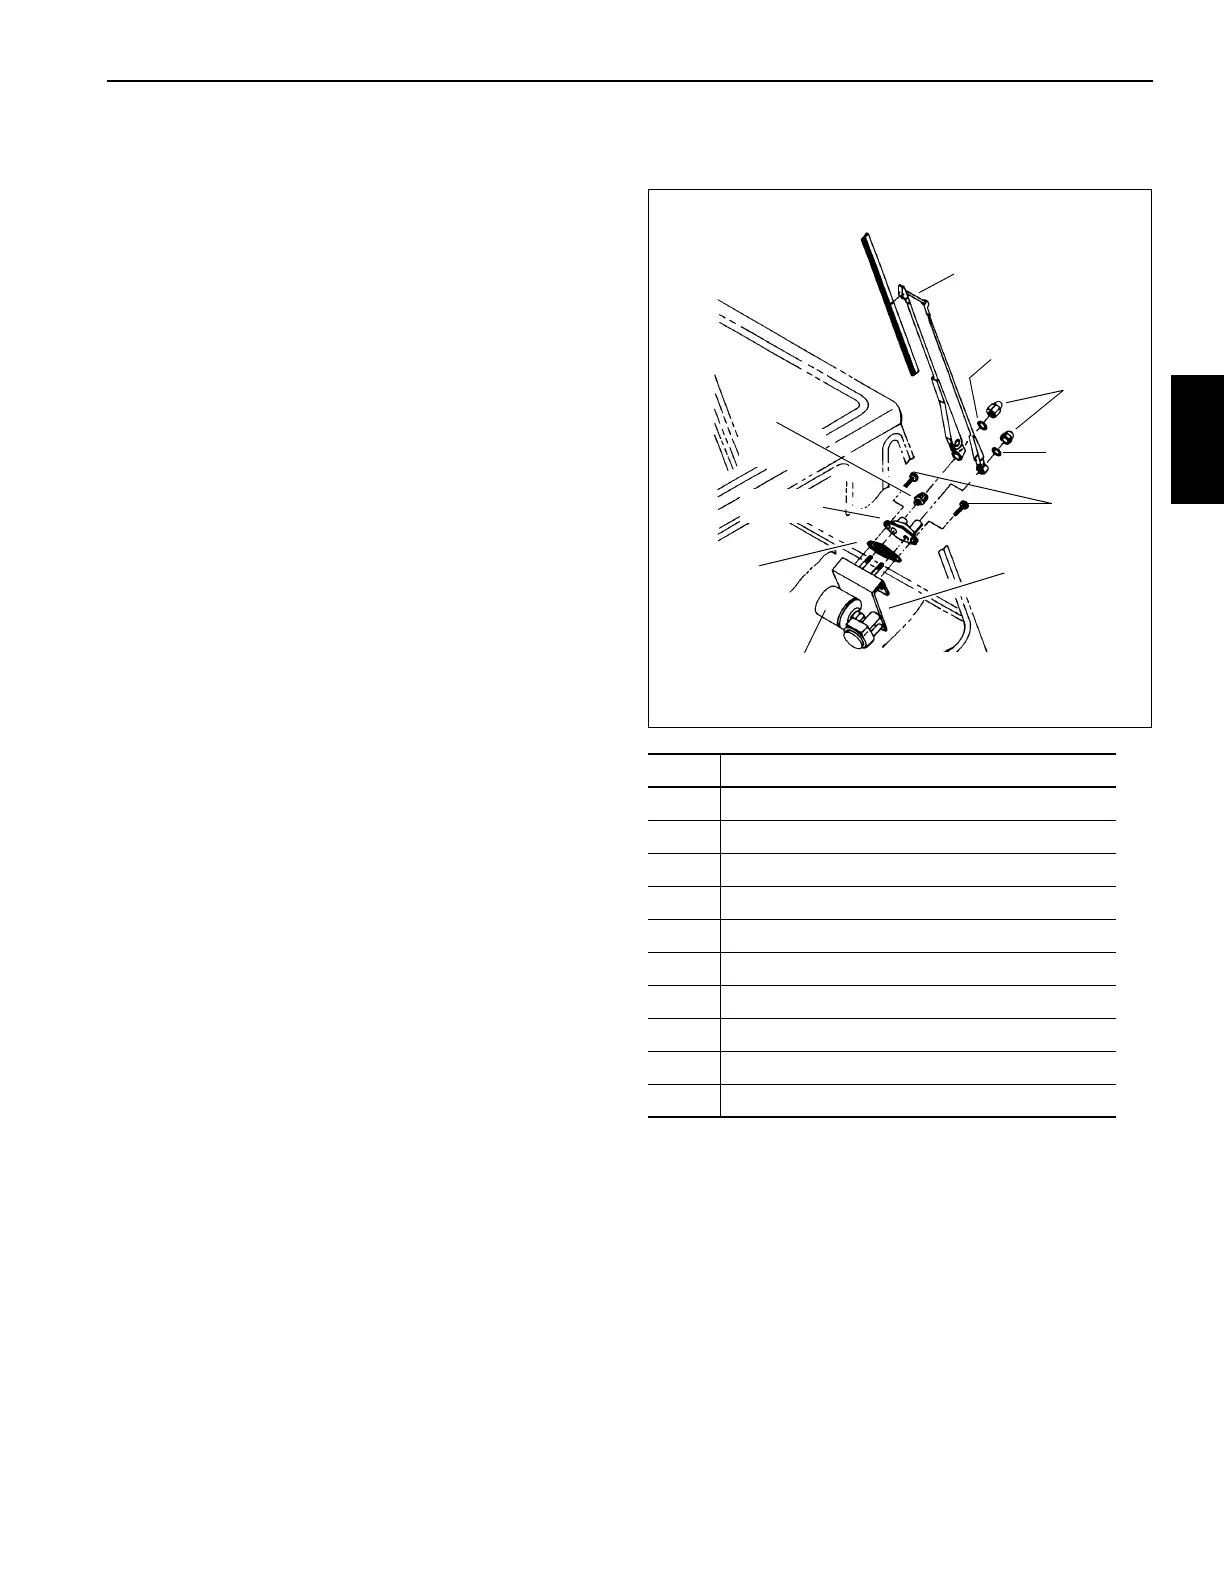
Windshield Wiper Assembly Replacement
Removal
1. Turn the ignition switch to the OFF position and remove
the ignition key.
2. Wait two minutes.
3. Turn the battery disconnect switch to the OFF position.
4. Tag and disconnect the electrical leads from the motor.
5. Disconnect the washer hose on the wiper arm (also
called the pantograph arm assembly) from the washer
nozzle fitting assembly (Figure 3-10).
NOTE: The nut and washer are part of the pantograph
adapter kit. The nut, washer and sleeve are part of
the pivot shaft kit.
6. Remove the cap nut and washer securing the wiper arm
to the pantograph adapter kit. Remove the cap nut,
washer, and tapered sleeve securing the wiper arm to
the pivot shaft.
7. Remove the wiper arm from the pantograph adapter and
the pivot shaft.
8. Remove the flanged sleeve, nut, and two flat washers
from the pivot shaft.
9. Remove the two capscrews and lockwashers securing
the pantograph adapter to the cab exterior. Remove the
pantograph adapter and gasket.
10. Remove attaching hardware to free the windshield wiper
motor bracket from the cab interior. Remove the bracket,
with motor and pivot shaft connected, from the cab.
NOTE: You may have to remove or move other parts to get
the bracket and attached parts around the steering
column. Take care not to damage any parts.
11. Remove the nut to free the wiper motor’s shaft from the
wiper motor crank. Remove the three screws and
washers to free the wiper motor from its bracket.
Remove the wiper motor from its bracket. Leave the
other parts attached to the bracket for now.
Inspection
1. Visually check the motor housing for evidence of cracks
or other damage. Check for excessive shaft end play
indicating worn or damaged bearings. Replace motor if
worn or damaged.
2. Inspect the wiper blade for serviceability. Replace wiper
blade when worn.
3. Inspect the wiper arm and parts of the linking component
kits (pantograph adapter, pivot shaft, wiper motor link
and crank, wiper motor bracket) for damage. Replace as
needed.
Installation
1. Verify the pivot shaft and the wiper motor link and crank
are in place on the motor bracket. (Washers and clip
springs fasten the link to the pivot pins on the crank and
the pivot shaft. The pivot shaft’s pivot pin mounts in the
hole nearest the end of the pivot shaft’s lever.)
2. Connect the wiper motor to the motor bracket with
screws and washers. Connect the wiper motor’s shaft to
the wiper motor crank with the nut and washer. Secure
the adapter and the gasket of the pantograph adapter to
the cab exterior with capscrews and lockwashers.
Item Description
1 Windshield Wiper Arm
2Washer
3Nut
4Washer
5Screw
6 Mounting Bracket
7 Motor
8 Gasket
9 Mounting Plate
10 Serrated Collar
FIGURE 3-10
3653
1
2
3
4
5
6
7
8
9
10
 Loading...


