BOOM MAINTENANCE 1300A
4-8 01-22-2019 Control # 051-08
8. Install the front side wear pads and shims between the
4
th
and 3
rd
sections.
NOTE: For boom reassembly with no new sections,
reinstall shims per removal tags. For new boom
section, shim calibration may be necessary.
9. Slide boom sections completely together.
10. Assemble the top rear wear pads to the 4
th
boom section
with the cam plates and install through the hoist mount
end of the boom. Install the capscrew through holes in
the outer boom sections.
NOTE: To adjust the wear pads on each side at the top/
rear of the boom, rotate the wear pad and plate or
the wear pads and plate independently. The
adjustment range is 0.187 inch (4.8mm).
Offset holes (0.06 inch (1.5mm) in the plate and
0.03 inch (0.8mm) the wear pad) allow for
adjustment.
Extend/Retract Cable installation
NOTE: Five cables to be installed in this part of boom
assembly (two are added later). The cables
installed now are four retract cables and one
proportioning cable.
.
1. Uncoil 3
rd
section retract cable assemblies and insert
the button end into the cable anchor pockets in the rear
of the 3
rd
section. Install the keeper plate over the cable
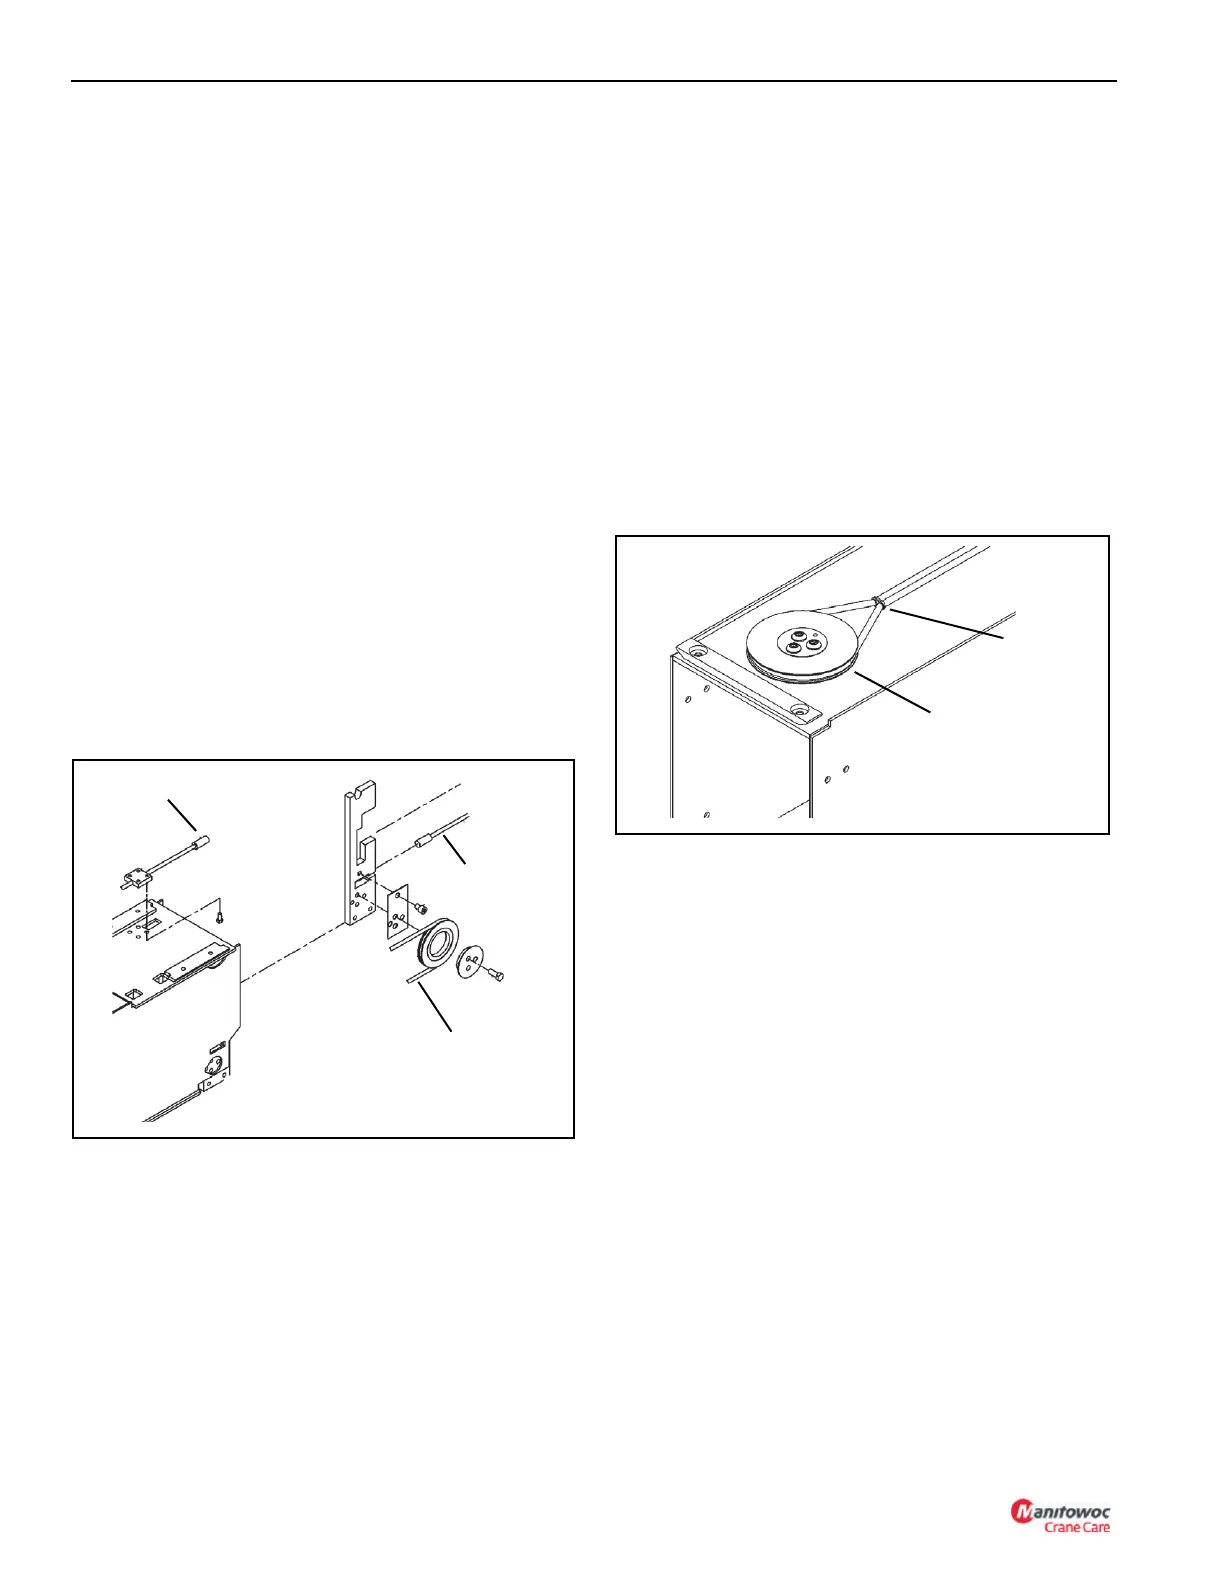
end (Figure 4-10).
2. Install the cable sheave onto anchor plate. Coat the
surfaces of the bearings and keeper plates with grease
before assembly.
a. Install the sheave retainer cap with the three cap
screws.
b. Reeve the 4
th
section retract cable around cable
sheave.
c. Install the cable retainer pin into anchor plate.
d. Place the uncoiled cable in a safe area to prevent
damage (Figure 4-10).
3. Place the retract cables anchored to 4
th
section over the
top of the retract sheaves on the 3
rd
section. Install the
keeper capscrew above the sheave to the hold retract
cables in place.
4. Reeve the cables over the retract sheave and install the
keeper/wear pad to bottom rear of 3
rd
section. This pad
acts as a side pad, bottom pad, and a cable retainer.
Loctite all wear pad mounting screws with Loctite 243
blue.
5. Loop the proportion cable in around the cable sheave
and place it on the top of the 3
rd
section. (this assembly
is attached to the 2
nd
section later). Tie the two cables
together as shown in Figure 4-11.
NOTE: The loop end must be towards the front. The
threaded and button end must be towards the rear.
6. Slide the 4
th
, 3
rd
section assembly into the 2
nd
section.
Leave this assembly hanging out of the 2
nd
section
about 4 to 5 feet.
7. On the tip end of the 2
nd
section install the bottom wear
pad, plate, capscrews and washers.
8. On the tip end of the 2
nd
section install the bottom side
wear pads and shim as required.
9. Remove the cable tie installed in step 15.
10. Slide the 4
th
, 3
th
section assembly into the 2
nd
section
about 2 feet.
11. Install the proportion cable and sheave to the top plate of
the 2
nd
section.
FIGURE 4-10
Proportioning
Cable
4
th
Section
Retract Cable
3
rd
Section
Retract Cable
FIGURE 4-11
Sheave and Cable
Laying Loose
Cable Tie

 Loading...


