EasyManuals Logo

Matrix MX-A5x Service Manual

Matrix MX-A5x
66 pages
To Next Page IconTo Next Page
To Previous Page IconTo Previous Page
Page #30 background imageLoading...
Page #30 background image
9.1 FRONT DISK REMOVAL – CONTINUED
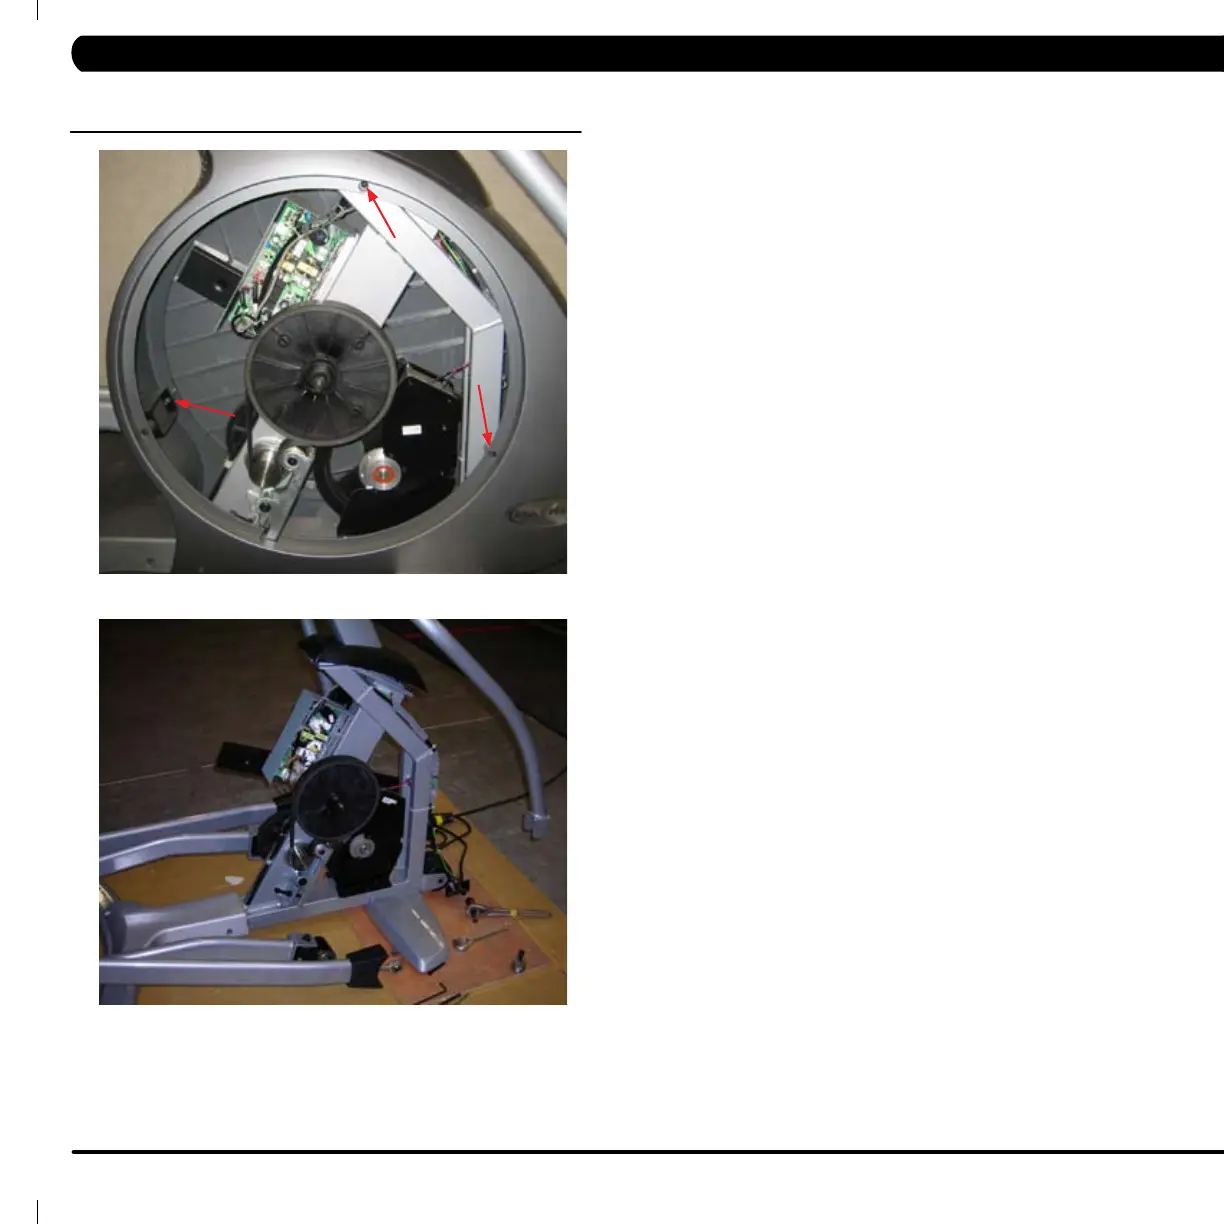
9. Remove the 12 screws that hold the front shrouds in place.
(Figure L)
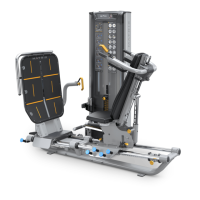
10. Remove the front shrouds for frame access. (Figure M)
11. Reverse steps 1-10 to reassemble machine, securing all
connections and fasteners as needed. 24mm nut should be
tightened to 196 N-m Torque. Once reassembled, test machine as
outlined in section 9.99.
Figure L
Figure M
CHAPTER 9: PART REPLACEMENT GUIDE
26

Table of Contents

Other manuals for Matrix MX-A5x

Questions and Answers:

Question and Answer IconNeed help?

Do you have a question about the Matrix MX-A5x and is the answer not in the manual?

Matrix MX-A5x Specifications

General IconGeneral
BrandMatrix
ModelMX-A5x
CategoryElliptical Trainer
LanguageEnglish

Related product manuals