Page 37 of 188
User Manual MAS-100 Regulus en.docx, Version: 4.0
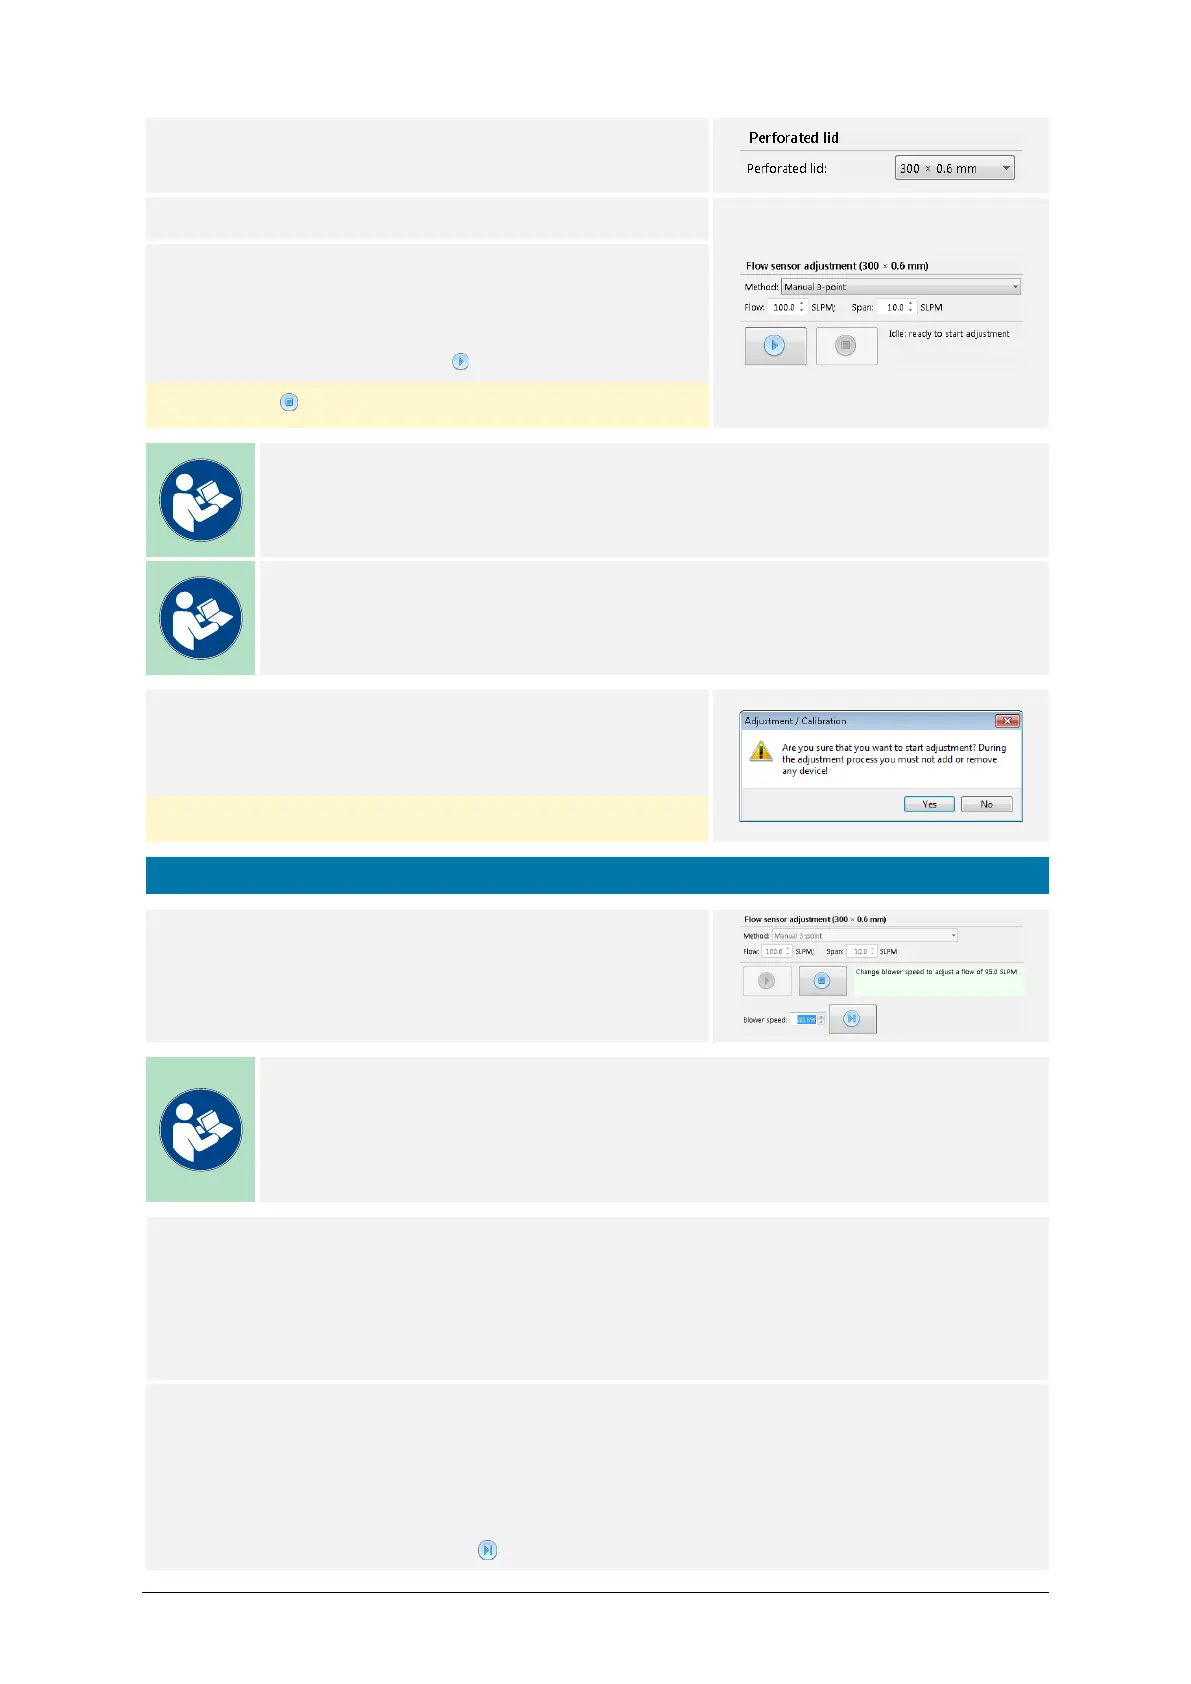
12) Select the perforated lid of the sampling head:
300 × 0.6 or 400 × 0.7
13) Select Manual 3-point.
14) Set the adjustment parameters:
– Adjustment Flow
– Adjustment Span
Start the process with the button.
Pressing afterwards aborts the process.
Note
The standard factory setting for the adjustment Flow is 100 SLPM.
Note
The standard factory setting for the adjustment Span is 10 SLPM.
15) Press Yes to proceed.
Do not add or remove instruments.
Pressing No aborts the process.
Adjustment point ❶
16) Change the Blower speed until the flow on the ane-
mometer is stable and close to the Adjust-
ment flow.
Note
If a reference value must be recorded for documentation purposes, go to the
Flow Adjustment Data tab in the PC Software and use the ADC at target flow
value after the adjustment.
Annex A.2.1 provides additional background information.
17) Anemometer reading:
– Allow the anemometer 40 seconds to settle prior taking readings.
– Take 3 consecutive readings from the anemometer.
– Note these 3 flow values: F
1
, F
2
, F
3
– Calculate the mean flow value: F
m
= (F
1
+ F
2
+ F
3
)/3
18) Iteration:
- Modify Blower PWM
- Take anemometer reading
- Is the F
m
value firmly inside the range of Adjustment flow ±0.5 SLPM?
o If No: Redo iteration.
If Yes: Press the button and continue.