User Manual for the Meca500 Industrial Robot (for rmware 10.1) 51
INSPECTION AND MAINTENANCE
10. INSPECTION AND MAINTENANCE
The Meca500 requires no maintenance, but we recommend that you inspect it every three months and
before storing it for more than a month, to ensure that it is still functioning properly. Proceed with the
following list of verifications, in that order.
Locking up the power supply
Follow the procedure described in Section 2.2.1.
Cleaning
Turn off the power supply and wipe away any dust or dirt observed on the robot arm using a soft, lint-
free cloth and Isopropyl alcohol. Never use compressed air to clean the robot arm.
Visual and functional inspection
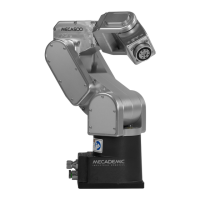
1. Turn the power on, activate and home the robot, and then move all joints to their zero position.
The robot must look like in Figure 1 of the Programming Manual. If only joint 6 is offset, follow the
procedure given in the section Homing of the Programming Guide.
2. Turn the power off and disconnect the power cable from both the robot and the power supply unit
(PSU). Inspect the cable and the two connectors for any damage.
3. Verify that the four M6 screws on the base of the robot are sufficiently tightened. They must be
tightened with a torque of 3 Nm.
4. Verify that the four M3 screws attaching your tool to the flange of the robot are sufficiently tight-
ened. They must be tightened with a torque of 1.5 Nm.
5. If you have an MEGP 25E* gripper or an MPM500 pneumatic module disconnect the tooling cable
and inspect the tool port and cable for any damage. Then, screw in the cable and validate that the
cable is not loose.
Safety inspection
1. Turn the power on, activate and home the robot, and then execute a large motion at high velocity.
Quickly, while the robot is still moving, press the E-STOP button and verify whether the robot stops
immediately.
2. If you have an R3 version, turn the power on, activate and home the robot. Bring your robot to a
fully-stretched horizontal position by executing the command MoveJoints(0,90,-90,0,0,0), or to
the most stretched position that is free of mechanical interferences. Then turn the power off and
verify whether the brakes of joints 1, 2 and 3 are stiff enough.