Imported tracks can be moved, copied, and shared on a network, but the cover art file (folder.jpg) cannot be viewed
by another device or copied to another location outside the “Internal” folder. If you want to move or copy the
“import_CD” folder to another device and it contains a cover art file, remove the file first.
To stop acquiring the cover art files when importing music file, navigate to Settings > USB-CD Drive > Gracenote
Coverart and select “Off”.
File Format of Imported Music Files
When importing music files from a CD, they will be saved as WAV files by default. They can be changed to FLAC files,
and FLAC compression levels are changeable as well. Available compression levels are described in the “Menu List”
section in chapter 5.
Changing the Cover Art
The cover art file (folder.jpg) is stored in the “import_CD” folder. To change the cover art, replace the current cover
art file with a new one. If the old cover art is displayed from a controller app, refresh the content on the controller
app to apply any changes. If the old cover art is still displayed, rescan the music database by navigating to Settings >
Music Database > Rescan Songs and Playlists on the Digital Music Library.
Importing Files from a Computer
To import music files from a computer, follow the procedure below.
Windows
1 From “Network” of Windows Explorer, click the Digital Music Library’s IP address or friendly name (hostname).
If you cannot find it, enter “\\” and the Digital Music Library’s IP address or friendly name (hostname) into the
address bar of Windows Explorer, then press the Enter key. (You can also enter them into the Run dialog box,
which can be opened by pressing the Windows logo key + R.)
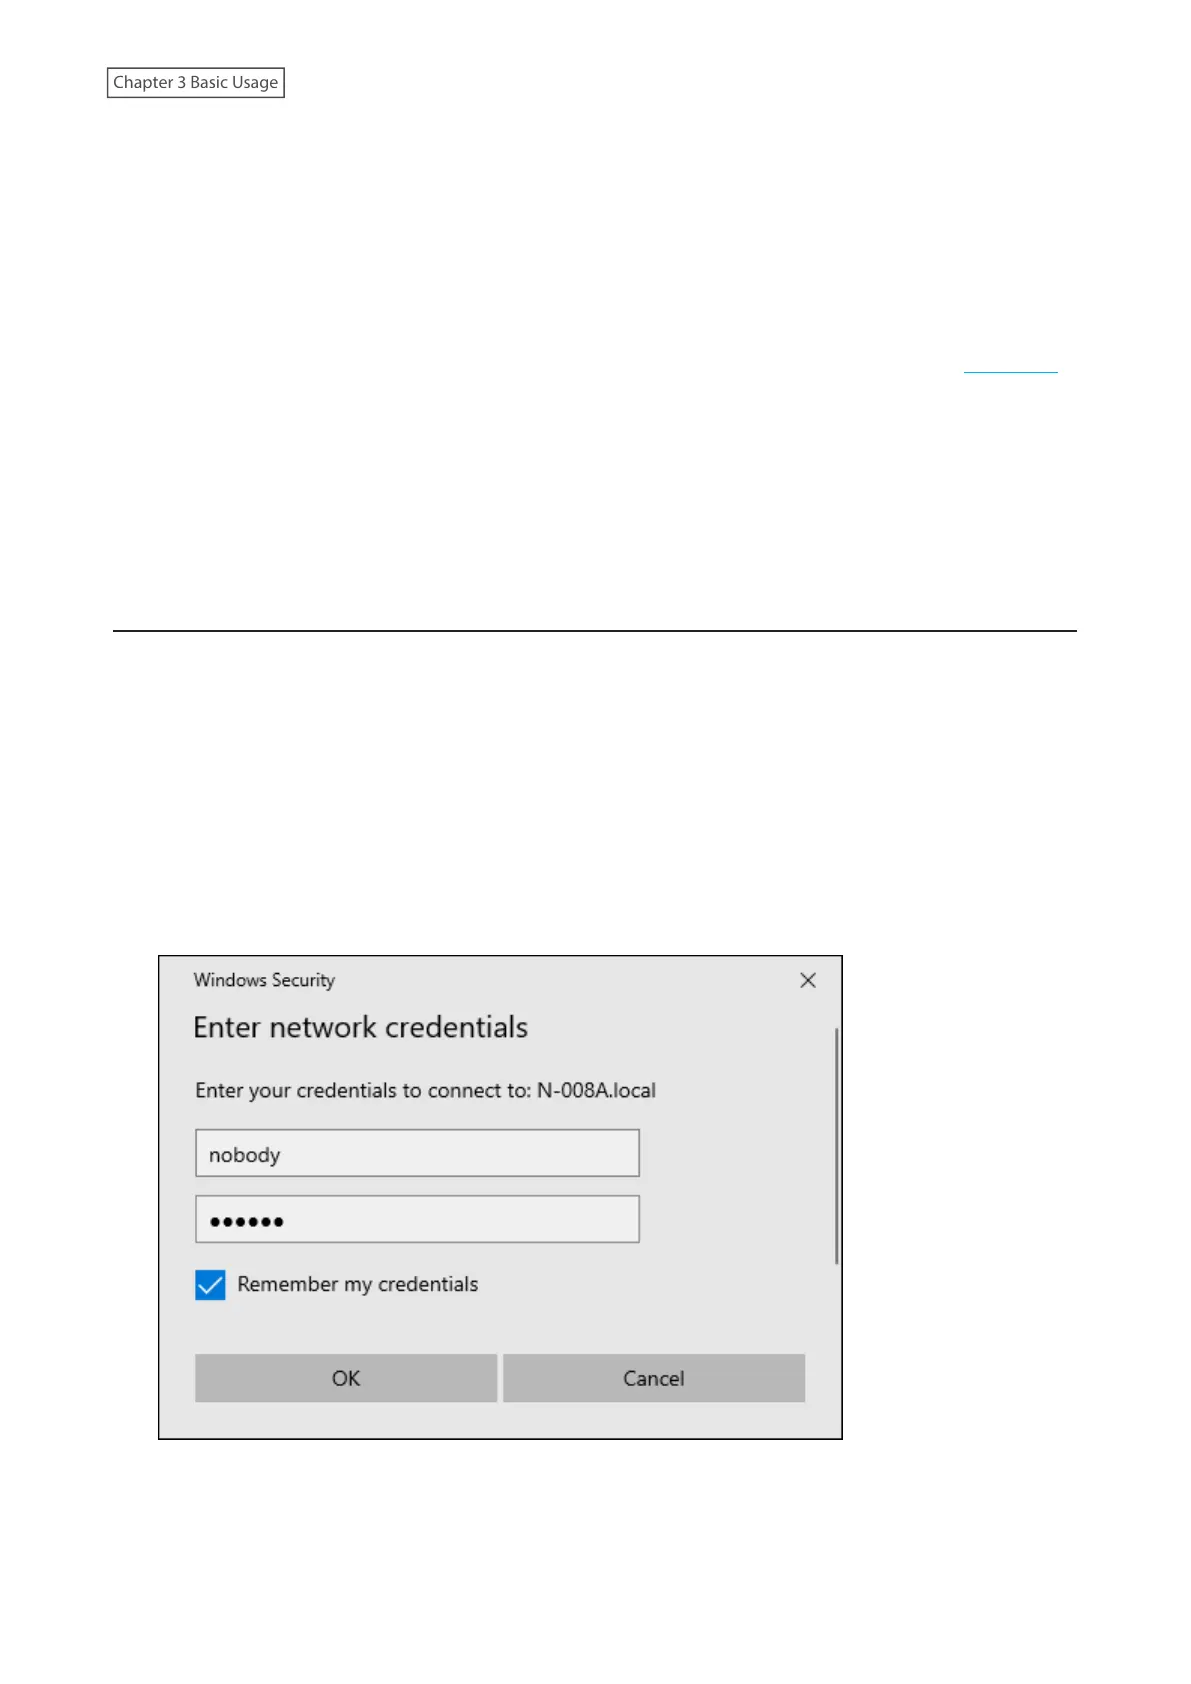
2 If the credential window appears on a Windows computer, enter “nobody” for both the username and
password, then click OK.
19