Chapter 4—Front Panel Operation
53
Setting the Baud Rate Set the circuit monitor’s baud rate to match the baud rate of all other devices
on the communications link. The available baud rates are 1200, 2400, 4800,
9600, and 19200. The factory default is 9600 bps.
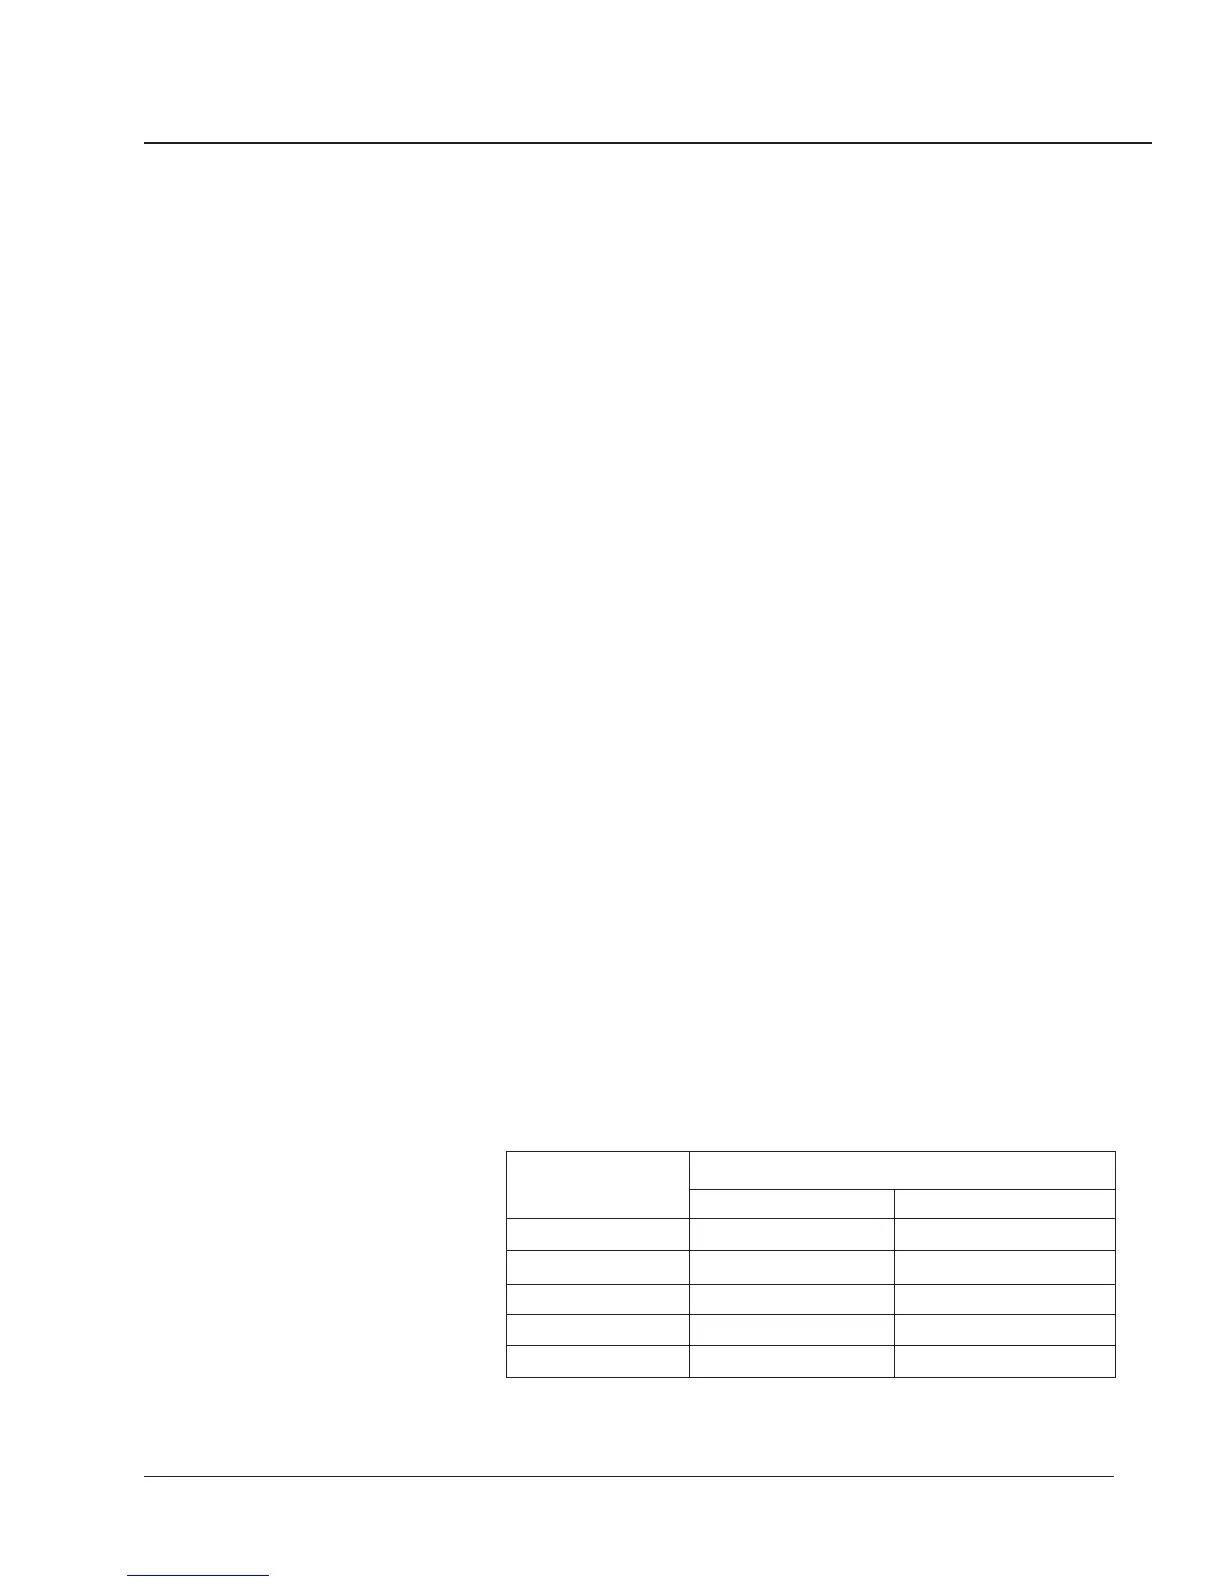
The maximum baud rate may be limited by the number of devices and total
length of the communications link. Table 4-3 shows distance restrictions at
varying baud rates.
To change the baud rate, complete the following steps:
1. Press the MODE button until the red LED next to [Setup] is lit.
The circuit monitor displays “ConFig.”
2. Press the PHASE [Enter] button to select the Configuration option.
The circuit monitor displays the password prompt “P - - - -.”
3. Enter the password.
To enter the password, use the SELECT METER [Value] buttons to
increase or decrease the displayed value until it reaches the password
value. Then press the PHASE [Enter] button.
4. Press the PHASE [Enter] button until the red LED next to [Baud Rate]
flashes.
5. Press the SELECT METER [Value] buttons until the desired baud rate is
displayed.
6. Press the MODE button once.
The red LED next to [Accept] flashes. The red LED next to [Baud Rate]
glows steadily.
7. To reject the new baud rate, press the PHASE [Enter] button once.
The circuit monitor returns to METERS mode.
8. To accept the new baud rate, press the SELECT METER [Value] button
once to change from No to Yes. Then, press the PHASE [Enter] button.
The circuit monitor restarts.
Maximum Distances
Baud Rate (bps) 1–16 devices 17–32 devices
1200 10,000 ft (3,050 m) 10,000 ft (3,050 m)
2400 10,000 ft (3,050 m) 5,000 ft (1,525 m)
4800 10,000 ft (3,050 m) 5,000 ft (1,525 m)
9600 10,000 ft (3,050 m) 4,000 ft (1,220 m)
19200 10,000 ft (3,050 m) 2,500 ft (762.5 m)
Table 4-3
Maximum Distances of Comms Link at Varying Baud Rates
 Loading...