■■■■■■■■■■■■■■■■■■■■■■
3 Installation
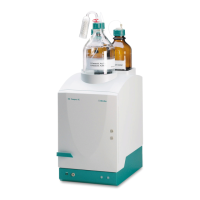
883 Basic IC plus
■■■■■■■■
53
Connecting the separation column
1
Removing the stoppers
■ Remove the stoppers from the separation column.
2
Installing the inlet of the separation column
CAUTION
When inserting the column, ensure that it is inserted correctly
based on the marked flow direction.
There are 3 possibilities:
■ Attach the column inlet directly onto the guard column or,
■ if the guard column is connected to the separation column using
a connection capillary: Connect the column inlet to the guard col-
umn outlet capillary using a PEEK pressure screw (6.2744.070) or,
■ if no guard column is used (not recommended): Connect the col-
umn inlet capillary to the inlet of the separation column using a
short pressure screw (6.2744.070).
3
Rinsing the separation column
■ Place a beaker under the outlet of the separation column.
■ Start manual control in MagIC Net and select the high-pressure
pump: Manual ▶ Manual control ▶ Pump
– Flow: Increase gradually up to the flow rate recommended
in the column leaflet.
– On
■ Rinse the separation column with eluent for approx. 10 minutes.
■ Stop the high-pressure pump in the manual control in MagIC Net
again: Off.
4
Removing the coupling
■ Remove the coupling (6.2744.040) from the column outlet capil-
lary.
5
Installing the outlet of the separation column
■ Fasten the column outlet capillary to the column outlet using a
short PEEK pressure screw (6.2744.070).